Do you have a question about the Gemini 7590T and is the answer not in the manual?
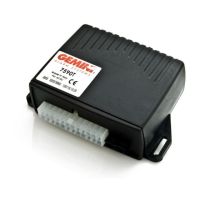
The Gemini 7590T (Art. Code 7590TK15) is a Thatcham Cat 1 approved vehicle alarm system with dual-point immobilization and built-in sensors, designed for use in vehicles with a negatively grounded 12V battery. This manual provides installation and use instructions.
The 7590T offers comprehensive security features, including:
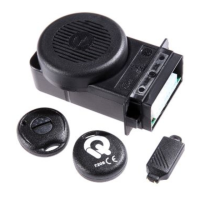
The remote control operates at 433.92 MHz.
Arming the Alarm: Press remote control button 1 or touch the electronic key to its receptacle. A quick flash of the turn indicators confirms arming. Functions enabled include module output, LED output, engine immobilizer, and door-lock control. If the electronic key is used, an entry delay (approx. 10 sec., LED ON steady) allows entry to disable the alarm without triggering it.
Arming Delay, Sensor and Comfort Exclusion, Window-Up Stop: An arming delay of approximately 45 seconds (LED ON steady) provides exit time. During the initial 25 seconds, external sensors can be excluded and window roll-up stopped by pressing button 2 on the remote control (requires module 2344 or Comfort System). A quick flash of turn indicators confirms exclusion. Sensor exclusion is valid for a single alarm activation cycle.
Siren Sound Exclusion When Arming: To arm silently, turn ignition key "ON", wait for the LED to turn ON (approx. 0.5 sec.), then press remote control button 2 while the LED is ON. The LED will turn OFF. To reactivate acoustic signaling, arm and disarm the system. Siren sound exclusion is valid for each single arming cycle.
Total Arming After Arming Delay: After the 45-second delay, the system is fully armed. The LED flashes (200ms ON, 2sec OFF) to minimize power consumption.
Alarm Conditions: The system detects various alarm conditions: wire tamper (via self-powered siren), ignition attempt, power drain (if enabled), door tamper, boot tamper, bonnet tamper, motion detection by internal ultrasound volumetric sensor, motion detection by external sensors (optional, wireless), and panic alarm (programmable via button 2). Ignition and door/boot switch inputs have a 200ms debounce time to filter noise. An alarm event triggers acoustic signals (if enabled) and turn indicator flashes for 30 seconds, with the LED ON steady. Each input can trigger up to 5 alarm cycles per arming cycle, each lasting 30 seconds. Ignition attempts and wire tamper alarms have no limitations.
Alarm Cycle: Turn indicators and siren activate for 30 seconds. Additional siren provides a continuous audible signal, while the original horn provides an intermittent sound (2" ON - 2" OFF). The LED is ON steady. Pressing button 2 can interrupt the cycle without disarming. Each input triggers the alarm 5 times per activation cycle to limit acoustic pollution.
Neutral Time Between Alarm Cycles: After an alarm, there's a 5-second interval before another alarm cycle can start, during which no reaction to alarm events occurs. The LED is ON steady, then resumes normal flashing.
Alarm Disarming: Press remote control button 1 or touch the electronic key. Three flashes of turn indicators confirm disarming. If an alarm occurred while armed, 5 flashes signal this.
Alarm Memory: Five flashes of turn indicators when ignition is turned ON indicate a past alarm event. The last cause is identified by observing the status LED and counting flashes. This sequence repeats 5 times; turn ignition key "OFF" to interrupt.
Programmable Functions: The alarm system is factory configured but allows modification. To enter configuration mode: disarm the alarm, open and leave open the driver door, turn ignition key "ON". The status LED turns ON for 0.5 seconds; while ON, simultaneously press both remote control buttons. Turn indicators and LED flash twice to confirm entry into configuration mode. To enable a function, press button 1 (LED flashes once); to disable, press button 2 (LED flashes twice). Each button press moves to the next function. Turning ignition key "OFF" exits the procedure.
Ultrasonic Volumetric Sensor Adjustment (9.0): Provides interior protection. To adjust sensitivity: arm the system excluding sensors, adjust the trimmer to a medium setting. After arming delay, introduce an object in the cabin and move it; the status LED turns ON to signal presence. Readjust trimmer if sensitivity is too high or low.
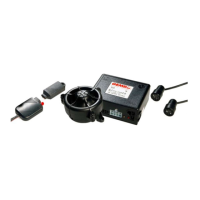
Learning New Control Devices (10.0): Memory stores up to 8 devices (remote controls, electronic keys, magnetic contacts). If an extra device is added, the LED flashes quickly to indicate full memory.
Remote Control Battery Replacement: The remote control has a low charge battery indicator (LED blinks when a button is pressed). Use only CR 1616 batteries.
Warranty Conditions (13.0): The product is guaranteed for 24 months from installation date against manufacturing defects, in compliance with Directive 1999/44/CE. The guarantee certificate must be filled entirely, and the guarantee label must not be removed. Warranty is void if labels are missing/torn, installation certificate is incomplete, or sale document is missing. Valid exclusively at Authorized Gemini Technologies Service Centers. The manufacturer declines responsibility for malfunctions or damage due to improper installation, use, or tampering. This alarm system is solely intended as a theft-deterrent device.
Waste Electrical and Electronic Equipment (WEEE) Directive (11.0): The device does not fall within the scope of Directive 2002/96/EC on WEEE as specified in art. 2.1 of L.D. no. 151 of 25/07/2005.
| Brand | Gemini |
|---|---|
| Model | 7590T |
| Category | Security System |
| Language | English |