EasyManua.ls Logo

Gemini 952N - User Manual

Gemini 952N
16 pages
Print Icon
To Next Page IconTo Next Page
Loading...
...........................................................................
...........................................................................
Alarm model:
Sold on:
By:
GEMINI Technologies S.r.l.
Via Luigi Galvani 12 - 21020 Bodio Lomnago (VA) - Italy
Tel. +39 0332 943211 - Fax +39 0332 948080
www.gemini-alarm.com
ISO 9001 Certified company
Installed on bike
model, number
REV.02 - 09/17
Made in Italy
952N
UK
USER AND INSTALLER
MANUAL
Question and Answer IconNeed help?

Do you have a question about the Gemini 952N and is the answer not in the manual?

Summary

Introductory Note

Alarm System Control Devices

Remote Control Buttons and LED Indicator

Details the functions of the two remote control buttons and the status LED.

System Operation - Basic Configuration

System Arming

Instructions on how to arm the alarm system using the remote control.

Topcase and Seat Open Warning

Explains the warning signal for open topcase or seat during arming.

Arming Delay Countdown

Describes the 20-second arming delay countdown and its implications.

Siren Exclusion During Arming

How to exclude the siren during the arming delay using Button 2.

Tilt Sensor Temporary Exclusion

Procedure to temporarily exclude the tilt sensor via ignition key and Button 2.

Armed Condition Status

Details the system's state when fully armed and ready to detect alarms.

Alarm Event Triggers

Lists the conditions and sensors that trigger an alarm event.

Limitation of Audible Alarms

Explains why the siren may be limited for consecutive alarm cycles.

Neutral Time Between Alarm Events

Describes the 5-second period after an alarm cycle where events are ignored.

System Disarming Without Alarm Memory

How to disarm the system and confirmation signals.

System Disarming With Alarm Memory

How alarm memory is signaled upon disarming and identifying the cause.

Programmable Features

Programmable Features Overview

Table showing factory settings for programmable features like Panic Alarm.

Optical and Acoustic Signals

Explanation of how operations are signaled and option to exclude them.

Panic Alarm Activation

How to activate the panic alarm using remote control button '2'.

Tilt Sensor Functionality

Details the tilt sensor's function when the system is armed and exclusion.

Passive Arming Feature

How the system automatically arms after ignition is turned OFF.

Anti-Hijack Feature

Activating the Anti-Hijack Feature

Instructions to activate the anti-hijack feature while the engine is running.

Exiting Anti-Hijack Mode

Methods to deactivate the anti-hijack mode using PIN or button.

Pre-Alarm Mode

Pre-Alarm Siren Behavior

How the siren sounds during pre-alarm condition for different cycles.

Self-Rearming

Automatic Self-Rearming

System automatically rearms 35 seconds after accidental disarming.

Sleep Mode - Energy Saver Feature

Sleep Mode When Disarmed

System enters sleep mode 72h after disarming or engine off.

Manual Sleep Mode Activation

Procedure to manually activate sleep mode before the 72h period.

Sleep Mode When Armed

System automatically enters sleep mode 72h after arming.

Hazard Warning Flashers

Activating Hazard Warning Flashers

How to make turn indicators flash as hazard warning lights.

PIN Code Override

PIN Code Override Procedure

Steps to disarm the system using the PIN code if remotes are lost.

PIN Code Override Example

Example PIN Code Entry

Step-by-step example of entering a PIN code for system override.

PIN Code Customization

Customizing Factory PIN Code

Procedure to change the default 4-digit PIN code.

Replacing Remote Control Batteries

Replacing Remote Control Batteries

Instructions for replacing batteries in the remote controls.

Technical Specifications

Technical Specifications: Power and Current

Details on power supply, current absorption, and sound level.

Technical Specifications: Relay and Output

Specifications for relay capacity and turn indicator output.

Waste Electrical and Electronic Equipment (WEEE) Directive

WEEE Directive Compliance

Information regarding the WEEE directive and the product's scope.

Use and Maintenance

Use and Maintenance Guidelines

Recommendations for proper use and maintenance of the alarm system.

Warranty Conditions

Warranty Terms and Conditions

Details the 24-month warranty period and conditions for validity.

Fitting Instructions

General Fitting Instructions

Read and understand all instructions before starting installation.

Alarm Unit Sealing

Alarm Unit Sealing Procedure

Instructions on how to properly seal the alarm unit housing.

Alarm Unit Positioning

Alarm Unit Positioning Guidelines

Recommendations for positioning the alarm unit to prevent water ingress.

Accessories

Status LED Installation

Guide for installing the status LED for visibility and deterrence.

Contact Switch Installation

How to fit an optional contact switch for seat or topcase protection.

Anti-Hijack Button Connection

Connecting the optional anti-hijack button to the White-Violet wire.

Pinout Table

Generic Wiring Harness Pinout Table

Table mapping wire colors to functions for the generic wiring harness.

Immobilizer Wire Joint Connections

Specific connections for the immobilizer wire joint.

Immobilizer Grounded Wire Connections

Connections for the immobilizer grounded wire.

Wiring Diagram

Main Wiring Diagram

Diagram illustrating the overall wiring connections for the alarm system.

Immobilizer Wiring Diagram

Immobilizer Grounded Wire Diagram

Wiring diagram for the engine immobilizer using a grounded wire.

Immobilizer Cut Wire Diagram

Wiring diagram for the engine immobilizer using a cut wire.

Diode Installation

When to Install a Diode

How to determine if a diode is needed for turn indicator circuits.

Diode Installation Diagram

Diagram showing the correct in-line diode installation.

Learning New Devices

Learning New Devices (Remotes)

Procedure for adding additional remote controls to the system.

Learning Devices via BROWN;GREEN Wire Grounding

Steps to learn new devices by grounding the BROWN/GREEN wire.

Learning Devices Without BROWN;GREEN Wire Grounding

Steps to learn new devices without grounding the BROWN/GREEN wire.

Programmable Features

Enabling and Disabling Programmable Features

General procedure to enable or disable programmable features.

Programming Acoustic Signals

How to enable or disable acoustic signals.

Programming Panic Alarm

How to enable or disable the panic alarm feature.

Programming Tilt Sensor

How to enable or disable the tilt sensor feature.

Programming Passive Arming

How to enable or disable the passive arming feature.

Programming Anti-Hijack Feature

How to enable or disable the anti-hijack feature.

Programming Pre-Alarm Feature

How to enable or disable the pre-alarm feature.

Programming System Self-Rearming

How to enable or disable the self-rearming feature.

Programming Example

Programming Example Walkthrough

Step-by-step example of programming acoustic signals, panic alarm, and pre-alarm.

Tilt Sensor Adjustment

Adjusting Tilt Sensor Sensitivity Levels

Procedure to adjust the tilt/shock sensor sensitivity levels.

Overview

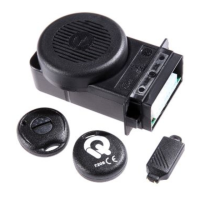
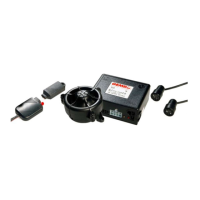
The provided document is a user and installer manual for the Gemini 952N alarm system, designed and manufactured in Italy for 2-wheeled vehicles. It is supplied with two remote controls and does not use a backup battery. The alarm system is factory programmed, but its features can be customized, and the tilt/shock sensor sensitivity can be adjusted.

Function Description

The Gemini 952N is a vehicle alarm system primarily designed to deter theft and signal irregularities. It offers various protection features and can be controlled via remote controls or an emergency PIN code override.

Core Functions:

  • Arming/Disarming: The system can be armed and disarmed using remote control button "1." Arming is confirmed by acoustic and optical signals (2 beeps, 1 turn indicator flash, steady LED). Disarming is confirmed by 3 beeps and 3 turn indicator flashes.
  • Immobilizer: The engine immobilizer is enabled during the arming delay and remains active when the system is armed.
  • Alarm Events: The system detects ignition attempts, tilt/shock, and seat/topcase tampering (if a contact switch is installed). A panic alarm can also be triggered manually.
  • Audible Alarm Limitation: To comply with noise regulations and save battery life, audible alarms are limited to 7 consecutive cycles for events like unauthorized motion, tampering, or ignition attempts. After 7 cycles, the siren is automatically excluded.
  • Neutral Time: After an alarm cycle, further alarm events are ignored for 5 seconds, during which the system can be disarmed via PIN code.
  • Alarm Memory: If an alarm event occurs while away from the vehicle, it is signaled upon disarming by 2 turn indicator flashes and 2 bops. The last cause of the alarm can be identified by counting LED flashes.

Programmable Features (Factory Presets):

  • Acoustic Signals: Enabled by default, providing audible feedback for operations like arming/disarming. Can be excluded.
  • Panic Alarm: Enabled by default. Can be triggered by pressing remote control button "2" for approximately 30 seconds, even when the system is armed or disarmed.
  • Tilt Sensor: Enabled by default. Triggers an alarm upon motion detection. Can be temporarily excluded for a single arming cycle.
  • Passive Arming: Disabled by default. If enabled, the system automatically arms 35 seconds after ignition is turned OFF.
  • Anti-hijack Feature: Disabled by default. If enabled, it can be activated while the engine is running via remote control buttons "1" or "2," or an optional anti-hijack button. It triggers the siren and immobilizes the engine after 20 seconds.
  • Pre-alarm Mode: Disabled by default. If enabled, the siren will sound for 2.5 seconds for the first 3 alarm cycles (e.g., tilt), then for 30 seconds from the 4th cycle onward.
  • Self-rearming (Anti-distraction): Disabled by default. If enabled, the system automatically re-arms 35 seconds after being accidentally disarmed.

Energy Saver Feature (Sleep Mode):

  • Disarmed State: The system enters sleep mode 72 hours after being disarmed or engine turned OFF. Remote controls are inoperative, but normal operation is restored by turning ignition ON. Can be manually activated earlier.
  • Armed State: The system enters sleep mode 72 hours after being armed. All protection features remain operative, except for the status LED. Remote controls are inoperative, and normal operation is restored when ignition is switched ON. A 5-second delay allows disarming without triggering the siren.

Hazard Warning Flashers: Can be activated when the system is disarmed by cycling the ignition key and pressing remote control button "1." Disabled by turning ignition ON/OFF or arming the system.

PIN Code Override: Allows emergency disarming if remote controls are lost or inoperative. The PIN code is entered using the vehicle's ignition key. The factory default PIN code is 1-1-1-1 and can be customized.

Important Technical Specifications

  • Power Supply: 12 Vdc
  • Power Supply Range: 9Vdc-15Vdc
  • Current Absorption @ 12Vdc (armed, LED flashing): <2mA
  • Current Absorption in Sleep Mode: <1mA
  • Siren Sound Level: 118 dBA @ 1 m
  • Relay Capacity: 8A
  • Turn Indicator Output: 12V max. (6A max. per side)
  • Remote Control Frequency: 433.92 Mhz
  • Batteries (Remote Control): CR1616 (risk of explosion if incorrect type is used)
  • Sensors: Built-in high-sensitivity triaxial tilt/shock sensor with 4 levels of sensitivity adjustment (factory preset to minimum sensitivity).

Usage Features

  • Remote Control Operation: Two buttons for various functions (arming/disarming, panic alarm, anti-hijack, siren/tilt sensor exclusion).
  • Low Battery Indicator: The remote control LED blinks when a button is pressed, signaling low battery charge.
  • PIN Code Customization: The 4-digit PIN code can be changed from the factory setting.
  • Learning New Devices: Up to 8 remote controls can be learned by the system. Saving an extra device automatically deletes the first one.
  • Tilt Sensor Adjustment: The sensitivity of the tilt/shock sensor can be adjusted through 4 levels.
  • Optical/Acoustic Signals: Operations are signaled both acoustically (beeps, bops) and optically (LED, turn indicators).

Maintenance Features

  • Remote Control Battery Replacement: Instructions are provided for replacing CR1616 batteries, emphasizing correct polarity and avoiding incorrect battery types.
  • General Care:
    • Do not clean the alarm unit with water; use a damp cloth.
    • Do not use voltages other than specified.
    • Protect the alarm from direct water flow (e.g., car wash).
  • Installation Considerations (Installer Manual):
    • Alarm Unit Sealing: Proper sealing with a rubber cap and screws is crucial to prevent water ingress.
    • Alarm Unit Positioning: Can be positioned vertically or horizontally. Must avoid water ingress points, muffled siren, moving parts, high-frequency electromagnetic disturbances, high temperatures, and direct mounting on the vehicle frame. A "goose-neck" bending of the rubber sheath is recommended.
    • Status LED Installation: Must be installed where visible as a deterrent and indicator.
    • Contact Switch (Optional): Must detect opening without being accessible from outside and have a carefully set trigger threshold.
    • Anti-hijack Button (Optional): Connects to the White-Violet wire and triggers on a negative signal.
    • Diode Installation: May be required for turn indicators to prevent instrument panel lights from activating when the alarm is armed.

Warranty Conditions: The product is guaranteed for 24 months from the date of purchase. The warranty is void if labels are missing/torn, the certificate is incomplete, or the sales receipt is missing. The manufacturer is not responsible for installation, after-sales service, or technical support, and declines responsibility for malfunctions or damages caused by improper installation, use, or tampering. The alarm system is solely intended as a theft-deterrent device.

Gemini 952N Specifications

General IconGeneral
BrandGemini
Model952N
CategorySecurity System
LanguageEnglish

Related product manuals