24
Operators Manual
4.5.10 Test
Insert the safety key supplied with the machine into the door switch. The
machine is now
oonn
.
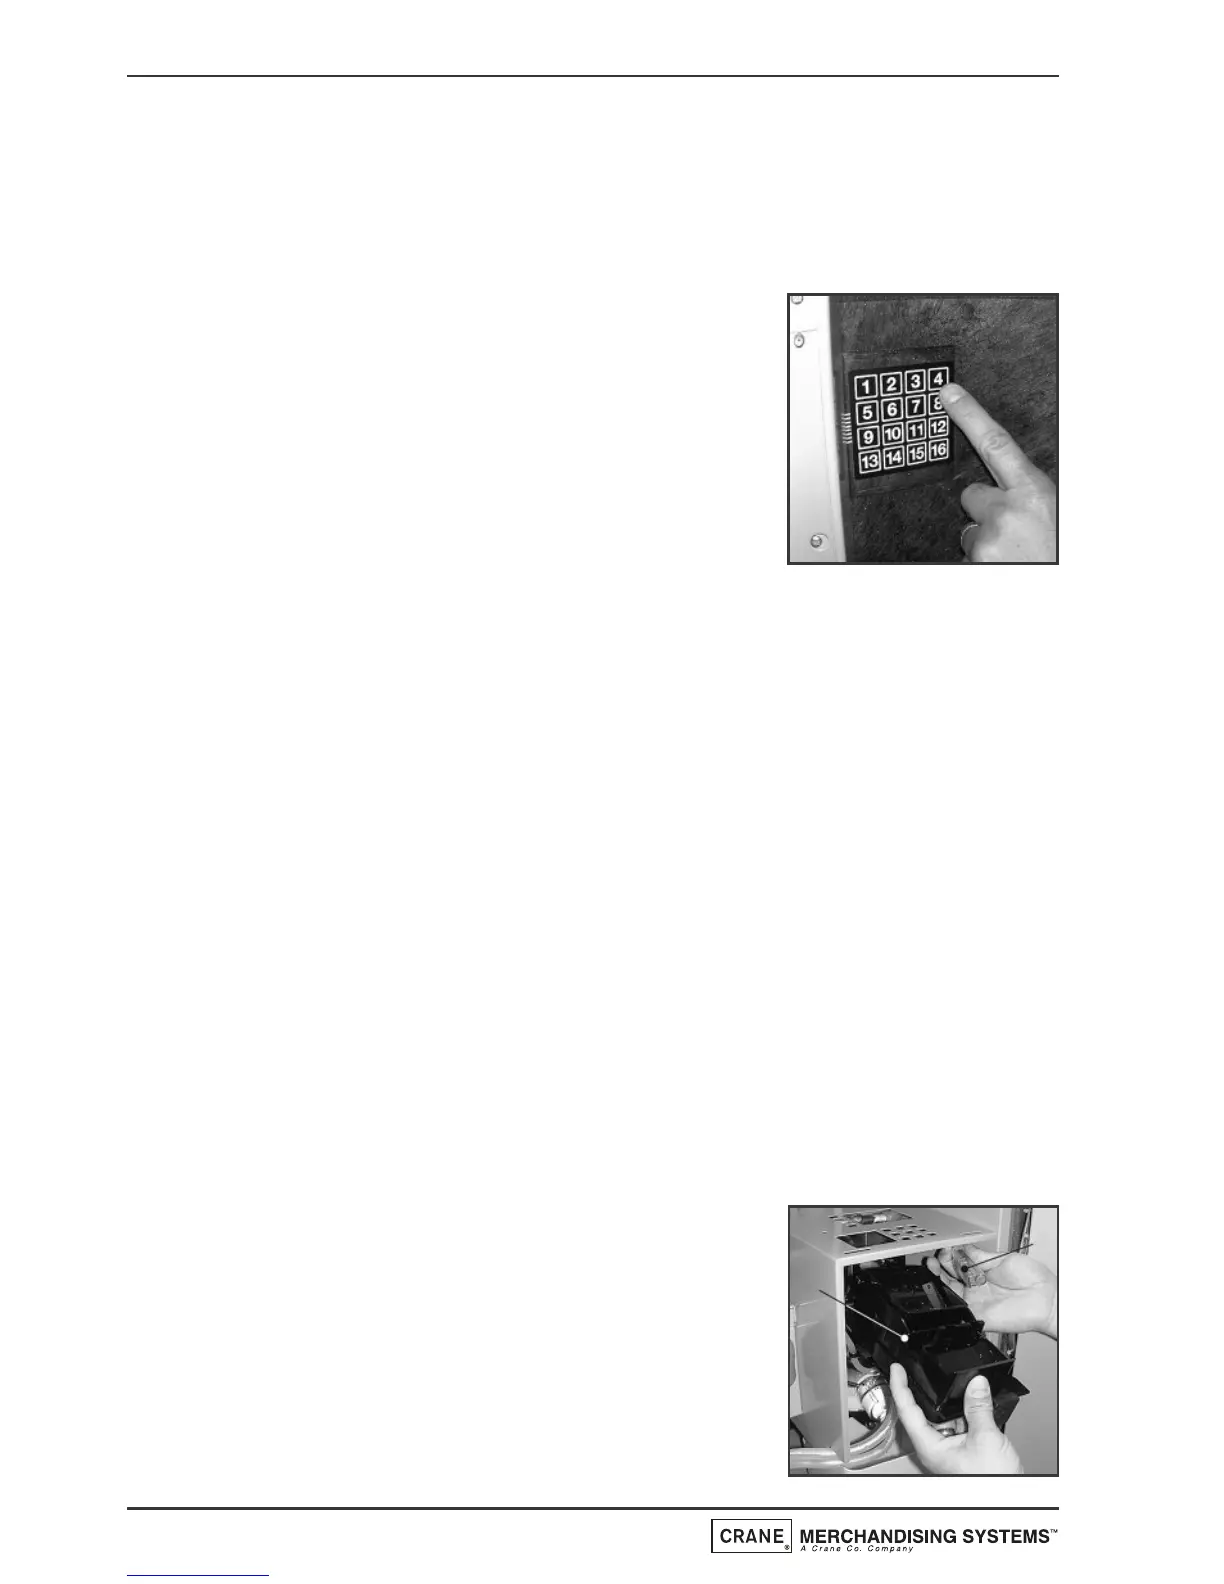
Using the service keypad located in the rear of the door (see page 30),
proceed as follows:
1. Press the Cup Test button (7) and check
that a cup is ejected correctly from the
Cup drop unit.
2. Press the Park Head button (8) to ensure
that the dispense head operates correctly
and that the dispense pipes are fitted
correctly.
3. Place a suitable container under the
dispense head and press the Rinse/Flush
button (3). The machine will flush the system. Check that all of the
mixing stations are water tight. Empty the contents of the container.
4. Place an empty cup under the dispense head. Press the Test Vend
button (6) and using the selection buttons on the front of the
machine, vend a drink to ensure that the machine operates correctly.
Press the ‘X’ (Exit) key to exit from the Test Vend menu.
5. Press the View Counters button (5) and record the audit
information displayed on the LCD (see page 32 for full details).
6. Remove the safety key and close the door. Clean and buff the outside
of the machine.
4.6 Paperless Brewer Unit - Cleaning Procedure
1. Switch on the power using the door switch safety key. Remove the brewer
guard. Press and then press and hold the service keypad Brewer Open
button (2) until the brewer chamber reaches its fully open position.
Important: Ensure that the two wiper arms are also at their fully open
postion.
Remove the door switch safety key to switch off
the power to the machine.
2. Carefully remove the water outlet tubes c/w
water pipes (a) from the tea and coffee
chambers. Lift the latch bar (b) and remove the
brewer chambers/wiper assembly.
b
a