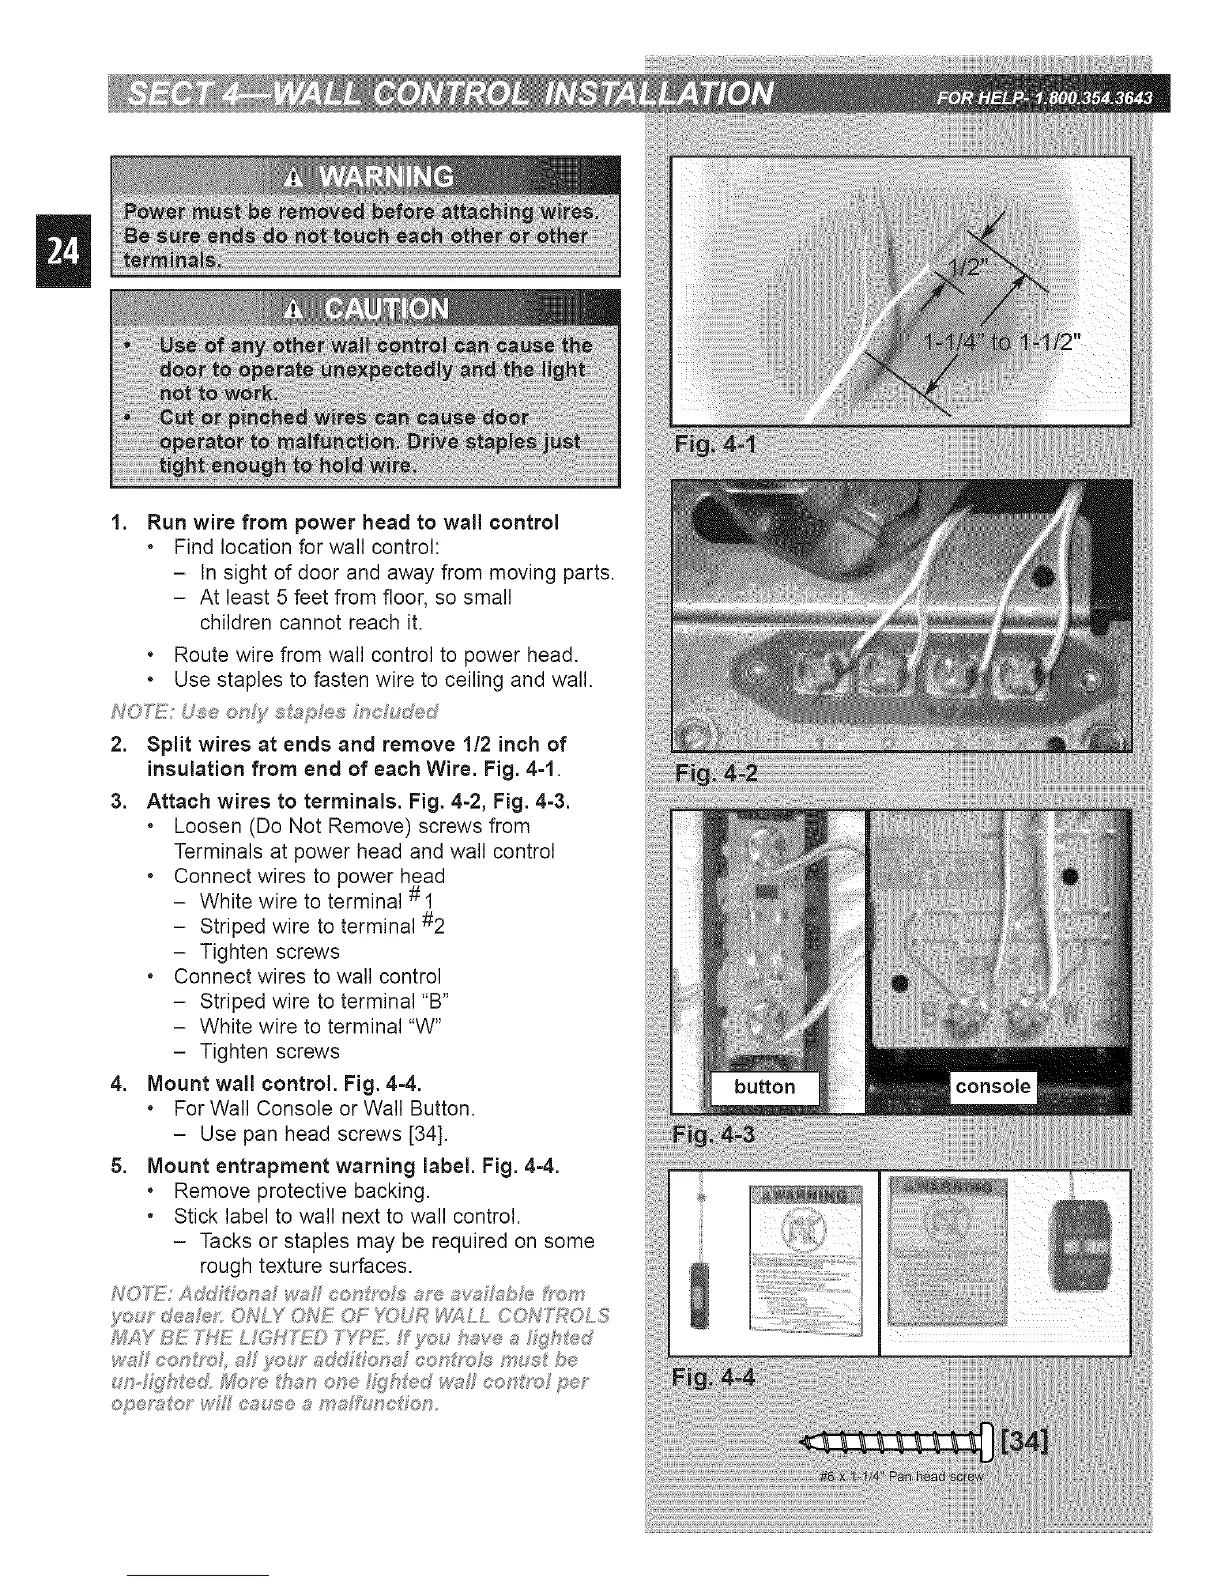
1. Run wire from power head to wall control
, Find location for wall control:
- In sight of door and away from moving parts.
- At least 5 feet from floor, so small
children cannot reach it.
• Route wire from wall control to power head.
• Use staples to fasten wire to ceiling and wall.
NON_!: Use only _J;_p e_; nc uded
2. Split wires at ends and remove 1!2 inch of
insulation from end of each Wire. Fig. 4=1.
3. Attach wires to terminals. Fig. 4=2, Fig. 4=3.
, Loosen (Do Not Remove) screws from
Terminals at power head and wall control
• Connect wires to power head
- White wire to terminal # 1
- Striped wire to terminal #2
- Tighten screws
• Connect wires to wall control
- Striped wire to terminal "B"
- White wire to terminal "W"
- Tighten screws
4. Mount wall control. Fig. 44.
. For Wall Console or Wall Button.
- Use pan head screws [34].
5. Mount entrapment warning label. Fig. 44.
. Remove protective backing.
• Stick label to wall next to wall control.
- Tacks or staples may be required on some
rough texture surfaces.
f<:,: y d®aFef' ONLY ONE OF YOUR _LL CON'f\POLS
_;_Y BE THE L GH'_) T'_'_E. f _m,_have a Z_h%_d
ws eet_f/_oh s :y'_:,:r add _;_'®t:_af¢ot:_g'oJs m_; be
 Loading...