1. Set limit switch position.
, Check door fully closed.
- tf not, close door manually.
, Check carriage is between limit switches.
- If not, move "CLOSE" limit switch (brown wire)
to new position between door and carriage.
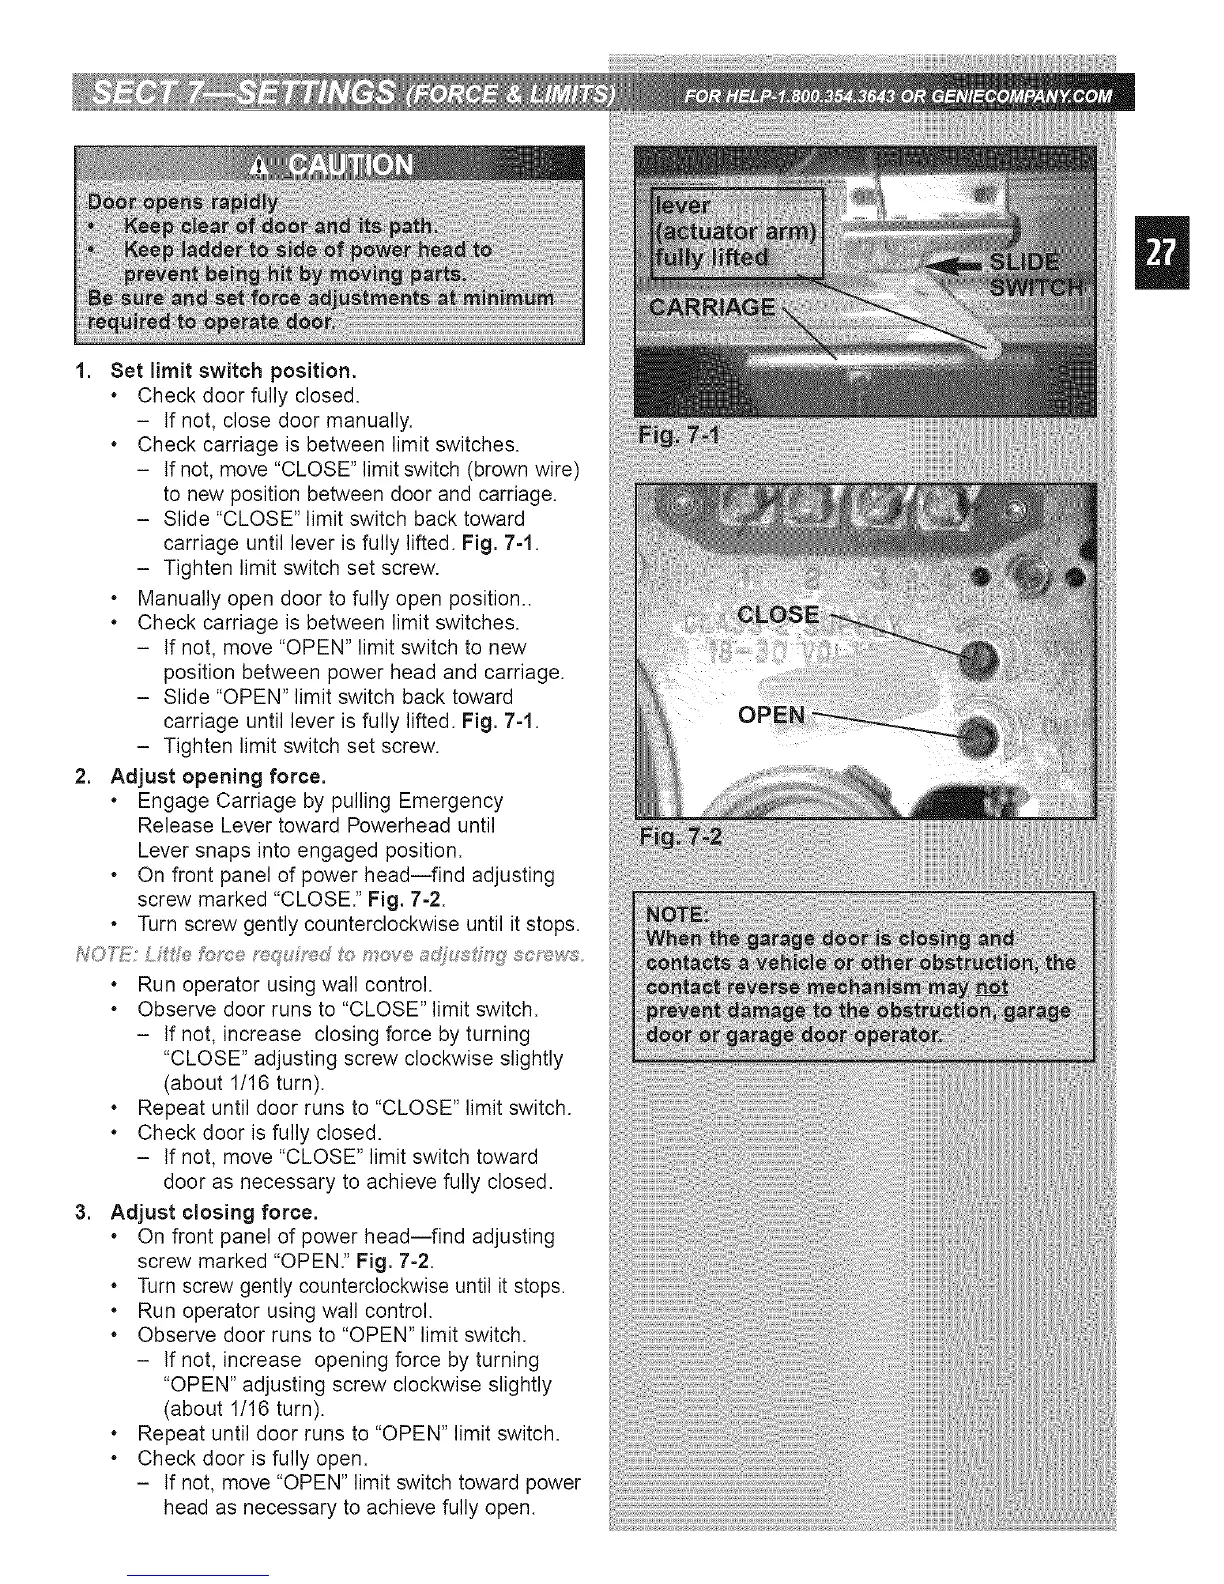
- Slide "CLOSE" limit switch back toward
carriage until lever is fully lifted. Fig. 7-1.
- Tighten limit switch set screw.
, Manually open door to fully open position..
, Check carriage is between limit switches.
- If not, move "OPEN" limit switch to new
position between power head and carriage.
- Slide "OPEN" limit switch back toward
carriage until lever is fully lifted. Fig. 7-1.
- Tighten limit switch set screw.
2. Adjust opening force.
, Engage Carriage by pulling Emergency
Release Lever toward Powerhead until
Lever snaps into engaged position.
, On front panel of power head--find adjusting
screw marked "CLOSE." Fig. 7-2.
• Turn screw gently counterclockwise until it stops.
. Run operator using wall control.
. Observe door runs to "CLOSE" limit switch.
- If not, increase closing force by turning
"CLOSE" adjusting screw clockwise slightly
(about 1/16 turn).
, Repeat until door runs to "CLOSE" limit switch.
, Check door is fully closed.
- If not, move "CLOSE" limit switch toward
door as necessary to achieve fully closed.
3. Adjust closing force.
, On front panel of power head--find adjusting
screw marked "OPEN." Fig. 7=2.
, Turn screw gently counterclockwise until it stops.
, Run operator using wall control.
, Observe door runs to "OPEN" limit switch.
- If not, increase opening force by turning
"OPEN" adjusting screw clockwise slightly
(about 1/16 turn).
, Repeat until door runs to "OPEN" limit switch.
, Check door is fully open.
- If not, move "OPEN" limit switch toward power
head as necessary to achieve fully open.
 Loading...