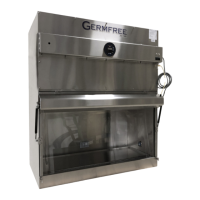
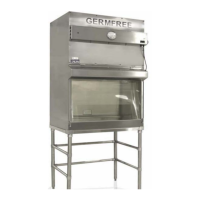
Class II, Type A2 Biosafety Cabinet
User Manual
14
Advance Planning:
To achieve maximum safety and utilization of your Class II, Type A2 Biosafety Cabinet you must take into account
the equipment and materials necessary for the proposed operation and must outline the procedural details of
your particular operation or experiment. The best way to accomplish this is through the use of a checklist and/or
protocol that would include the equipment, apparatus, media, supplies, and any other items necessary for the
anticipated procedure. The procedural checklist should include the order of events and other details necessary
for the successful completion of the proposed operation or experiment.
Your advance planning could include a layout for the arrangement of items in the work area. This should be
planned so that contaminated items and clean items are segregated and the movement of contaminated items
over clean items is minimized. Arrive at a logical progression for a particular operation and arrange your layout
accordingly. In a complex situation, an ideal arrangement of equipment may not be achieved easily so it may be
necessary to compromise.
Good Technique:
When the planning phase is completed, the start up procedure can begin. Turn on the unit and the fluorescent
lights. Clean the entire stainless steel surface in the work area thoroughly using a so, lint free cloth and 70%
alcohol. Using your checklist, collect all items for the procedure, which are to be placed in the chamber. Clean
all of these items thoroughly before introducing large items of equipment. Do not overload the work area. It
is important, however, that everything needed for the complete procedure be placed in the chamber before
starting so nothing passes in or out through the air curtain until the procedure is completed. Items should be
positioned within the work area so they do not block the air intake or the return air openings. Perform work far
enough away from the access opening, i.e., over the work tray, to insure good containment.
Wait approximately ten minutes aer starting the unit before initiating procedures. This allows sufficient time for
the ultra clean air circulating within the chamber to remove any airborne contamination from the work area and
any particulate maer from the newly introduced items. Many facilities will choose to leave the cabinets running
at all times.
The operator is a critical factor in the successful and safe operation of any biological safety cabinet. It is
dangerous to have the idea that the chamber is going to do all of the work. A properly balanced and properly
utilized Class II, Type A2 Biosafety Cabinet will do an excellent job of controlling airborne contamination. Before
starting to work in the chamber, the hands and arms of the operator should be washed thoroughly with a
germicidal soap. It is also recommended that technicians working in the Class II, Type A2 Biosafety Cabinet wear
long sleeved gowns with knit cuffs and rubber gloves. This minimizes the shedding of skin flora into the work
area and protects the hands and arms from contamination with viable agents. Conventional laboratory coats
Use of the Biosafety
Cabinet
The successful use of the Class II, Type A2 Biosafety
Cabinet as a safety tool depends upon two factors:
advance planning and good technique. Even the
most sophisticated and elaborate systems would be
useless if proper technique were not employed. It is
therefore the responsibility of the senior investigator
or the head of a particular facility to train the
personnel who will use the unit and to see that good
technique is maintained. If this is not done, a false
Start-Up Procedure:
1. Turn on unit
2. Wipe down all interior surfaces
3. Allow 10 minutes for particles to wash into HEPA
4. Begin use
Shutdown Procedure:
5. Wipe down all interior surfaces
6. Allow 10 minutes for particles to wash into HEPA
7. Turn off unit