GETINGE SAFESTEP ATP MONITOR GETINGE SAFESTEP ATP MONITOR
17 18
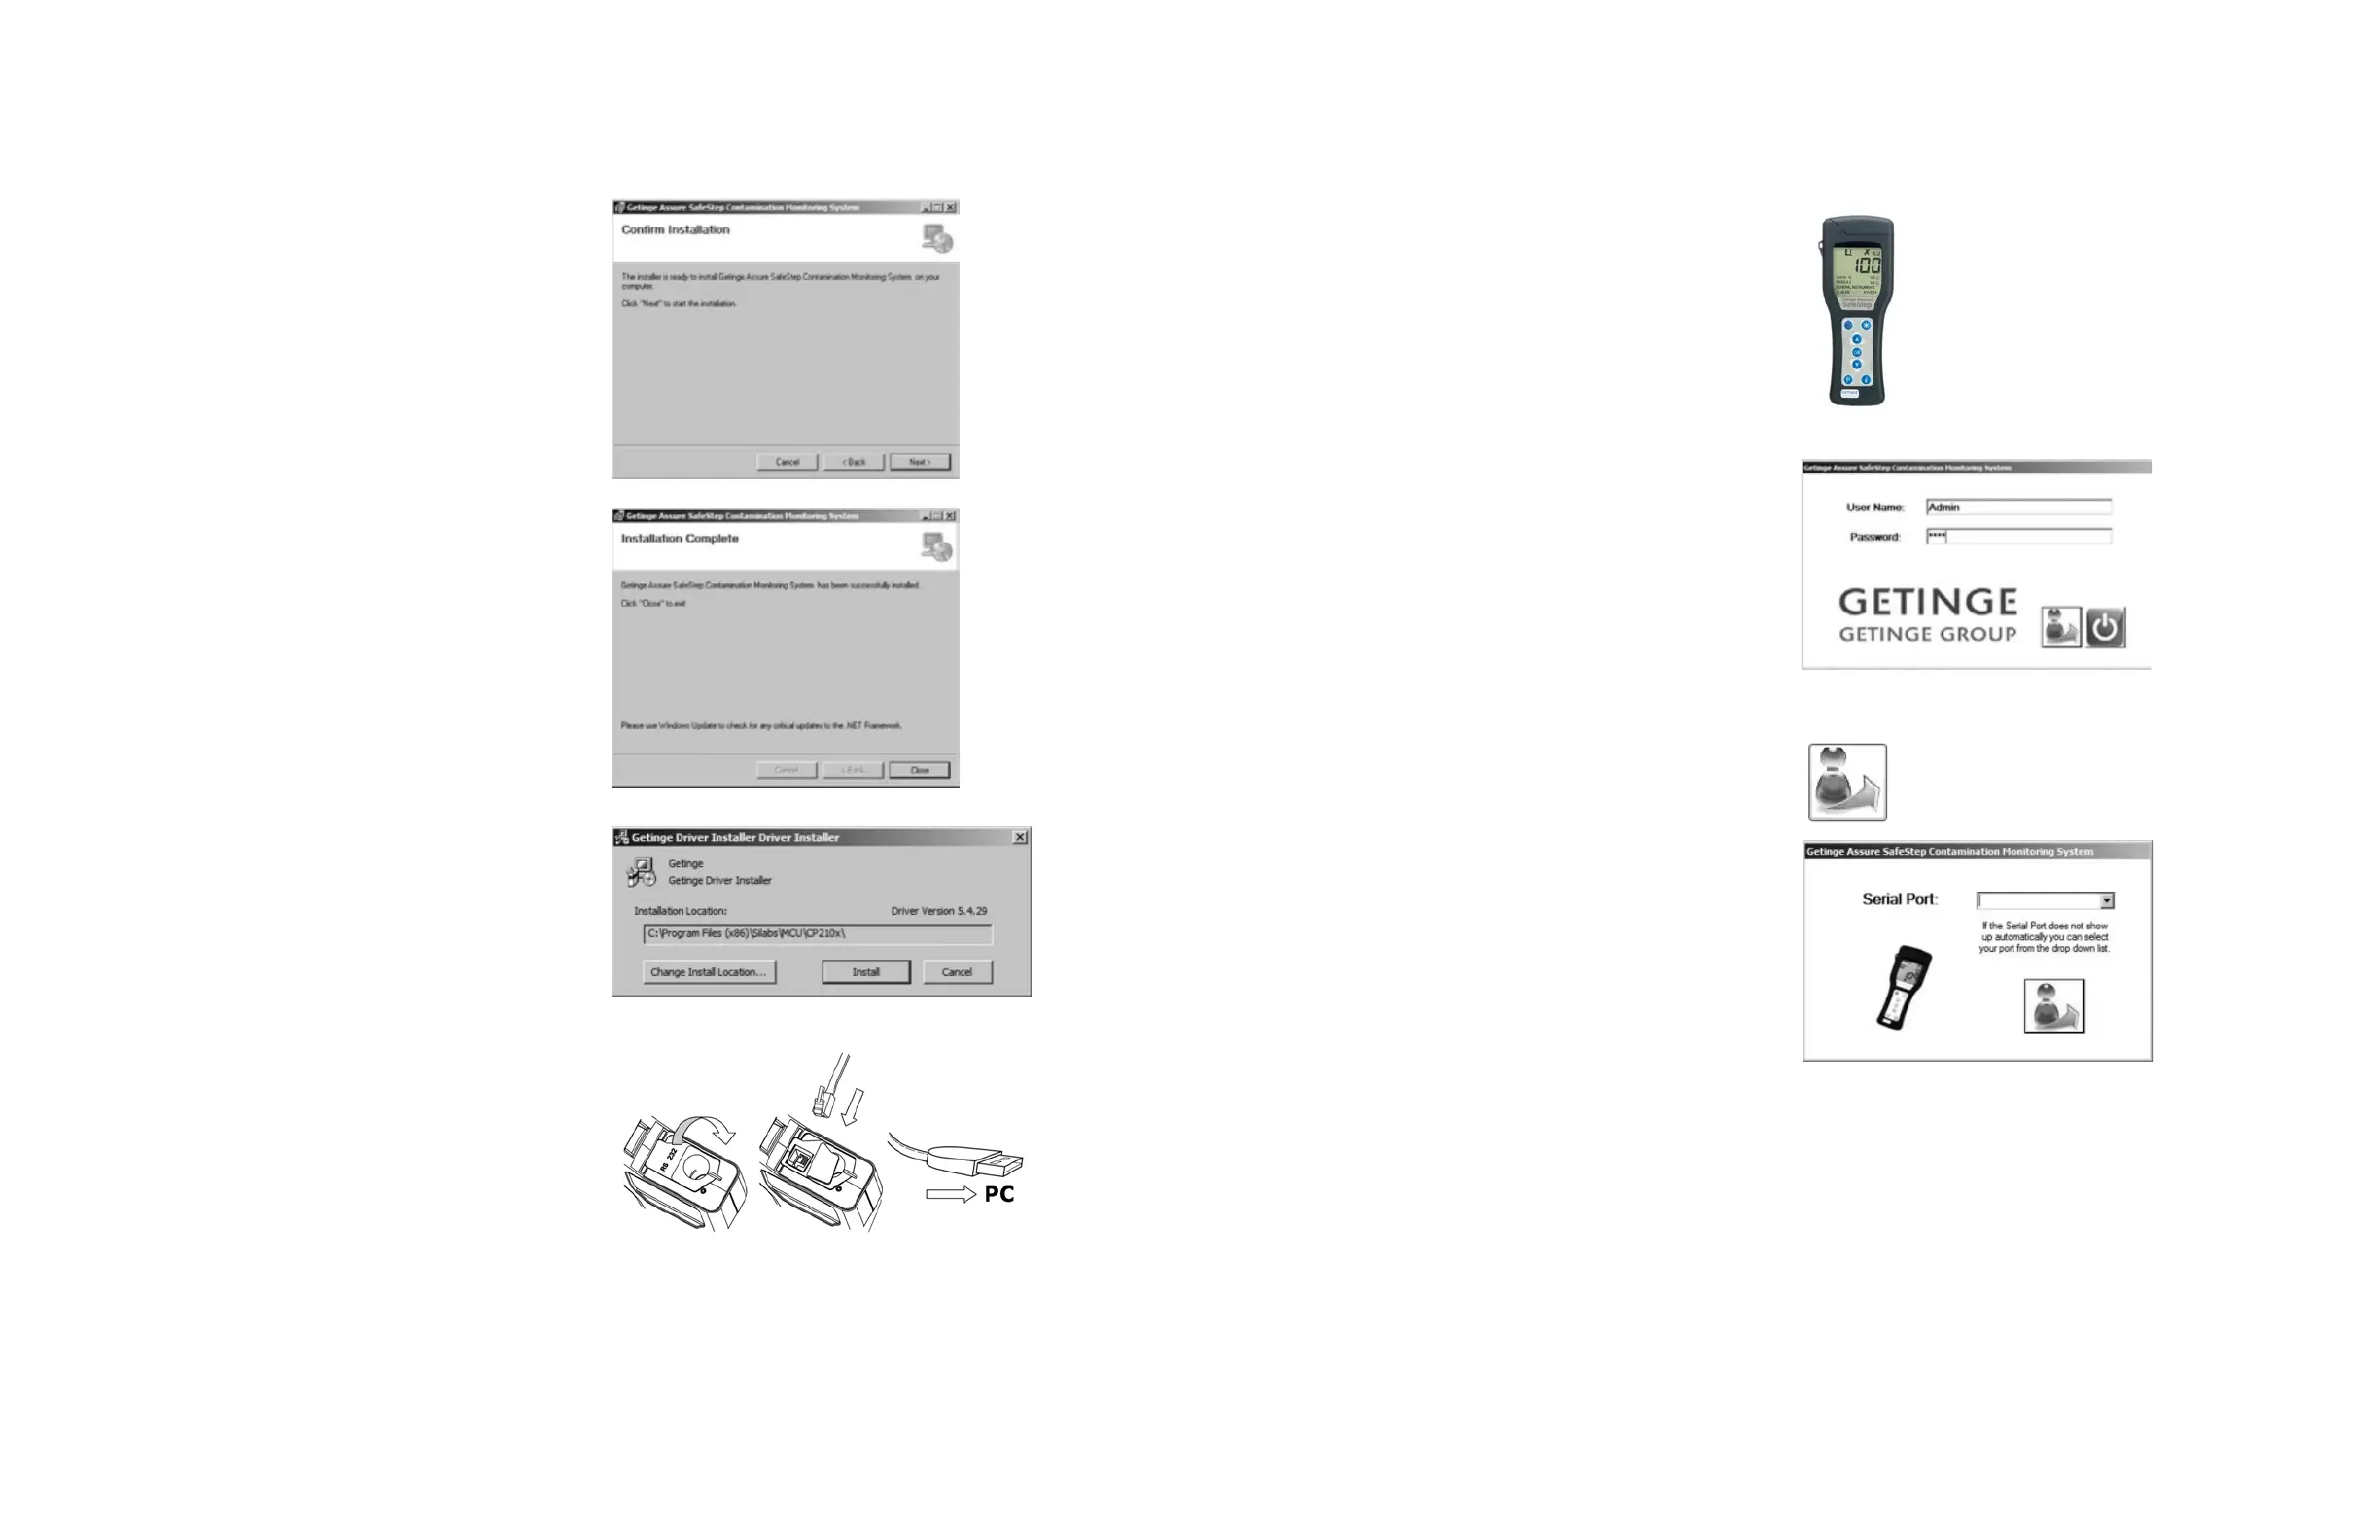
Step 5. Microso .Net Framework 4 isrequired to be
installed for the soware to run. If the soware
is not installed, the installer will automatically
install the needed soware and any patches.
Click Next
Step 6. The install of the drivers for the handheld drivers
will begin. Follow the on screen prompts and the
ATP install will continue to completion. Do not
click to restart the computer until the installation
completed. Click Close
Step 7. Click Next then finish. (Do not click to restart the
computer until the installation completed.)
Step 8. Step 8. Prior to turning on the handheld unit make
sure the flap is sealed over the RS232 port, and
the top of the handheld is closed. Press the power
buon and the device will self-calibrate for 15 or
60 seconds.
To connect the handheld device please follow
these simple instructions: Open the top of the
device, and gently move the rubber flap back until
you see the RS232 socket. Place the RJ10 plug
into the RS232 socket, and connect the other end
of the cable to your PC’s USB port.
Step 9. Double click this icon to start the soware.
Step 10. The first time you run the soware, the default
user name Admin and password 1234 will be
needed and may be changed in the soware
users’ form. This is the default Admin account so
the password should be changed if you choose so.
Step 11. Hit the Enter Key aer you enter your login
credentials. If your ATP device was already
connected prior to opening the soware the
serial port should be recognized and you can
press Enter to continue. If the serial port is not
recognized automatically, you can choose the
port from the drop down list. To see what port
your Getinge SafeStep ATP handheld device is
connected to, follow the instructions below. The
system will tell you whether the port is a valid port
on the system.
a. Go to the Device Manager:
• Windows XP: Start -> Control Panel -> System
-> Hardware -> Device Manager
• Windows 7/Vista: Start -> Control Panel ->
System -> Device Manager (Top Le Panel)
b. Click on the plus sign (+) next to “Ports.”
If the device is installed properly, you will see
Prolific USB to Serial Com Port with the port
number (Ex (Com 4).
1. Fold back rubber 2. Insert small RJ10 3. Connect other
cover to access plug into unit’s end of cable to
RS232 socket RS232 socket PC’s USB port

 Loading...