MDE-5265E BRCM2.x Installation and Upgrade Instructions · April 2021 Page 19
Upgrading to BRCM2.x
Upgrading D-Box Using PA04222000202 or PA04222000202B or
PA04222000002B
To upgrade D-Box using PA04222000202/202B/002B, proceed as follows:
Note: For BRCM2.x connections, refer to “Appendix A: BRCM2.x Communication Diagram”
on page 35. These connections vary significantly depending on the site
configuration.
1 Power down the existing D-Box by removing the power cord from the outlet and the chassis.
2 Open the lid of the existing D-Box.
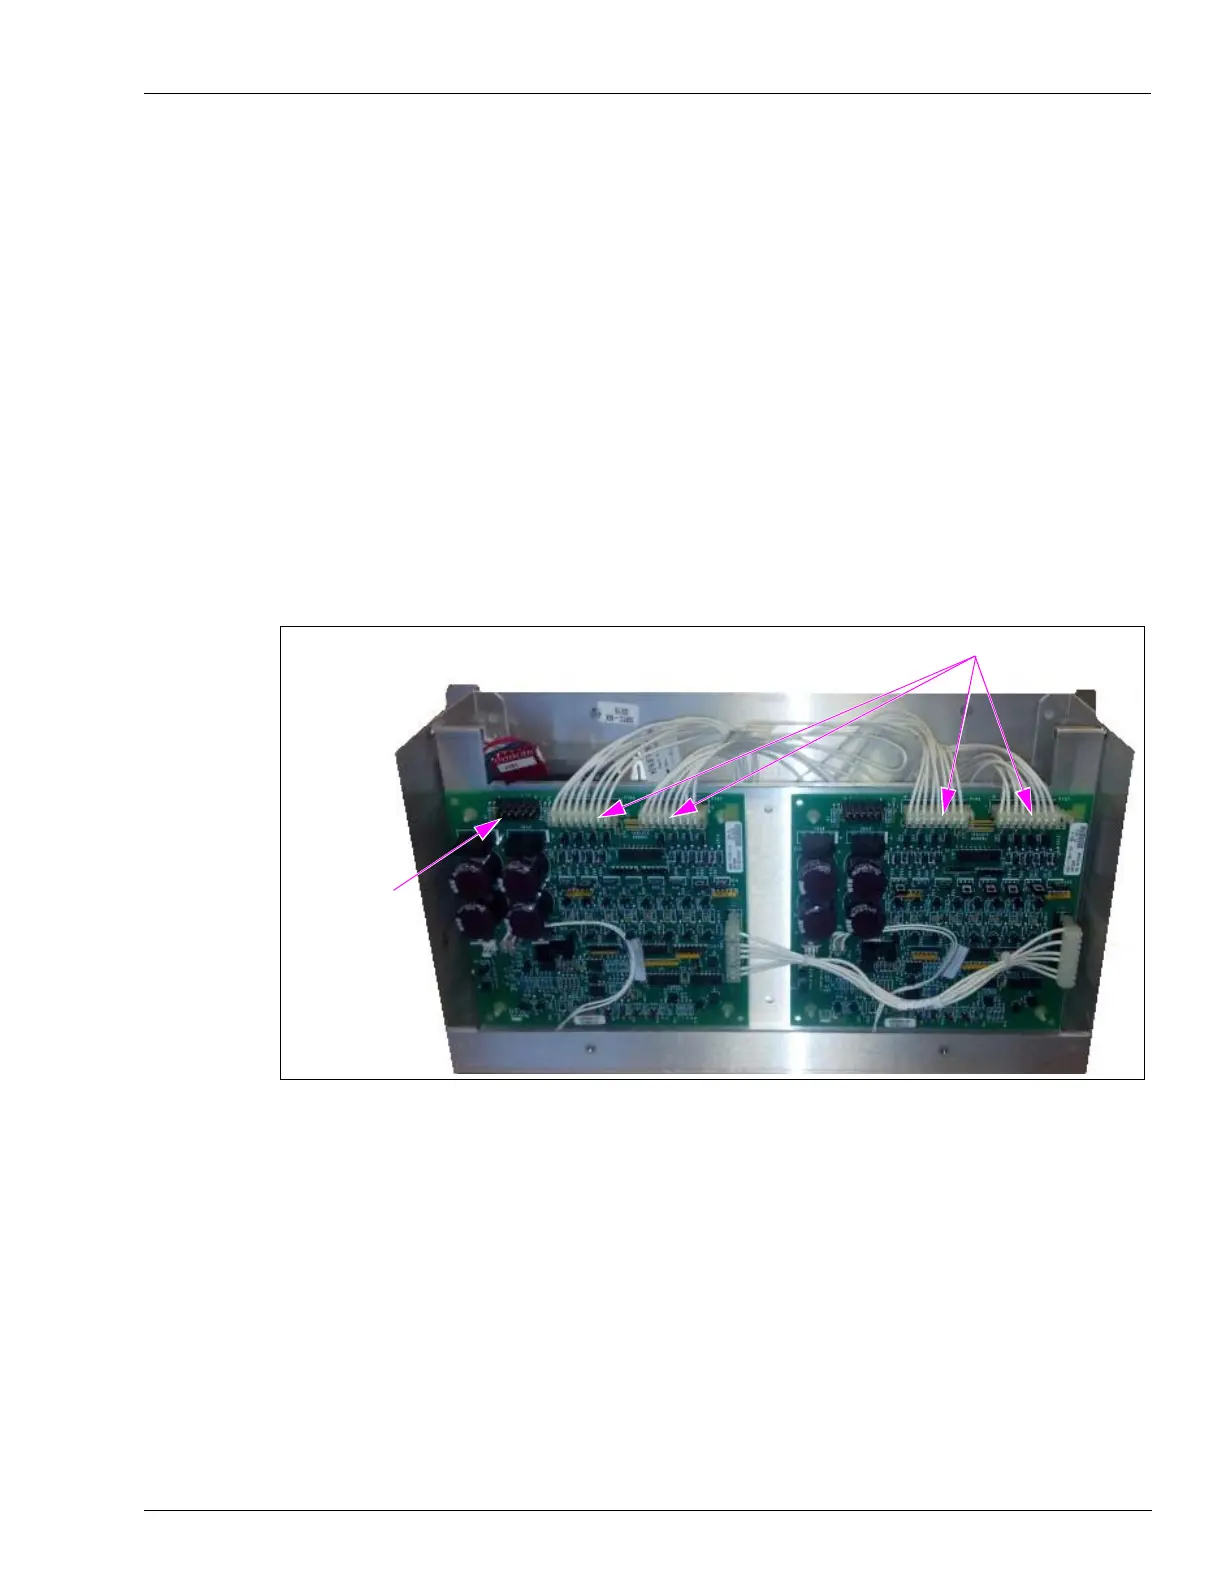
3 Remove the transformer connections to both D-Boxes [the existing D-Box and the
PA04222000202/202B/002B (see Figure 11)].
4 Remove the existing field wiring connectors (see Figure 11).
Figure 11: Removing Transformer and Existing Field Wiring Connectors
Connection to
Transformer
Field Wiring Connectors
5 Remove the field wiring board tray assembly from the PA04222000202/202B/002B.
6 Remove the hasp panel from the PA04222000202/202B/002B and transfer it to the existing
D-Box. Mount it with the flat
surface facing towards you.
7 Discard the empty chassis.
8 Remove the D-Box tray.
 Loading...