10.
Tighten bolts and then apply silicone caulking to the top edge and
both sides of each bracket.
11.
On the motor side of the awning drill a 7/16” hole for the awning
motor cable to enter the RV near the electrical source. Position the
hole 1” to the left or right of the bracket. Do not drill hole higher or
lower than the bracket. This will ensure that it will not be seen after
the awning is installed.
12.
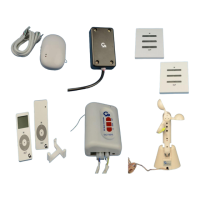
If you are using a 12V Motion Sensor locate the wire, then drill the
appropriate sized hole to rout the wire to your interior 12V source.
Make sure to seal any perforations made in the shell of the vehicle.
13.
Locate the white wire grommet supplied with the awning. Place a
fine bead of silicone around the body of the grommet. Slide
grommet into the 7/16” hole previously drilled for the motor wire.
C.
MOUNTING THE AWNING TO THE
BRACKETS
1.
Lift the awning into position for installing the awning on the brackets.
A.
Ladders are usually sufficient, however, a scaffold or forklift may
be used.
B.
If using a forklift use all necessary caution to protect the surface
of the awning. Lift from the center of the awning to maintain
product balance while elevating.
2.
Place the awning onto the brackets while feeding the motor wire
through the white motor grommet. A small amount of lubricant may
aid the feeding of the wire. Make sure the grooves of the awning are
securely engaged into the channels on the bracket. (Figure 4)
3.
Secure the awning by moving the slide locks along the bottom awning
track until they are located under their respective brackets. The final