NOTE: This adjustment is usually required after an arm replacement. Also, when
the elbow of the arm hits the bottom of the casing as the lead rail closes.
Tools Required
•
19mm (3/4”) open-end wrench
•
10mm (3/8”) open-end wrench
A. ELBOW HEIGHTH
1.
Extend the awning about 18”
2.
On the selected arm, loosen the two(2) nylon nuts on the side of the upper arm
connection, using a 19mm open-end wrench.
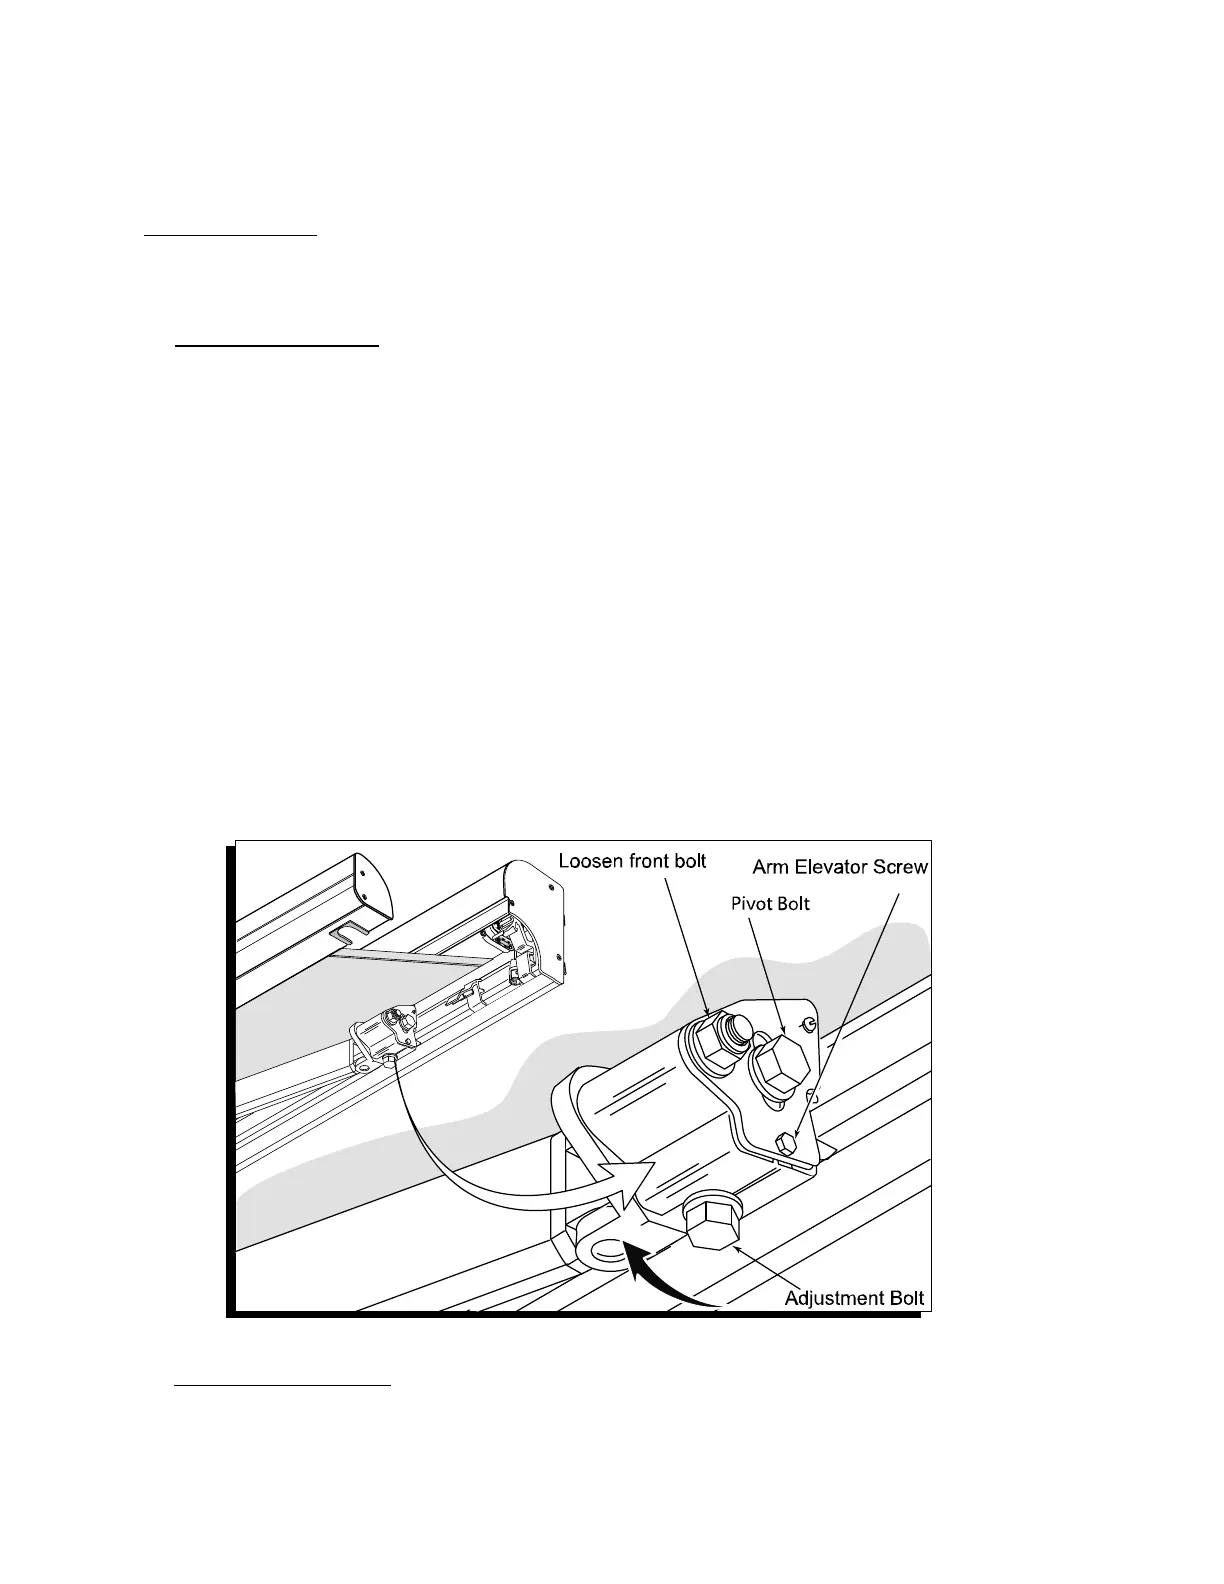
3.
Locate the smaller adjustment bolt located directly below the rear lock nut
loosened in step #2. (Figure 9) Using a 10mm open-end wrench rotate the bolt
clockwise to TIGHTEN and raise the arm location inside the cassette. Rotate the
bolt counter-clockwise to LOOSEN or lower the arm location inside the cassette.
NOTE: After retightening the nylon nuts, the arms will raise slightly higher.
4. Tighten the two(2) nylon nuts located on the side of the upper arm connection.
5. Close the awning completely to ensure a proper fit.
(Figure 9)
B. ADJUSTING PITCH