available use the motor limit switches to adjust the OUT limit until the
C-shaped channel is accessible
2.
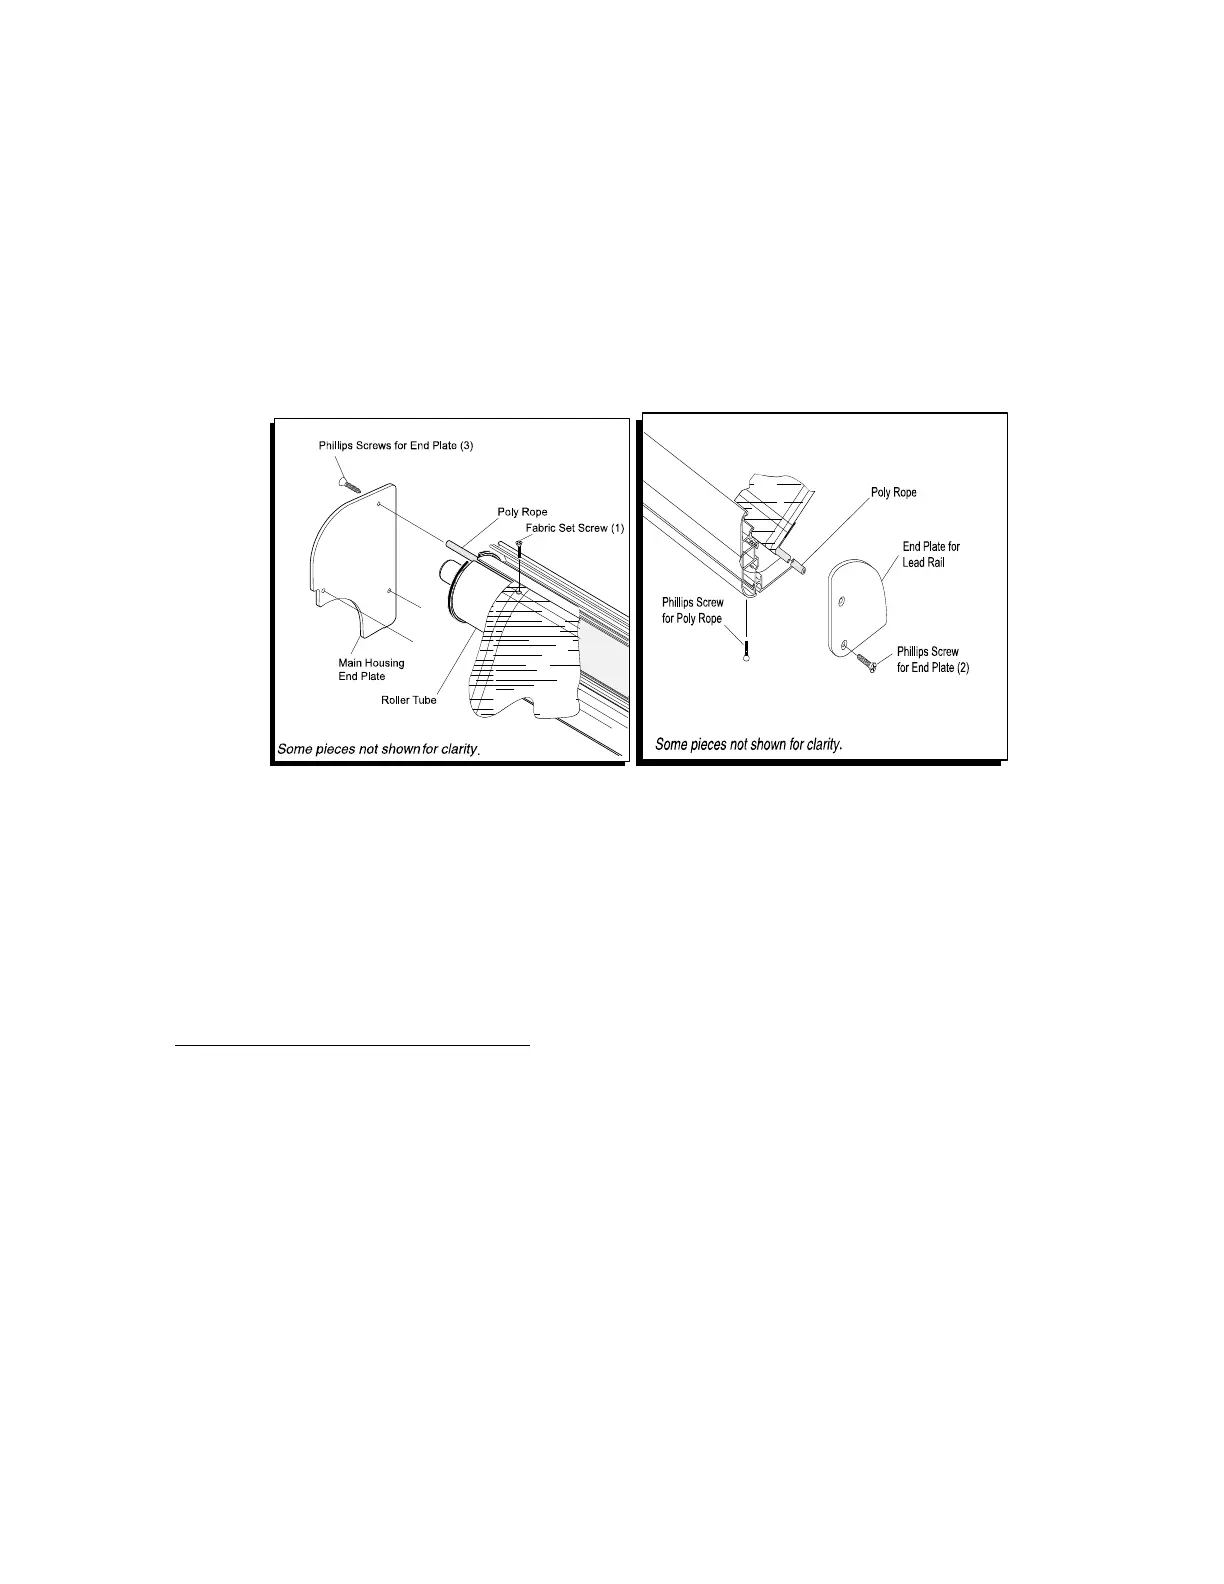
Remove all four(3) fabric set screws. There are two(2) on the lead rail
and there is one(1) on the roller tube on the opposite side that the
motor is located on.
3.
Remove the corresponding lead rail housing end plate.
Figure 16 and 17
(Figure 16 and 17)
4.
Carefully slide out the entire fabric from the left end of the roller tube
and lead rail. Make sure the polyrope clears the support bracket.
NOTE: FOR PERSONAL SAFETY, AND BEST RESULTS IT IS
RECOMMENDED THAT TWO TECHNICIANS PERFORM THIS
FUNCTION.
C. INSTALLING THE NEW FABRIC
IMPORTANT: REPLACEMENT FABRICS ARE ROLLED FOR SHIPMENT. THE
SEAMS MUST FACE DOWNWARDS AS THE FABRIC IS INSTALLED. THERE IS A
SMALL WHITE POLY (POLYESTER) ROPE INSERTED IN THE FABRIC THAT WILL
SLIDE INTO THE ROLLER TUBE.
1.
Apply masking tape to the sharp edges of the lead rail’s C-shaped
fabric channel, and all sharp edges of the awning cassette and the
roller tube support bracket. This will allow the fabric to enter the
channel freely without snagging or tearing.
2.
Insert the leading edges of the fabric into the C-shaped channel in the
lead rail and roller tube on the side where the end caps have been