8.
If the arm you are replacing has a fixed bolt: Insert the arm into the shoulder,
ensure that the fixed bolt on the arm goes through the pitch adjustment
assembly, the spacer bushing, and the washer. (These are the components inside
of the shoulder) Insert the previously removed bolt and nut. If the arm you are
replacing does not have a fixed bolt: Use the bolt supplied with the arm, slide
through the spacer bushing for shoulder support, the pitch- adjustment
assembly, and the arm connection plate. Insert the previously removed bolt and
nut.
9.
With the awning open about 18”, unband the high tension arm very carefully.
Slowly guide it into position on the lead rail and fasten with the 17mm nut and
bolt.
10.
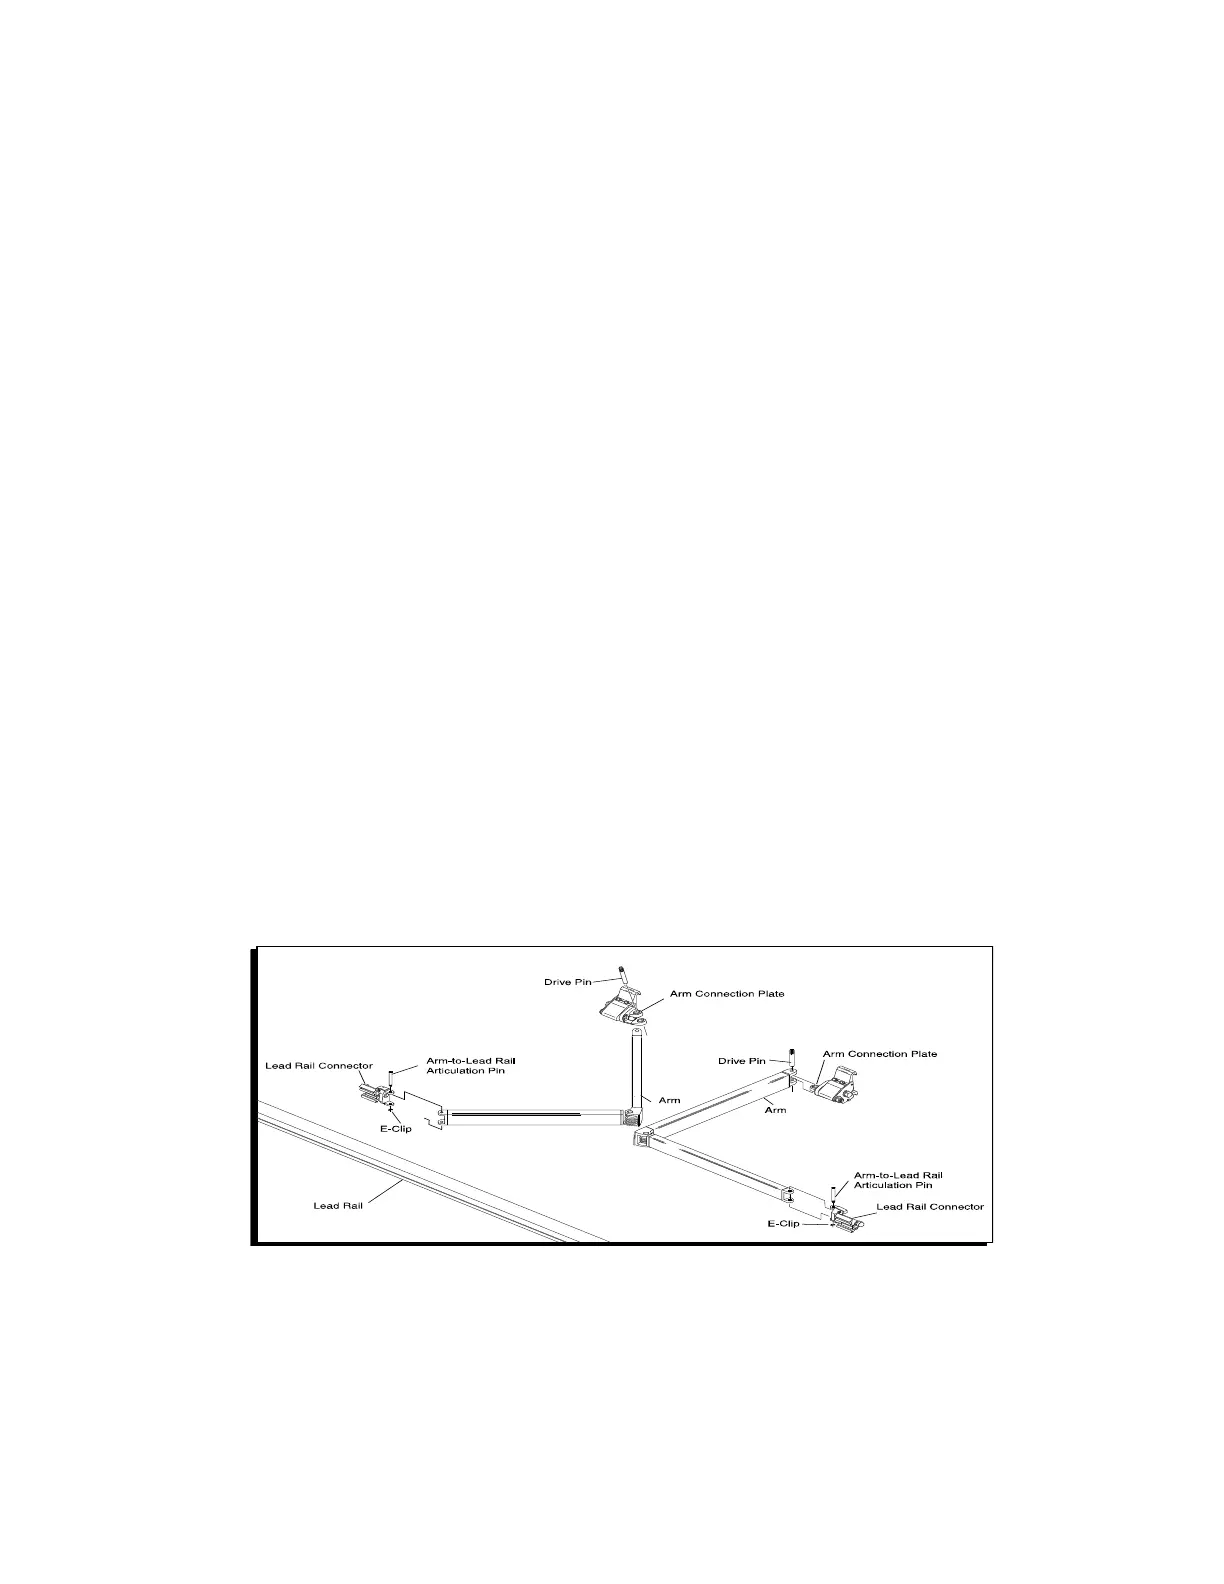
Attach the front of the arm to its connection point at the lead rail by replacing
the pivot pin from the top and securing it with the retaining ring (F-clip). (Figure
19) Then slide into the lead rail connection and replace the nut and washer. At
the shoulder assembly of the arm, tighten both lock nuts until they are one turn
from being tight. Adjust the arms’ pitch angle to match the others by rotating the
head of the pitch-adjustment screw as follows; rotate in a clockwise direction to
lower the arm, or rotate counterclockwise to raise it. Fully tighten both lock nuts
on the shoulder assembly. Please refer to the “ADJUSTING THE PITCH
ANGLE” section of this manual.
!
(Figure 19)
Shoulder parts pictures here.