Page 17
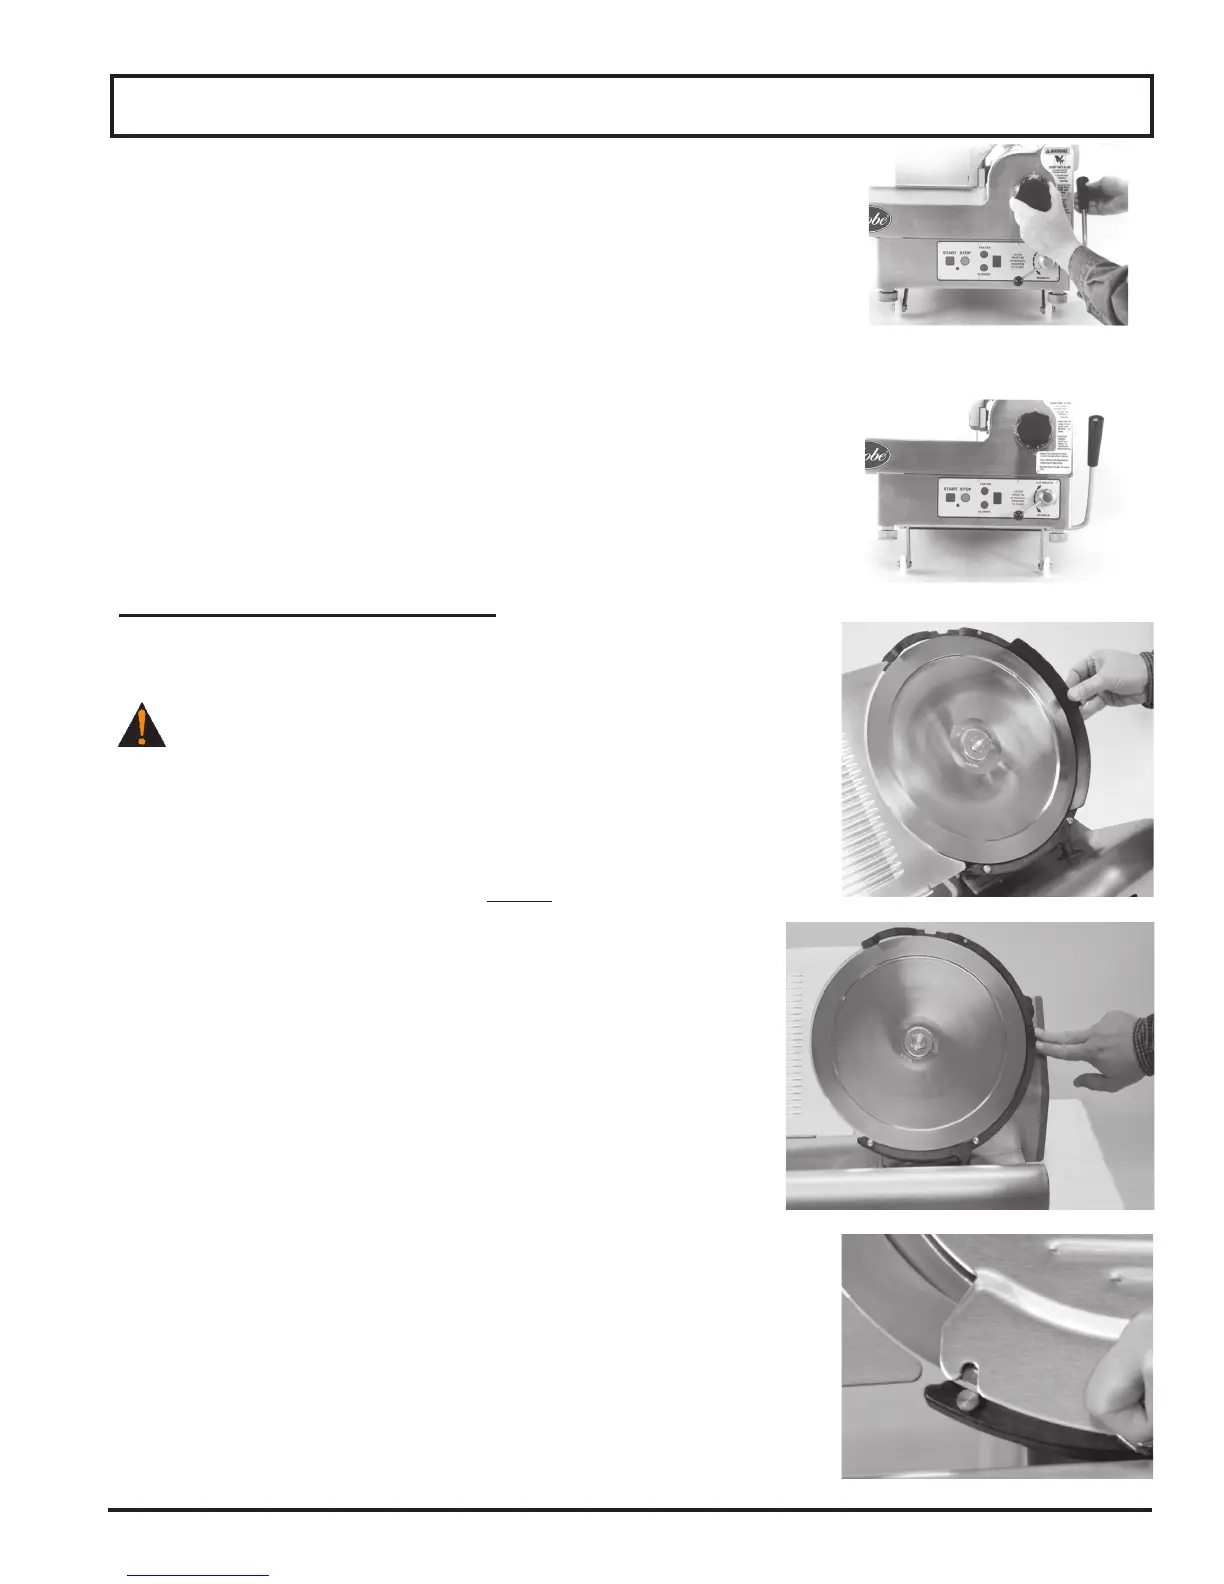
16. Manual slicers are equipped with a cleaning brace that raises the slicer to
allow cleaning underneath. Push chute arm to the back of slicer.
Simply lift up the front of slicer and pull brace all the way toward the
front of slicer and lower the unit (Fig. 17-1).
17. Automatic slicers have a lift lever that raises slicer to allow cleaning
underneath.
a. With auto engage lever in “Manual” position, push chute arm
to the back of slicer.
b. Pull lift lever knob towards you with your right hand while gently lifting
up on slice thickness dial with other hand (Fig. 17-2).
c. Pull lift lever all the way towards you until it stops (Fig. 17-2).
18. After cleaning the counter area under slicer, lower slicer back to its
operating position.
REINSTALL REMOVABLE PARTS
After cleaning, sanitizing, and allowing the parts to air dry, they must be
reinstalled.
BE ALERT. Slicer knife is exposed. Always be aware of placement of your
hands/ngers in relationship to the knife.
1. Carefully insert slice deector into place between knife and ring guard
(Fig. 17-3). Align tab over the lock notch and with two ngers, press tab over
lock notch (Fig. 17-4). You will hear it “click” when it has securely locked into
place.
Note: if slice deector does not securely “click” into place, slice
deector is not properly reinstalled. Do not operate slicer unless
slice deector has been properly installed.
2. Reinstall knife cover by aligning the notches of knife cover with
pins located at the bottom and one at the top of
knife ring guard (Fig 17-5). Locator pin at top of knife ring guard
must be set through knife cover and pressed into place. Once locator
pin is seated over pin, screw knife cover knob back into place on top
of slicer.
Note: Slicer will not operate unless knife cover is secured in place.
Cleaning
Figure 17-1
Figure 17-2
Figure 17-3
Figure 16-2
Figure 17-5
Figure 17-4