Page 8
Installation and Proper Grounding
UNPACKING:
1. Unpack slicer immediately after receipt. If the machine is found to be damaged, save the packaging material
and contact the carrier within fteen (15) days of delivery and immediately contact your source of the
equipment. You have no recourse for damage after fteen (15) days of receipt.
2. With slicer you should receive: a bottle of Globe oil, a wall chart, and an instruction manual. Complete your
product warranty registeration online at: www.globefoodequip.com/support/warrenty-registration-form.
Contact Globe, or your local supplier, if you did not receive all of these items.
TO AVOID SERIOUS PERSONAL INJURY PROPERLY INSTALL SLICER IN
ADEQUATE WORK AREA.
• ALWAYS install equipment in a work area with adequate light and space.
• ONLY operate slicer on a solid, level, nonskid surface that is nonammable.
• NEVER bypass, alter, or modify this equipment in any way from its original condition. Doing so can
create hazards and will void the warranty.
• NEVER operate slicer without knife cover and knife ring guard securely installed.
• NEVER operate slicer without all warning labels attached to slicer and the Globe wall chart posted within
view of operator.
INSTALLATION:
1. Read this manual thoroughly before installation and operation. DO NOT proceed with installation and
operation if you have any questions or if you do not understand anything in the manual. Contact your local
representative or Globe rst. Make sure to clean and sanitize your entire slicer before use. Refer
to this manual for cleaning and sanitizing guidelines.
2. Remove slicer from corrugated box.
NEVER USE SLICER WITHOUT RUBBER FEET ON UNIT.
3. Select a location for slicer that has a level, solid, nonskid surface that is nonammable
and is in a well-lit work area away from children and visitors.
USE AT LEAST TWO PEOPLE TO LIFT SLICER UP TO OPERATING LOCATION.
NEVER ATTEMPT TO LIFT SLICER ALONE.
4. Make sure slicer is level. If slicer wobbles or rocks once it has been placed on table or counter, adjust rubber
feet until slicer is level.
5. Post Globe’s wall chart in a location within easy view of operator.
6. Inspect slicer to make sure all parts have been provided.
7. Make sure knife cover and knife ring guard are in place.
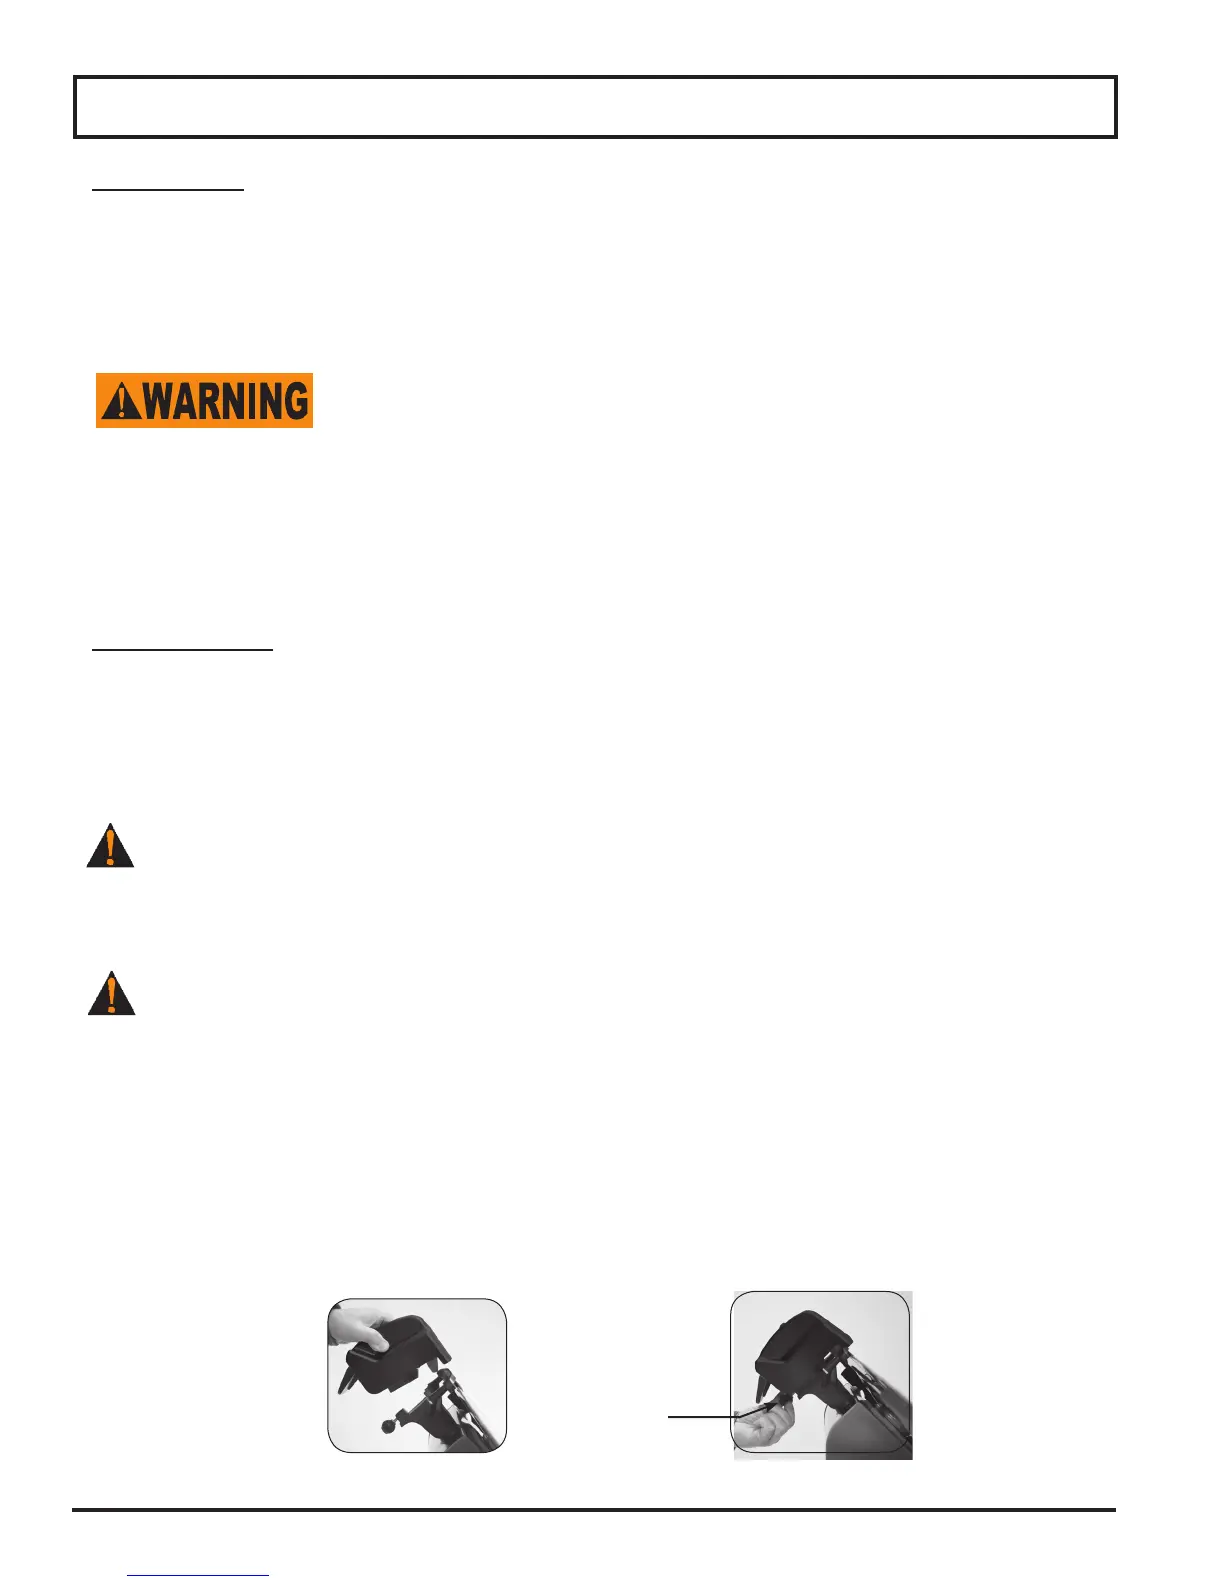
8. Locate slicer’s sharpener, packaged in its own box. Unpack it from box,
attach it to top of slicer (Figure 8-1), and secure it by tightening knife
sharpener release knob (Figure 8-2).
Figure 8-1
Figure 8-2
Knife Sharpner
Relase Knob