12 Inspection and maintenance
32 Installation and maintenance instructions MicraCom 0020289288_02
G31 – Setting the CO₂ content
Great Britain
Liquefied petroleum gas
P
Removed front
casing
Fitted front cas-
ing
CO₂ at full load
10.4 ±0.3 % 10.6 ±0.3 %
Set for Wobbe in-
dex W₀
21.34 kW⋅h/m³ 21.34 kW⋅h/m³
O₂ at full load
5.4 ±0.4 vol. % 5.1 ±0.4 vol. %
CO at full load
≤ 250 ppm ≤ 250 ppm
CO/CO₂
≤ 0.0024 ≤ 0.0024
▽ If the setting is not in the specified adjustment
range, do not start up the product.
▶ Contact customer service.
6. Check whether the air-quality requirements with regard
to carbon monoxide are fulfilled.
7. Refit the covering cap (1).
8. Install the front casing.
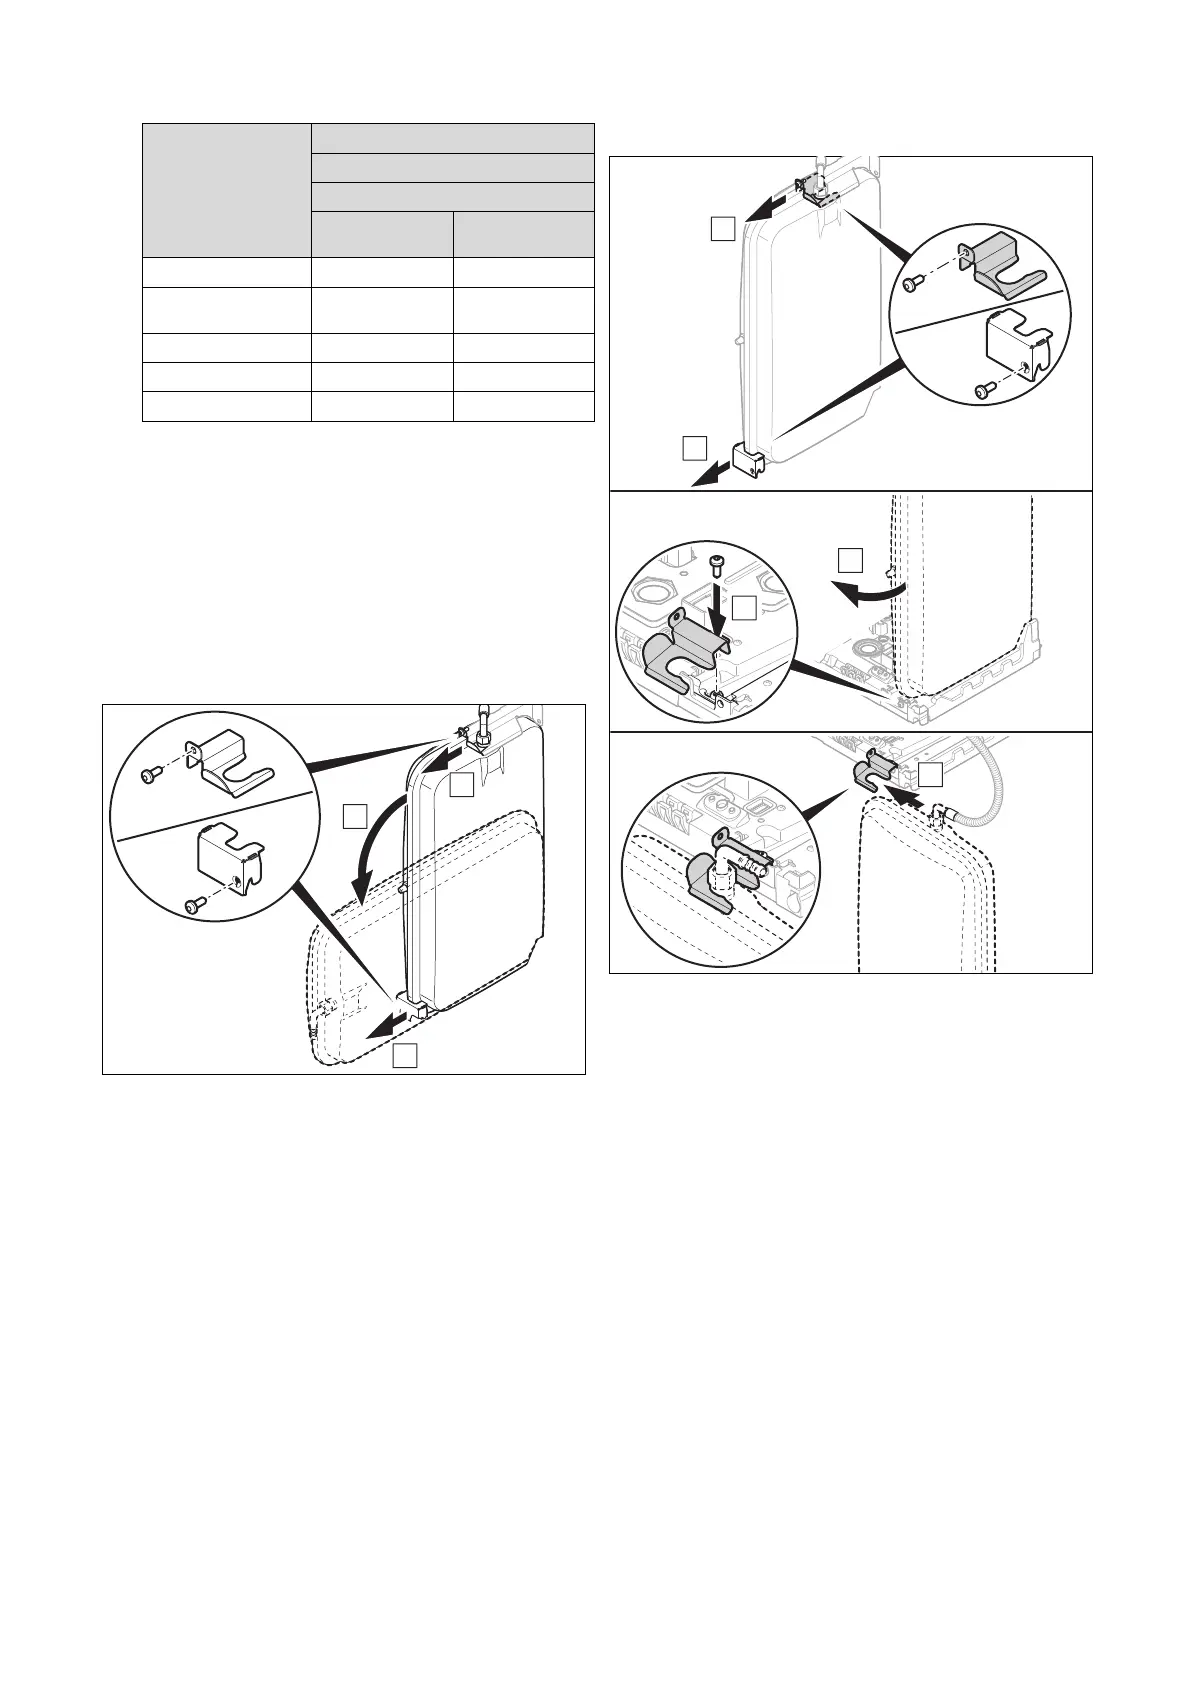
12.2 Moving the expansion
vessel to the maintenance position on
the combustion block
▶ Depending on the components on which you want to
work, move the expansion vessel to the maintenance
position.
12.3 Moving the expansion vessel to the
maintenance position on the hydraulic block
▶ Depending on the components on which you want to
work, move the expansion vessel to the maintenance
position.
12.4 Cleaning/checking the components
Carry out the preparatory work before cleaning/checking any
of the components.
▶ Prepare the cleaning and inspection work. (→ Page 32)
Carry out the work required to finish the task after clean-
ing/checking any of the components.
▶ Complete the cleaning and inspection work. (→ Page 36)
12.4.1 Preparing the cleaning and inspection work
1. Drain the product when you are carrying out work on
hydraulic components. (→ Page 37)
2. Temporarily decommission the product. (→ Page 39)
– Take all necessary precautions to ensure that it
cannot be switched back on again.
3. Disconnect the product from the mains power.
4. Close the service valves of the product.
5. Remove the front casing. (→ Page 22)
6. Hinge the electronics box downwards.
 Loading...