5. If MAN is selected, an additional field is displayed and
highlighted to allow manual entry of the magnetic variation.
Press the ENT key.
6. Use the Cursor keypad to select the required magnetic
variation. Press the
or keys to change the first character
to E (East) or W (West) then press the key to move the
cursor to the right. Use the or keys to change the value
(in degrees) of the magnetic variation. Press the ENT key
when done.
7. Press the MENU key twice to return to the navigation screen.
WPT Name
This defines how Waypoints are displayed on the plotter screen.
1. From the main menu select PLOTTER and press the ENT key.
2. Select the WPT NAME field and press the ENT key.
3. Choose from DSP GOTO, DSP RTE or DSP ALL and press
the ENT key.
4. Press the MENU key twice to return to the navigation screen.
DSP GOTO: Displays only the GOTO Waypoint name.
DSP RTE: Displays all Waypoint names in the currently
active route.
DSP ALL: Displays ALL Waypoint names.
TTG/ETA SPD
Select this option to define how the GP450X will calculate Time
to Go (TTG) and Estimated Time of Arrival (ETA).
1. From the main menu select PLOTTER and press the ENT key.
2. Select the TTG/ETA SPD field and press the ENT key.
3. Choose AUTO or MAN and press the ENT key.
AUTO: The unit will calculate TTG and ETA based on your
vessels average speed.
MAN: The unit will calculate TTG and ETA using a speed
you enter.
4. If MAN was selected a Speed field appears, press the
ENT key.
5. Use the cursor keys to select the required speed for use in
TTG and ETA calculations, then press the ENT key.
6. Press the MENU key twice to return to the navigation screen.
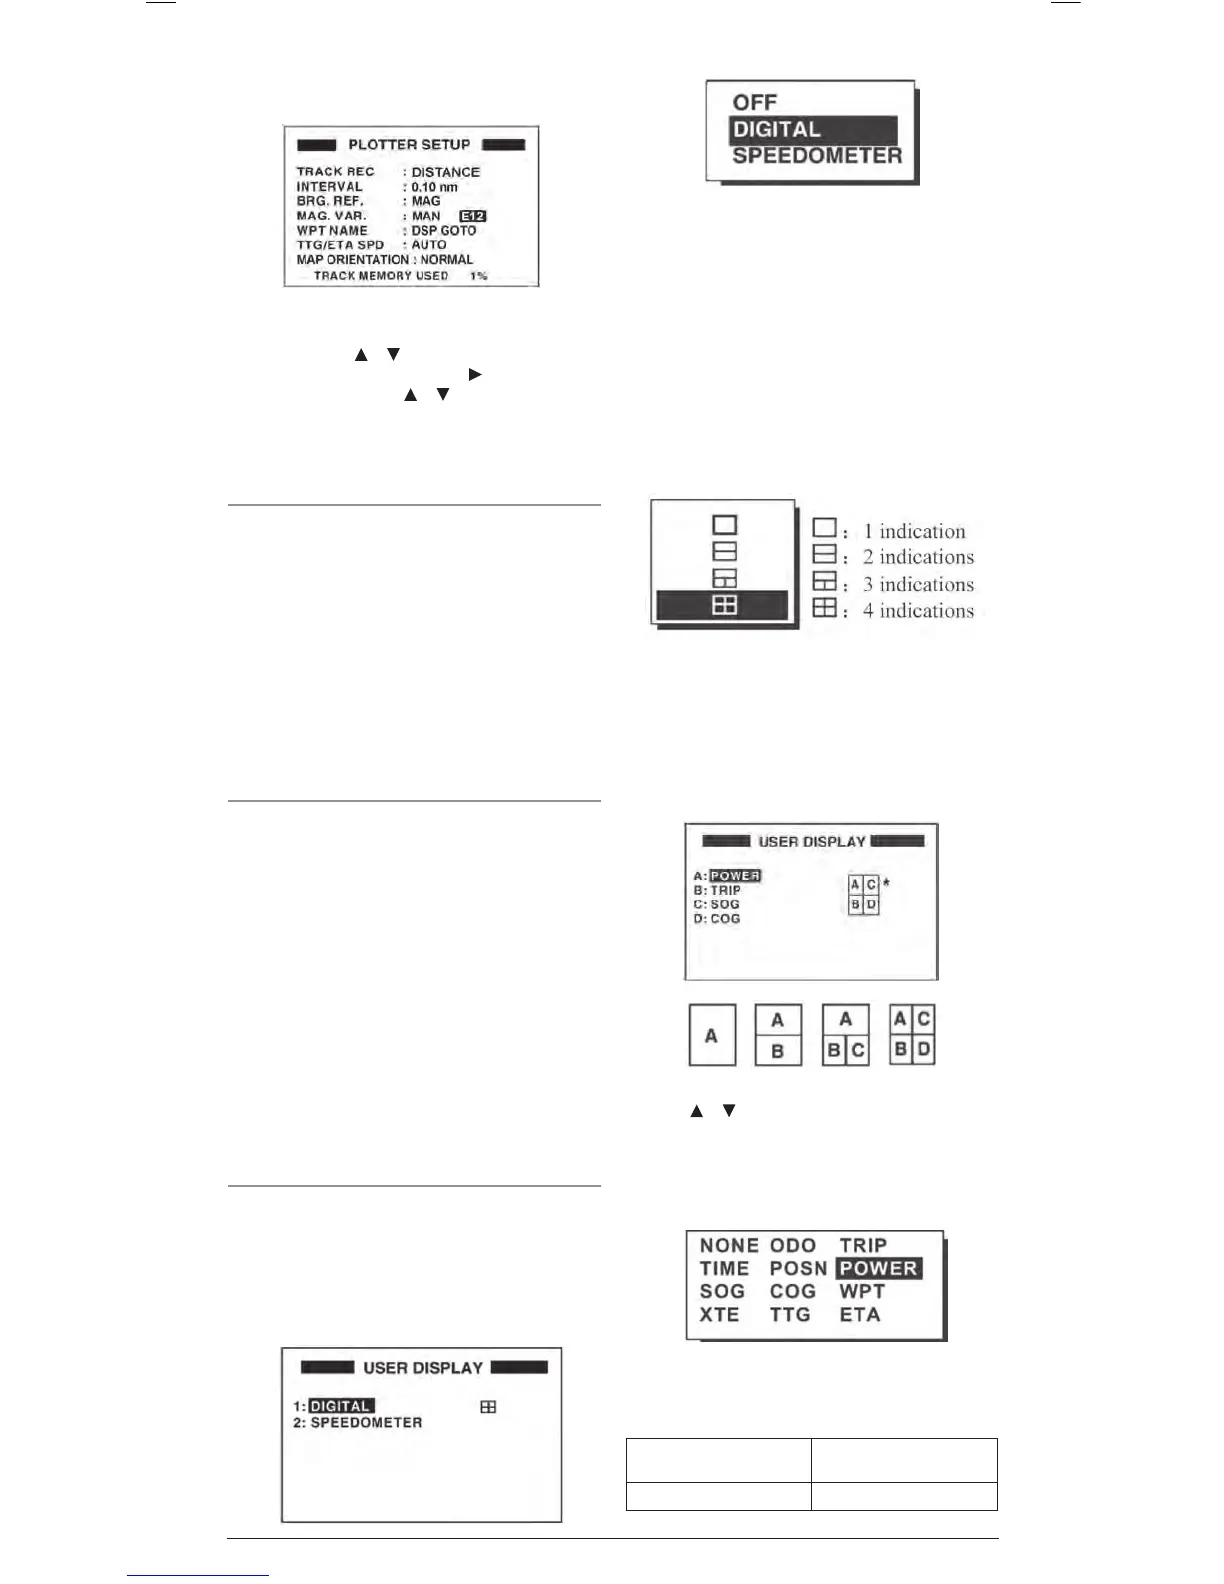
User Display Setup
There are two user displays that can appear when cycling the
DISP key. They can be set to show a Speedometer and/or a set
of digital numeric fields in a combination that you choose.
To setup the User Displays:
1. From the main menu, select USER DISP and press the ENT
key. Two user display screen selections are provided.
2. Select 1 or 2 and press the ENT key.
3. Choose from OFF, DIGITAL or SPEEDOMETER and press
the ENT key. Instructions for each option are shown below
OFF
Select OFF to turn the selected user display off. When OFF is
selected, nothing will be displayed for the selected user display
when the DISP key is cycled.
DIGITAL
Select DIGITAL to format the display with digital fields. The field
layout will be highlighted.
1. Press ENT to select the require layout of 1 to 4 data fields.
4. Once the required layout is selected, the field data option
screen is displayed along with the current settings for each
field. The fields are labelled A, B, C & D to match the field
position legend to the right of the display (see image below).
The field position legend will match the number of fields you
have selected.
5. Use the
or keys to select the required field (A, B, C or
D) and press the ENT key.
6. Use the cursor keys to select the require data to be displayed
at the selected field. Press the ENT key to accept it.
The data field options are;
NONE: No Display SOG: Speed over ground
ODO: Odometer distance COG: Course over ground
Data Field Options
 Loading...