7
Fury X-3 Installaon and Operang Instrucons
CONNECTION TO MAIN POWER
CAUTION! Electrical connecons are to be made by a qualied electrician only! Make sure
that the service AC input voltage is OFF before wiring charger.
CAUTION! Risk of Fire! Use on circuits provided with the following branch circuit protecon in
accordance with the Naonal Electric Code, NFPA 70.
**Ensure AC wiring and AC plugs used meet NEC requirements. Refer to the technical
specicaons secon of this manual to view AC input informaon.
VAC Input
480VAC
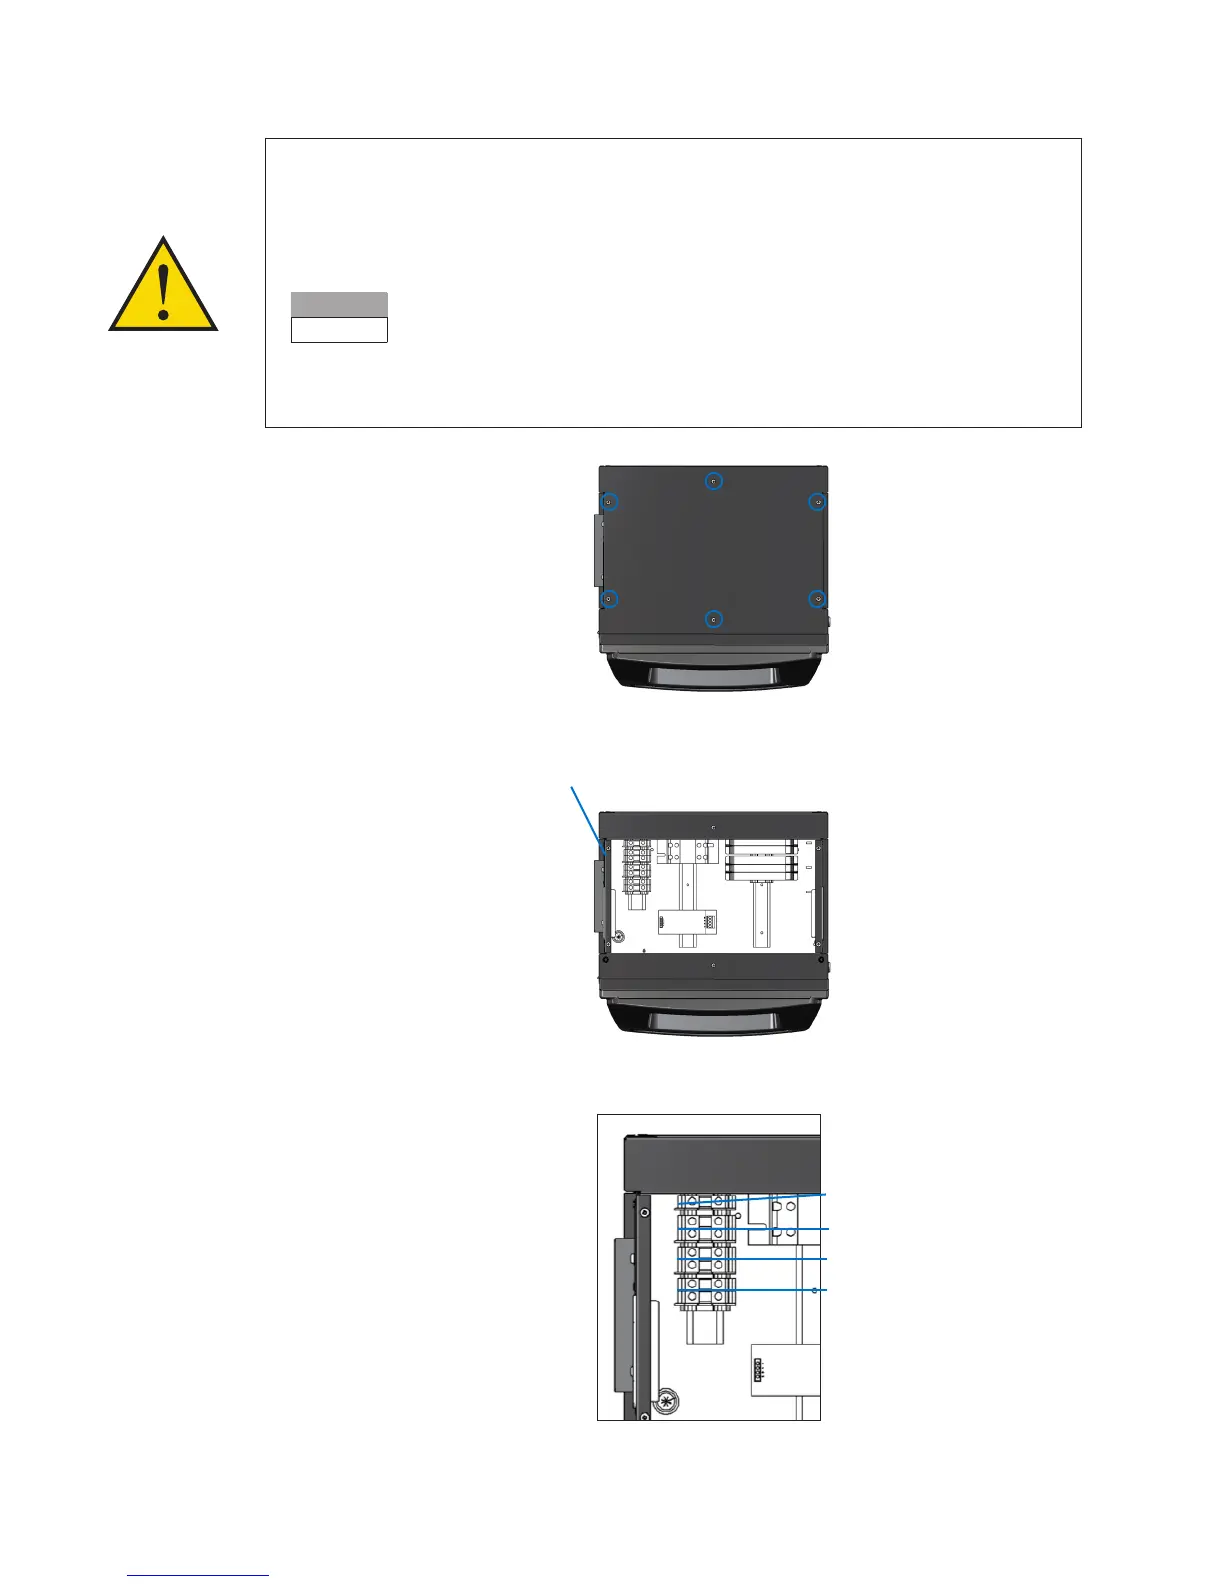
Step 1. Remove Top Panel of Charger
Remove the top panel of the charger by removing the six
screws shown:
Step 2. Aach Shielded Input Cable or Conduit to Charger
Use an NEC-approved conduit or AC input cable (such as
type SOOW) to connect to the charger.
Use appropriate minimum wire size or larger for maximum
kilowa rang of charger – See Technical Specicaon Table
(page 2): Min. AC Input Wire Size (AWG). The hole located in the
top le corner of the charger must be used for the AC service
entrance. Place an appropriate cable or conduit clamp in this AC
service entrance hole.
Step 3. Connect 3-Phase AC Input Power Cables
Ensure ground and power cables have been properly stripped
(approximately a half inch of insulaon from the ends). Loosen
the securing screws in the AC input block and insert the stripped
ends of the ground and power cables. Reghten the screws. The
3-phase input is not phase specic, so AC line input posions are
interchangeable. Ensure cable or conduit clamp has
been properly ghtened.
AC Service Entrance Hole
Ground
L1
L2
L3


 To Next Page