14
Fury X-3 Installaon and Operang Instrucons
POWER MODULE REPLACEMENT
IMPORTANT! Make sure the charger is completely POWERED OFF and NO BATTERY CONNECTED before opening the charger’s door
and replacing a power module. Power module replacement should only be performed by qualied personnel.
Required Tools
1. Flat Head Screwdriver
2. 7mm Socket Wrench
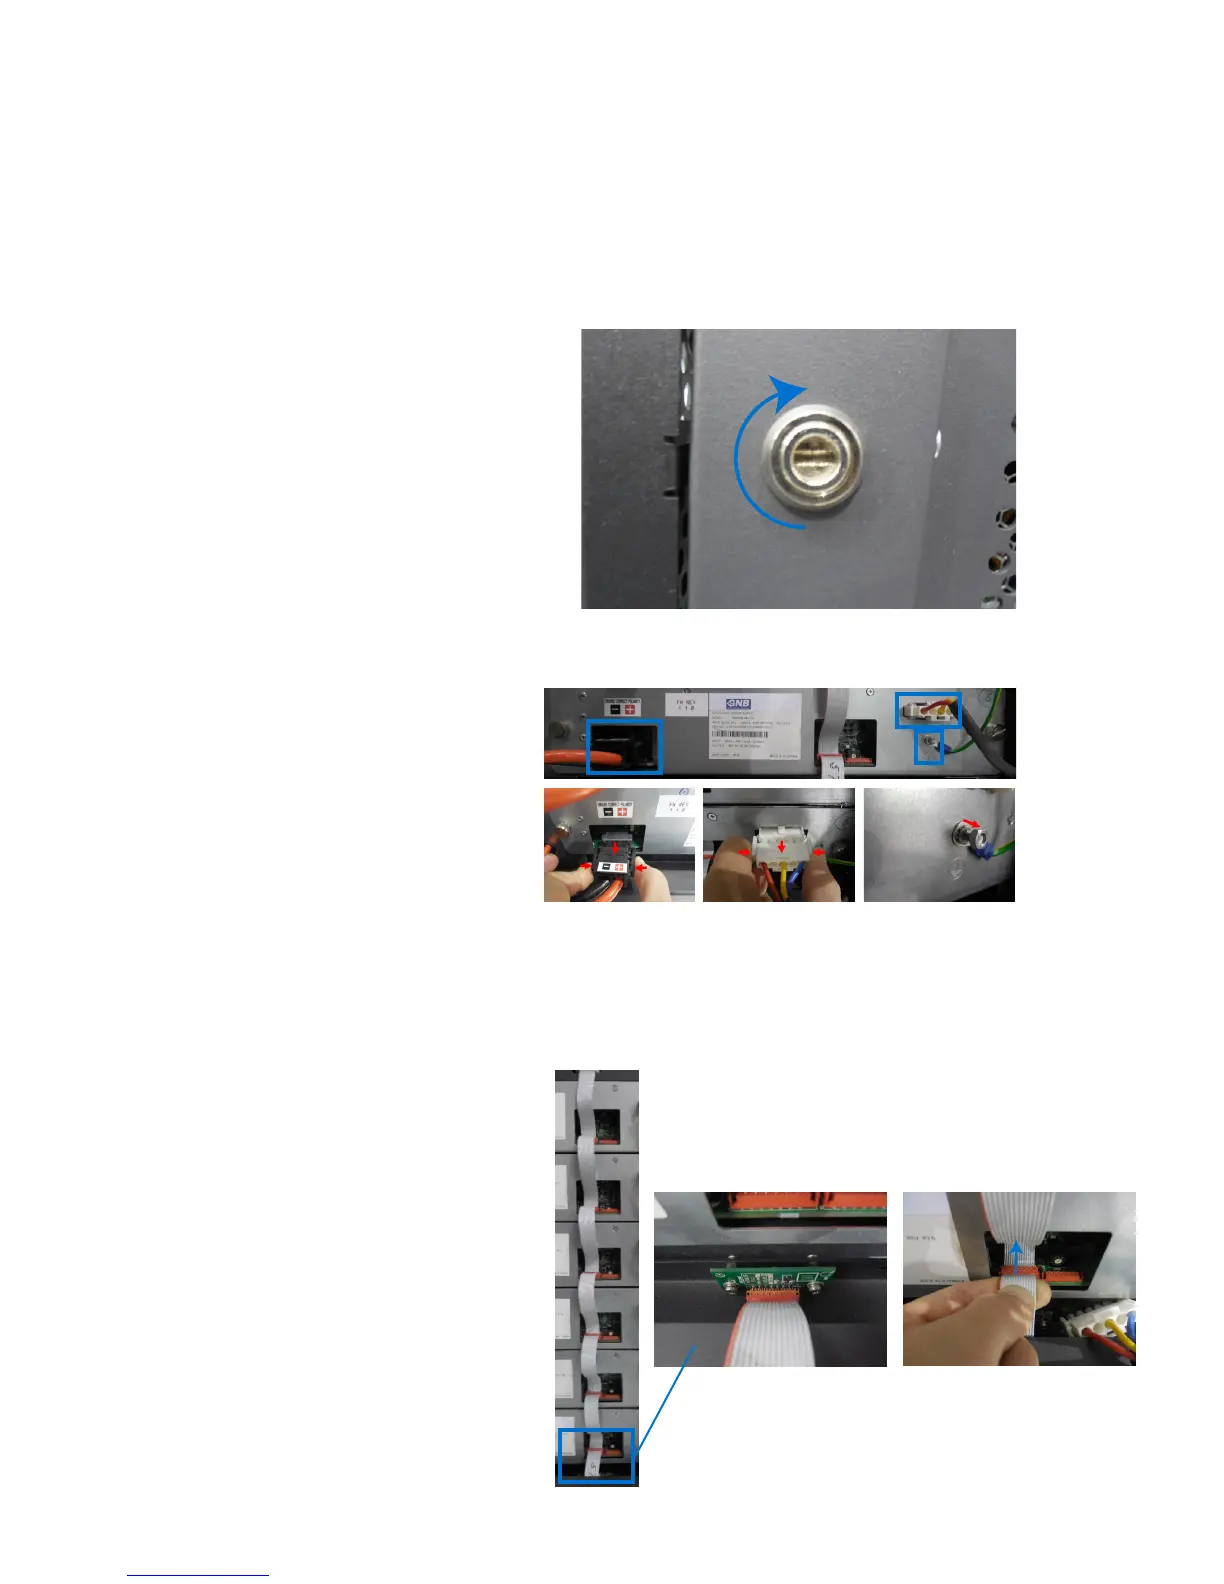
Step 1. Open Charger Door
Using the at head screw driver, turn the latch on the side of the
charger clockwise to unlock the door and open it.
Step 2. Disconnect Power Cables
Disconnect the 3-phase AC input and the DC output cables
from the power module you intend to replace by squeezing
the clamp releases and pulling. Use a 7mm socket wrench to
disconnect the ground cable.
Step 3. Disconnect Power Module Communicaon Cable(s)
There are two possible conguraons for power module communicaons. Direcons for disconnecng each type are shown:
Single Cable Connecon
For a single cable connecon, start by disconnecng the end
of the cable from the terminaon block located at the very
boom of the charger. Then, unplug the communicaons
starng from the boom power module unl you have
disconnected the module you are replacing.
Terminaon Block


 To Next Page