2020 2121
8. Installation 9. Commissioning/charging
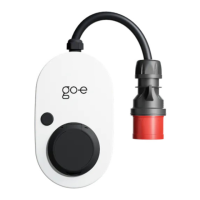
3. Starting the charging process
Connect the go-e Charger and the vehicle by using a
type 2 charging cable (or if the car has a type one so-
cket by using a type 2 to type 1 adapter cable). Make
sure that the type 2 plug is inserted as far as possible
into the type 2 socket of the charger.
The Charger is ready for charging and is waiting for
the car to release it. The LEDs light up yellow in the
number of the preset charging current.
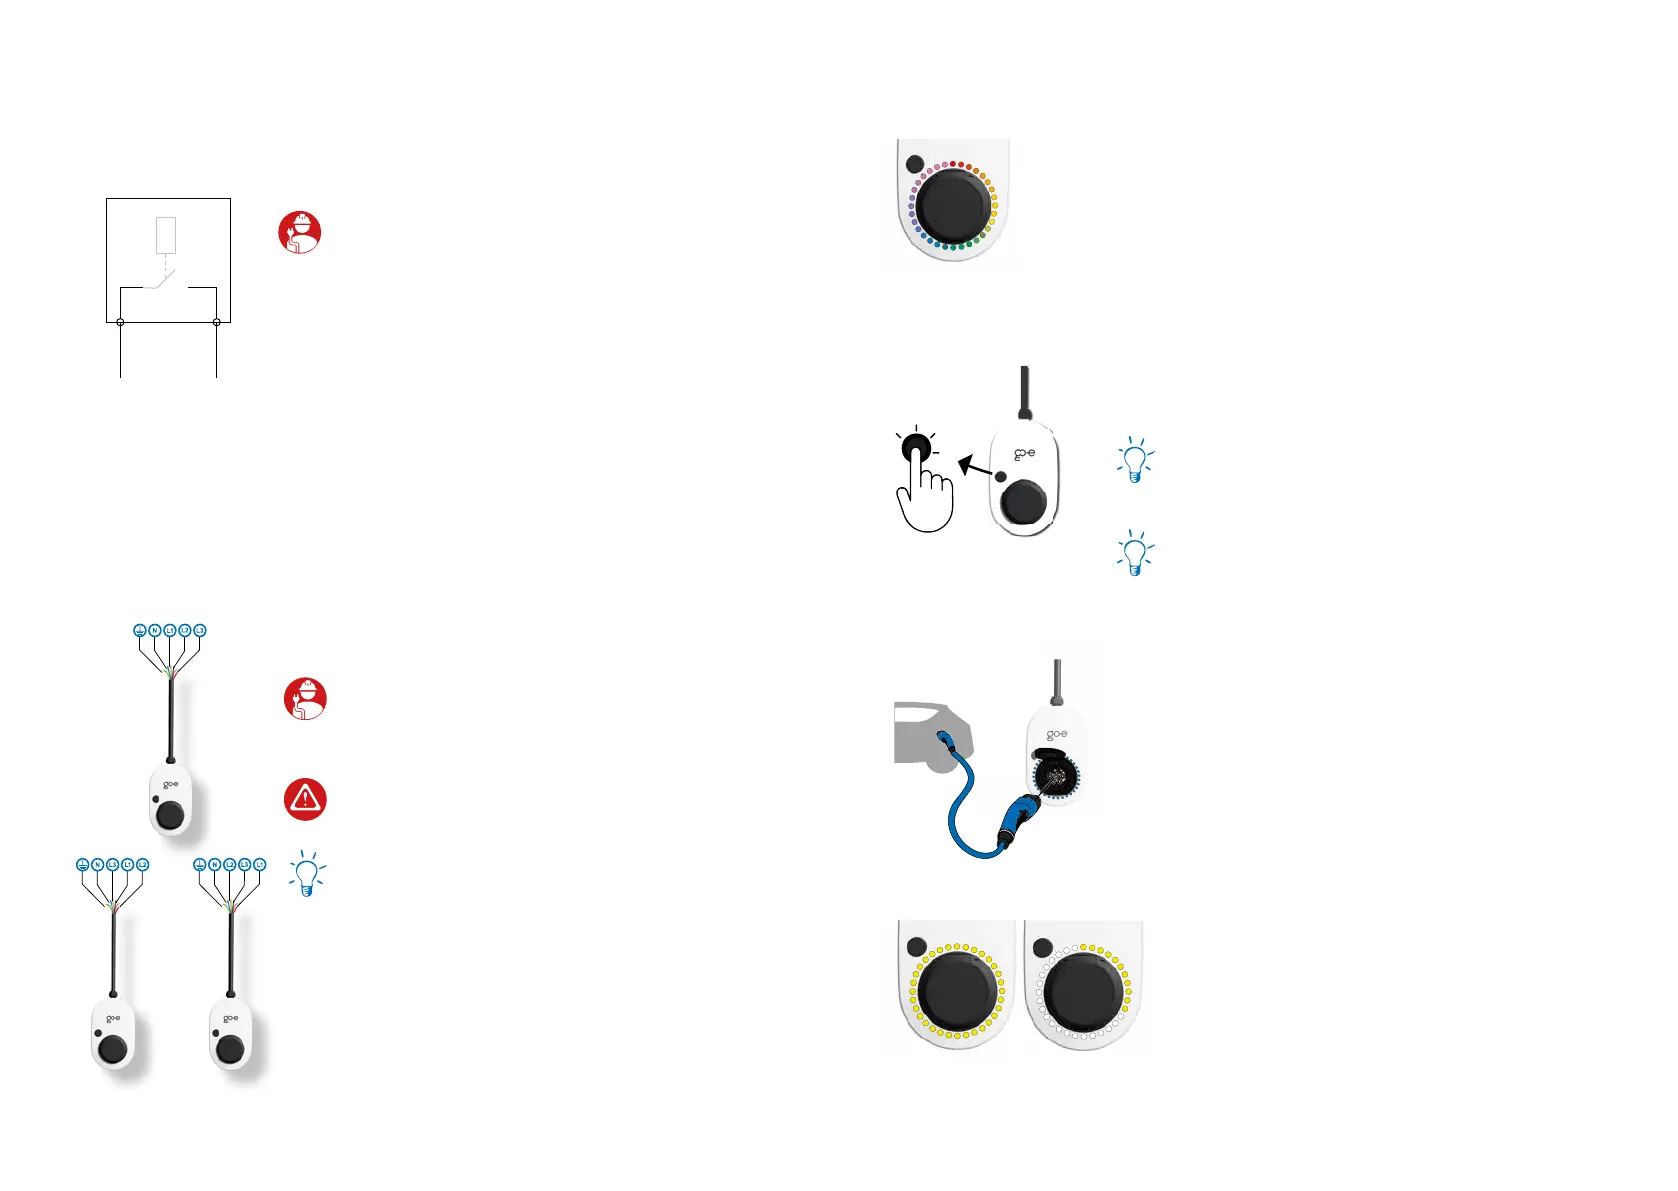
2. Ready to charge
The go-e Charger is ready for operation. The number
of blue LEDs corresponds to the set charging current.
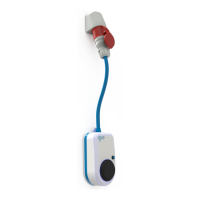
Five predened charging levels can be selected via
the but ton.
You can adjust the charging levels individually in the
go-e Charger app („Current levels“). It does not mat-
ter whether the go-e Charger is connected single-
phase or three-phase.
1 LED = 1 A
Gemini (2.0) 11 kW = 6 A - 16 A
Gemini (2.0) 22 kW = 6 A - 32 A
1. Start of the charger
The go-e Charger performs a self-test during initial
start-up or after a restart, during which the LEDs light
up in rainbow colours.
8.
7.
When installing several devices, connect the
phases of the rst, second and third charger to the
domestic circuit in rotation according to the adjacent
illustration to ensure even load distribution when
charging single-phase vehicles.
Activate static load balancing via the go-e app
(Internet required).
When using the go-e Controller, you can activate
dynamic load balancing, which takes into account the
electricity consumption in the entire house.
If your energy provider prescribes a ripple control
receiver, the two data cables (white and red) are
also needed to be installed.Polarity order does not
matter.
ripple control receiver
Installation and operating manual go-e Charger Gemini / go-e Charger Gemini 2.0 | V 1.0Installation and operating manual go-e Charger Gemini / go-e Charger Gemini 2.0 | V 1.0