8. Operating Instructions
8.1 Power Up
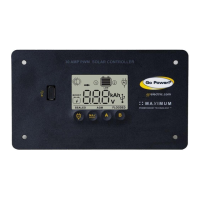
When the GP-PWM-30 is connected
to the battery, the controller will go into
Power Up mode.
Icons Displayed: All segments of
the numerical display blink
Depending on the battery voltage when the GP-PWM-30 Power Up occurs, the controller
maydoaBoostChargeorquicklygointoFloatCharge.TheChargingProleselected
willcommencethefollowingdayafteraPowerUp(refertotheChargingProleChart
on page 15 for more details).
8.2 SettingtheBatteryTypeandChargingProle
Toselectthebatterychargingprole,pressandholdtheB Button. This will cause
the current battery type to blink.
Setting Battery 1
To set the battery type for Battery
1, hold the B Button for 3 seconds.
When the display shows a blinking
number 1, release the B Button.
Next,selectthechargingprole
of Battery 1. Press and hold the
B Button (the current selected
battery type will blink). Then press the
B Buttontotogglethroughtheprole
options: Sealed/Gel, AGM or Flooded.
Toconrmthebatteryprole,press
and hold the A Button for 3 seconds.
page 11
 Loading...