26 27
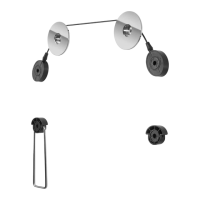
3. Tighten the nuts M8 (D) clockwise to
the screws 1 and 2 until tting well.
Therefor use the wrench (F).
Fi g . 21: Fixing the at screen
Endofinstalling.Toremove,proceedinreversedorder.
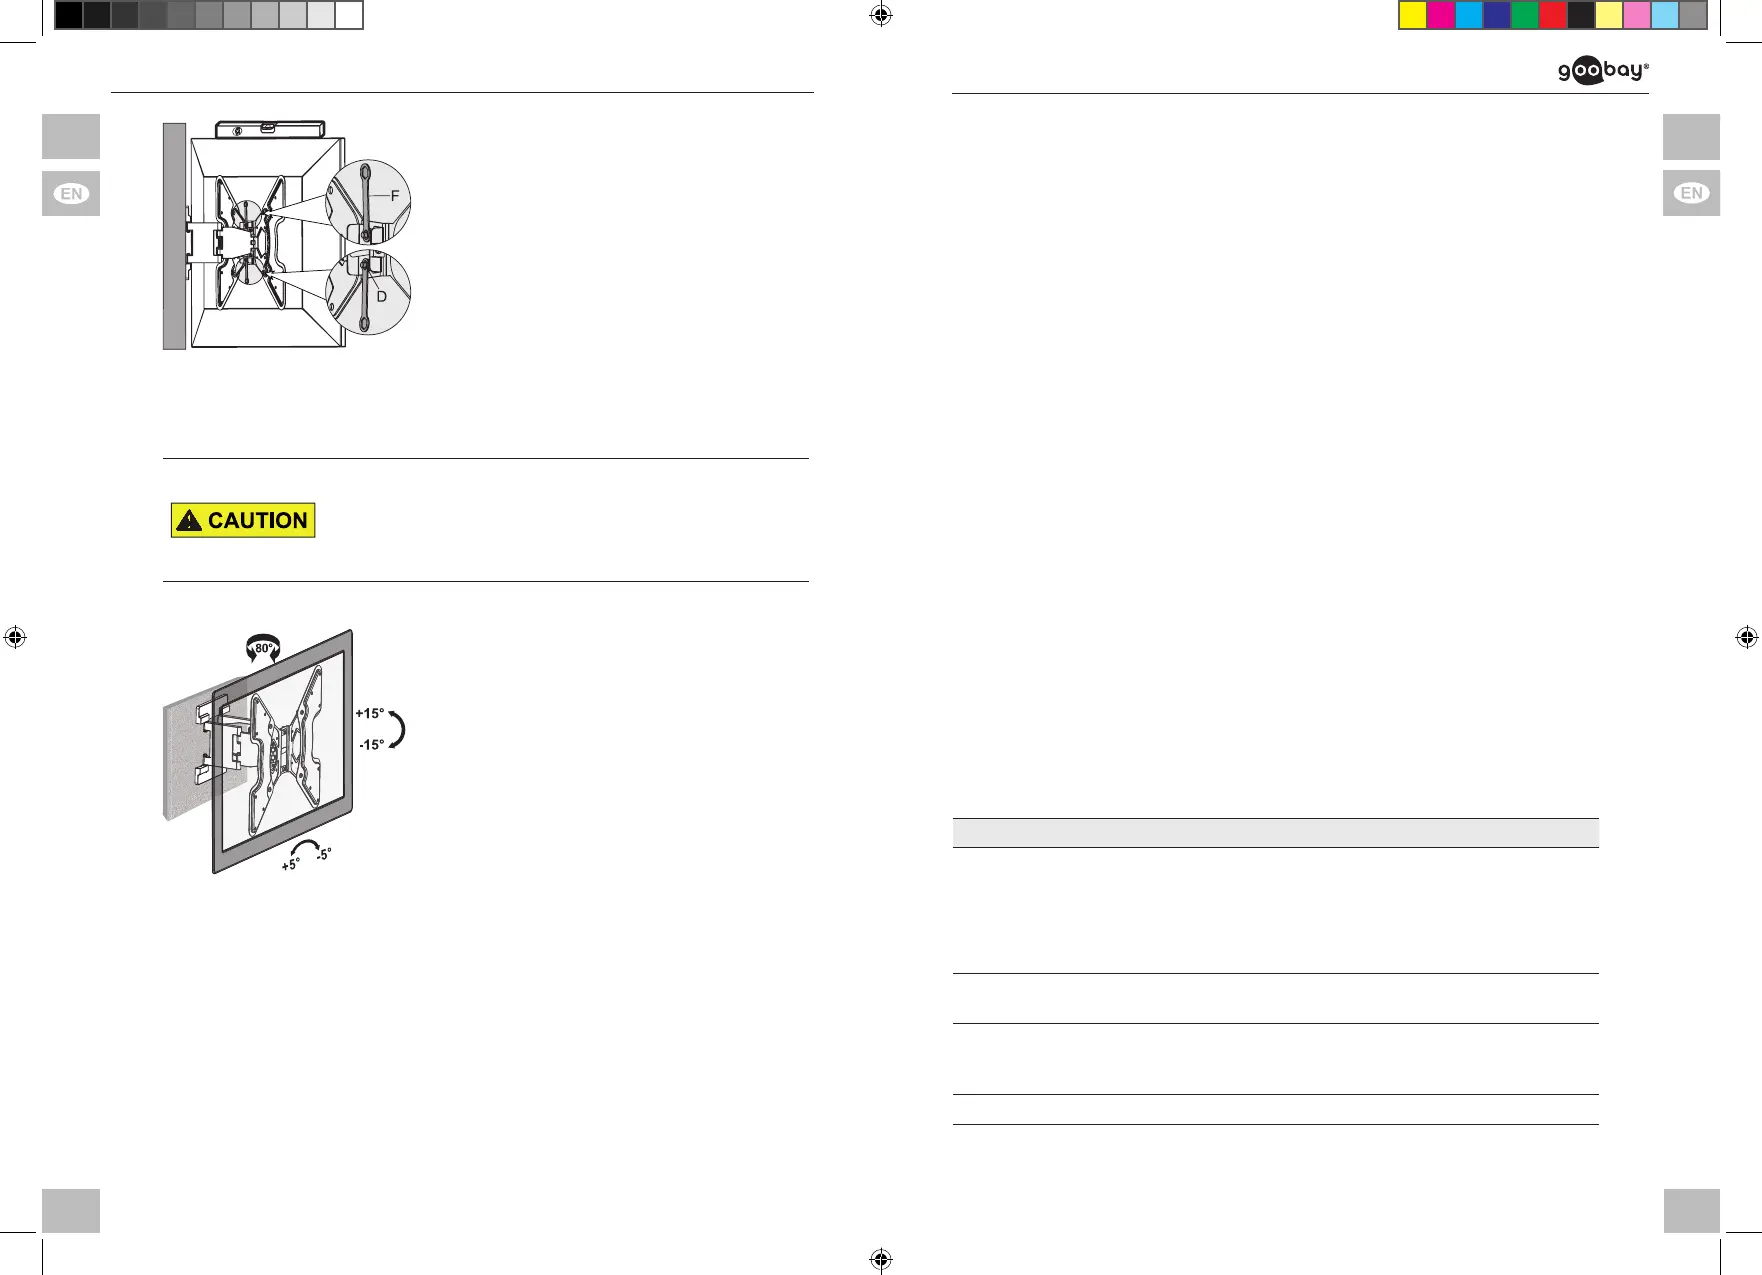
5 Aligningtheatscreen
Risk of injury by moving product parts
>>
>>
Do not hold limbs between shear parts during use.
Mind the mobility of the product during use. This may
move away from the wall or towards it and swivel
sideways.
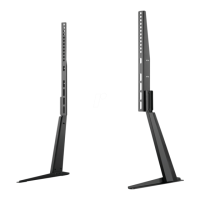
Ta b . 1 9 : Aligning the at screen
Align the at screen as needed
>> vertically
>> horizontally and/or
>> in rotation axis
Powercordscansubsequentlybe
connectedduetothemobilityofthe
TV wall mount.
Fig. 2 2: Aligning the at screen
6 Warranty and Liability
• The producer grants a 2 years warranty to a new device.
• As the manufacturer has no inuence on installation, warranty only applies
to the product itself.
• If any fault or damage is detected on your device, please contact your dealer
and provide your sales slip or invoice as evidence of the purchase, if
necessary. Your dealer will repair the fault either on site, or send the device
to the manufacturer. You make the work of our technicians considerably
easier, describing possible faults in detail – only then you can be assured
that faults, occurring only rarely, will be found and repaired with certainty!
• The manufacturer is not liable for damages to persons or property caused by
improper installation, operation or maintenance, not described in the manual.
• Do not alter or modify the product or its accessories.
• Any use other than described in this user manual is not permitted and
causes loss of warranty, loss of guarantee, and non-liability.
• We reserve our right for misprints and changes of the device, packing, or
user manual.
7 Maintenance,Care,StorageandTransport
• The product must be maintained only by professional workshops.
• Protect the angles from dirt and grease them regularly with light machine oil.
• Use a dry and soft cloth to clean your product. Be careful to avoid scratches.
Use a slightly moist cloth for heavy stains. Look out for live cables! Do not
use any cleaning supplies. This can cause burns to the materials. Avoid
liquid entry to the device.
• Make sure no body parts will be pinched in the swivel device, when parts of
the device are moved!
• Periodically check, if all attachments and screws are secured, and tighten
them again when they are loosened. This may be caused e.g. by frequent
movements. Do not overtighten screws.
• Avoid places with high temperatures, humidity, or places which can become
wet, also during maintenance, care, storage, and transport.
• Keep the product away from children and store it at dry and dust-proof places!
• Drill holes are still visible after removing the product. After use for a longer
time period, a spot may remain on the surface.
• Keep the original packing for transport and to avoid damages.
8 Troubleshooting
Problem Help
How to test wall
quality?
Loads for home use are regulated in various European
standards.
>>
>>
Check wall thickness and material under plaster / wall
paper.
Ask a specialist.
Which drill holes
must be drilled?
>> Read chapter 4.2.
The wall mount is
hard to align.
>>
>>
Slightly loosen the joints with the Allen wrench (E).
Due the TV size the maximum swivel angle may be
smaller than indicated.
Other questions >> Contact your dealer.
Ta b . 2 0: Troubleshooting
69295 manual_V3.indd 26-27 30.05.2018 13:21:15
 Loading...