I
J
KL
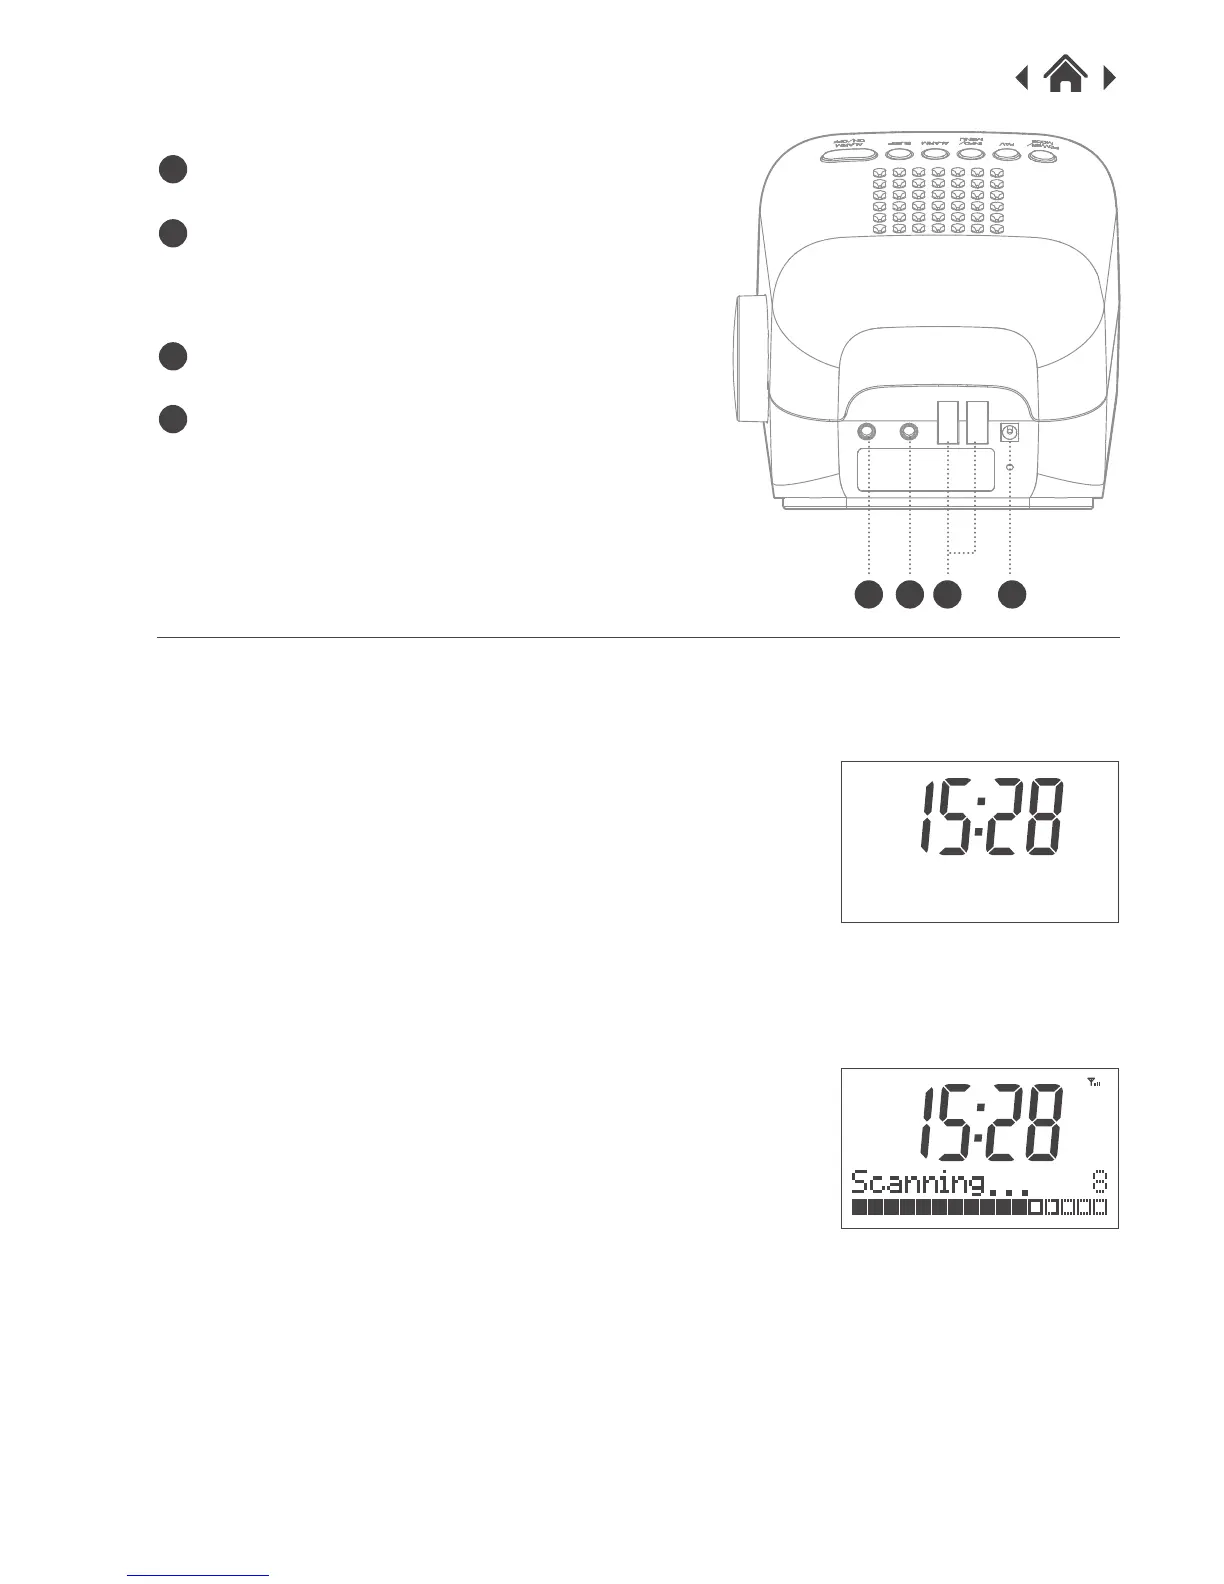
2.4 Rear view
DC IN
USB socket
For charging 1A - 2.1A mobile/tablet
device
Earphone jack
Aux-in jack
I
J
K
L
3 Quick Setup
3.1 Power on and Autoscan
1. Connect the power adaptor to the DC IN socket on
the DAB Radio and plug in the other end to the wall
socket.
2. Extend the wire aerial as far as it can go.
3. The LCD backligt will light up and show the Welcome
message. It will then display the screen below. (fig.1)
4. The radio is now in Standby. Press the Power/Mode
button briefly to turn on the radio.
5. It will start scanning the DAB radio stations
automatically. (fig.2)
6. Once the scan is finished, it will display the number of
radio stations received.
3.2 Changing Mode (DAB/FM/AUX-IN)
DAB/FM mode
1. Long pressing the Power/Mode button to switch
between DAB/FM mode.
2.The radio will tune to the first DAB station. To explore
the stations that have been found, push the Dial
briefly, the station list will appear. Rotate the dial to
browse the station you want to listen, push the Dial to
select. If you don't make any selection, the display
will revert back to original station after a few seconds.
3.When you turn on the radio next time, the radio plays
the same mode and same station as last listened.
fig.1
fig.2
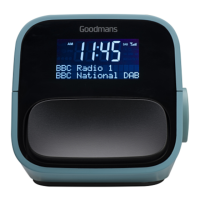
DAB & FM Clock Radio
DAB