深圳市中软赢科技术有限公司 版权所有 Shenzhen GPD Technology Co.Ltd All Rights Reserved
39 / 50
[Englis] GPD Pocket 3 Q&A
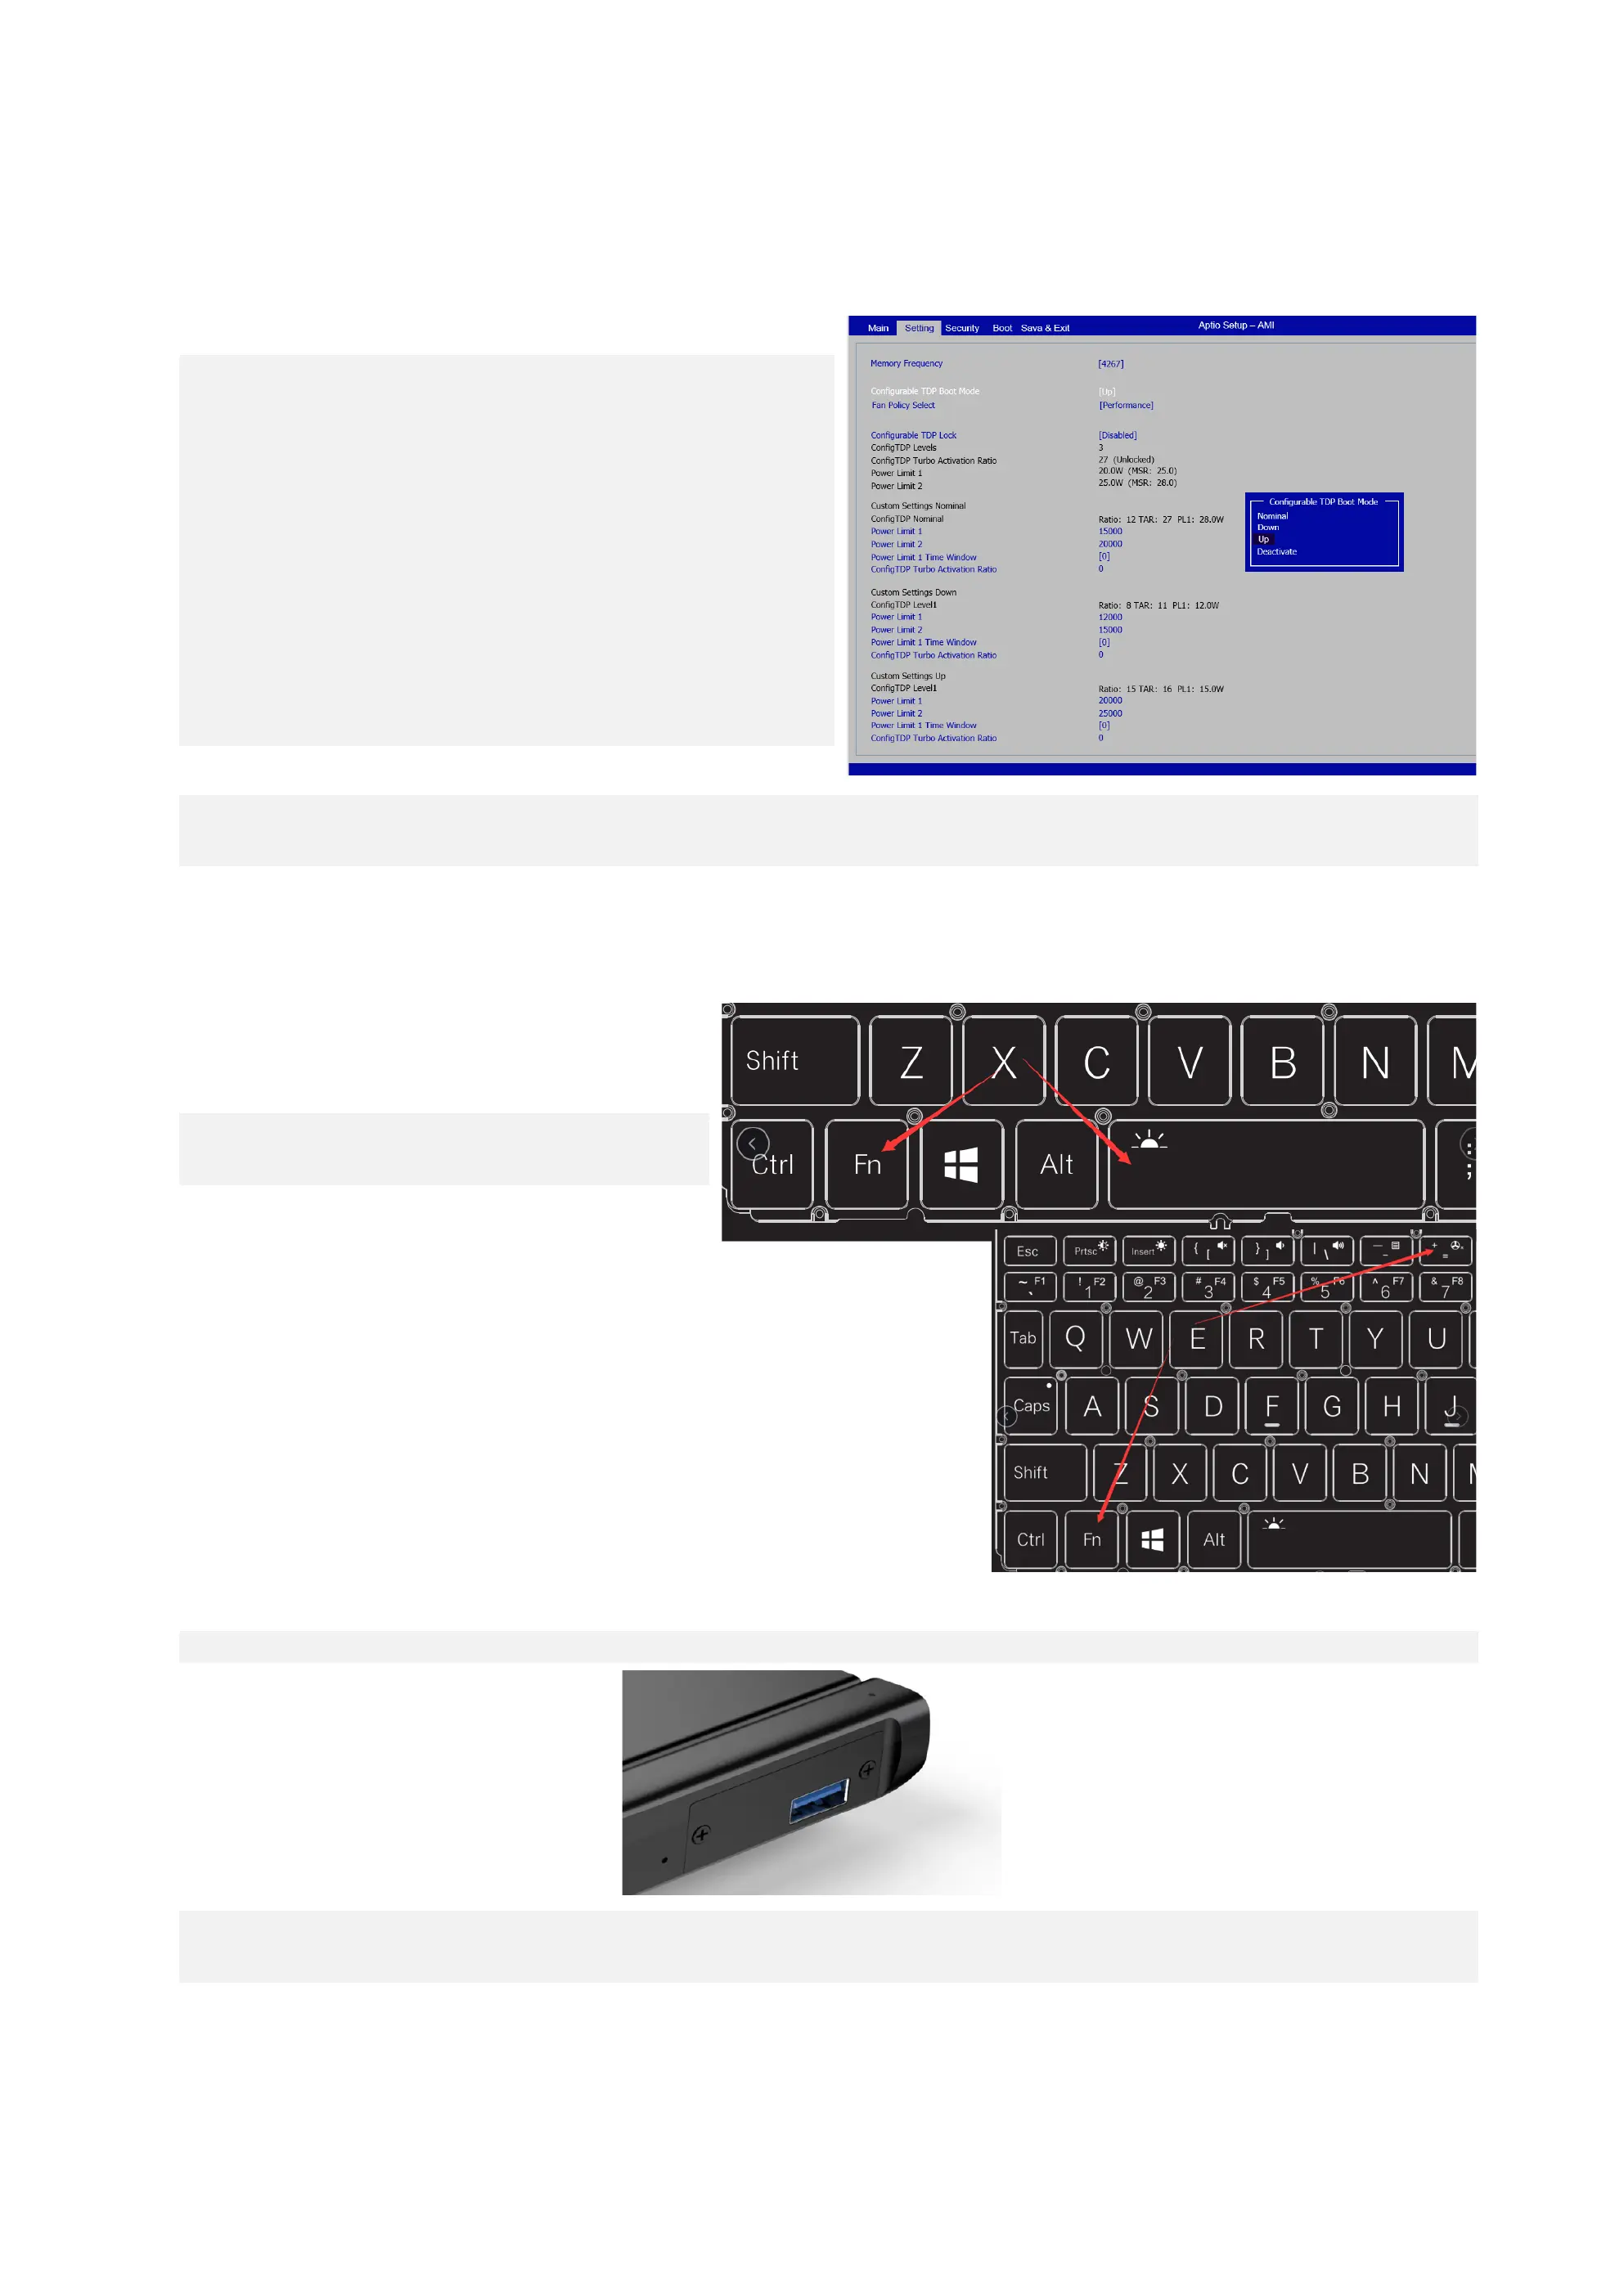
Q1: How to adjust the TDP power consumption of the device?
A1: It is very easy, you can adjust it through the BIOS. The specific operations are:
1. Press the power button to boot, and hold down the Fn+Del key at the same t
ime to enter the BIOS.
2. Select Setting tab.
3. Click "Configuration TDP Boot Mode", in the pop-up selection box, there are "
Nominal", "Down" and "Up" three block TDP to choose from,
Down: Energy saving mode (12W)
Nominal: Normal mode (15W)
UP: High performance mode (20W)
4. After selection, press Fn+F4 to save and restart to take effect. (For the BIOS in
terface, please refer to the figure below)
Please note:
The Pocket 3 (N6000 processor) only supports 6-10W power adjustment, but the three-stage power adjustment is not supported.
Q2: How to turn on or off the keyboard backlight?
A2: The operation is rather simple: when your computer has been tur
ned on, press Fn+Space to turn on the keyboard backlight, and press
the hotkey again to turn it off.
Please note:
The keyboard backlight turns off automatically after 30 seconds.
Q3: How to turn on or off the fan?
A3: For Pocket 3, the fan cannot be completely turned off. However, a Mute function is provided. When
your computer is turned on, the fan will start working by default and automatically adjust its rotational
speed according to the current temperature. If you want to go the Mute mode, press “Fn+=” and the f
an will rotate at a ultra low speed.
Q4: How to install and remove the RS-232/KVM module?
A4: Pocket 3 is fitted with the USB A module by default. If you have bought the RS-232 or KVM module, you can follow the following simple procedures to install it:
Step 1: Use a 2.5mm hex driver to remove the two screws of the USB A module and unplug it.
Step 2: Insert the RS-232 or KVM module until it is firmly seated. Please pay attention to the direction of the insertion - the motherboard should be in the lower
side.