Repair
WARNING
Turn
off
turbine and unplug power for the
following procedures.
-
Turbine Switch Replacement (Red Rocker Circuit
Breaker)
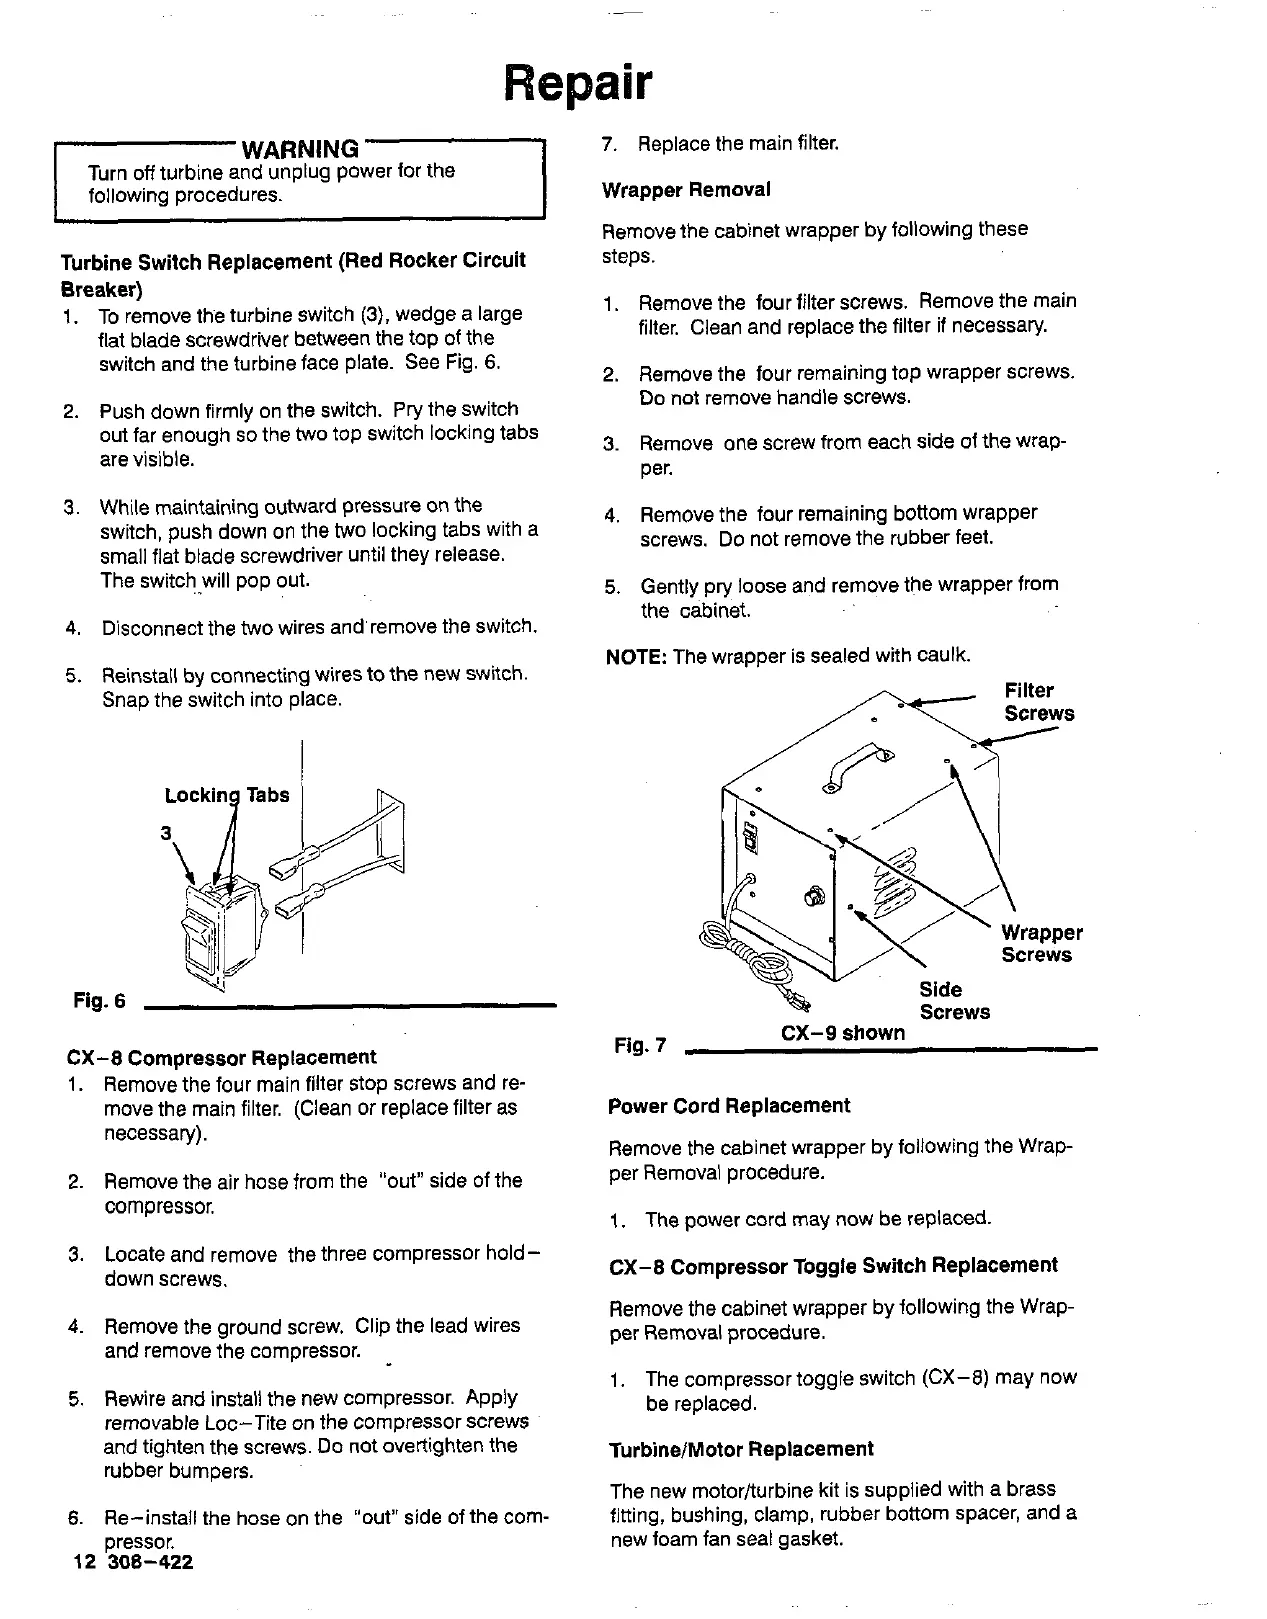
1.
To remove the turbine switch
(3),
wedge a large
flat blade screwdriver between the top
Of
the
switch and the turbine face plate. See Fig.
6.
2.
Push down firmly on the switch. Pry the switch
out far enough
so
the two top switch locking tabs
are visible.
3.
While maintaining outward pressure on the
switch, push down on the two locking tabs with a
The switch will pop out.
small flat blade screwdriver until they release.
4.
Disconnect the two wires and remove the switch.
5.
Reinstall by connecting wires to the new switch
Snap the switch into place.
Fig.
6
CX-8 Compressor Replacement
1.
Remove the four main filter stop screws and re-
move the main filter. (Clean or replace filter as
necessary).
2.
Remove the air hose from the
"out"
side of the
compressor.
3.
Locate and remove the three compressor hold-
down screws.
4.
Remove the ground screw. Clip the lead wires
and remove the compressor.
5.
Rewire and install the new compressor. Apply
removable Loc-Tite on the compressor screws
and tighten the screws. Do not overtighten the
rubber bumpers.
6.
Re-install the hose on the
"out"
side of the com-
12
308-422
pressor.
7.
Replace the main filter.
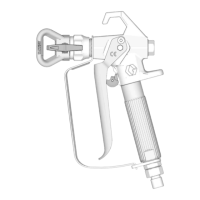
Wrapper Removal
Remove the cabinet wrapper by following these
steps.
I,
Remove the four filter screws. Remove the main
filter. Clean and replace the filter
if
necessary.
2.
Remove the four remaining top wrapper Screws.
Do not remove handle screws.
3.
Remove one screw from each side of the wrap-
per.
4.
Remove the four remaining bottom Wrapper
screws. Do not remove the rubber feet.
5.
Gently pry loose and remove the wrapper from
the cabinet.
NOTE: The wrapper is sealed with caulk.
Screws
Filter
/
Side
Screws
Fig.
7
CX-9 shown
Power Cord Replacement
Remove the cabinet wrapper by following the Wrap-
per Removal procedure.
1.
The power cord may now be replaced.
CX-8 Compressor Toggle Switch Replacement
Remove the cabinet wrapper by following the Wrap-
per Removal procedure.
1.
The compressor toggle switch (CX-8) may now
be replaced.
Turbine/Motor Replacement
The new motorfiurbine kit is supplied with a brass
fitting, bushing, clamp, rubber bottom spacer, and a
new foam fan seal gasket.