Compensator Seal Replacement
311283J 9
Compensator Seal Replacement
Removal
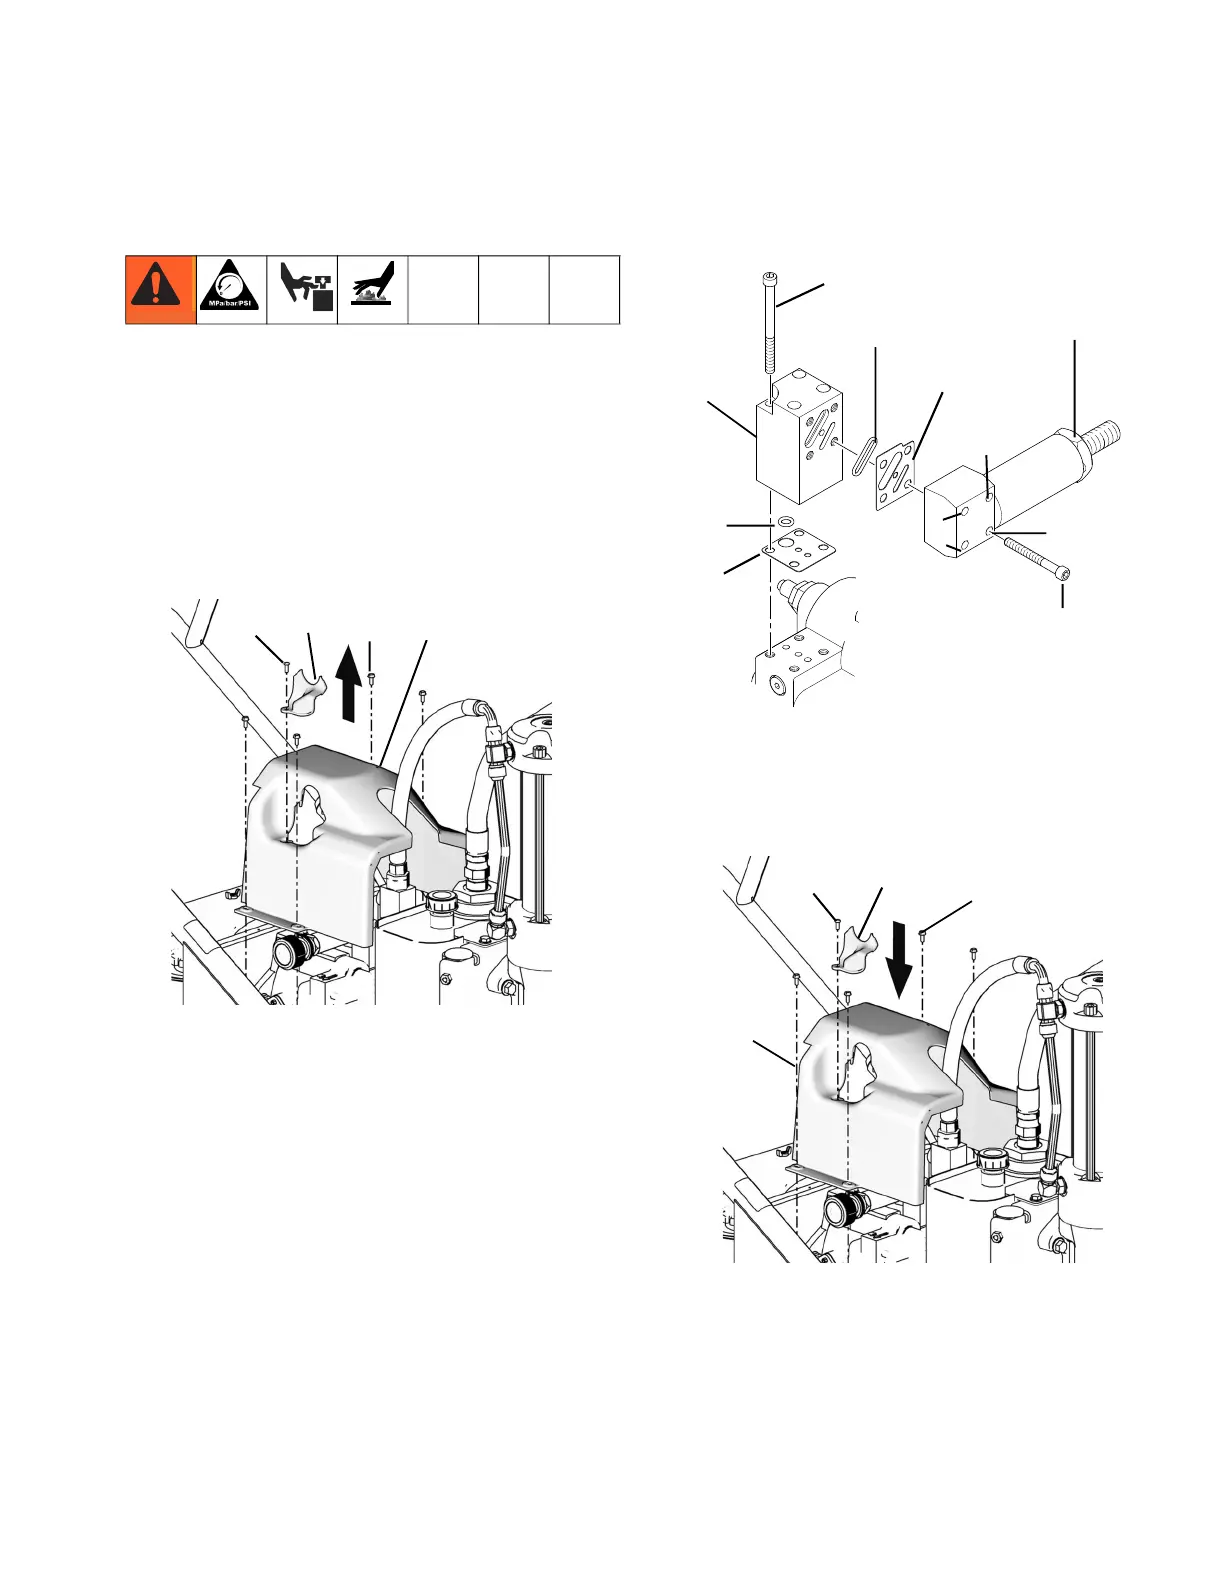
1. Relieve pressure, page 5. Allow hydraulic system to
cool before beginning the service procedure.
2. Remove screw(197) and pump handle cover (196).
Remove four cover bolts (79) and cover (140).
NOTE: It is not necessary to remove the hydraulic
lines before removing the cover. The cover is
designed to provide ample room for the cover to fit
over the hose.
3. Remove compensator screws and separate com-
pensator and adapter block.
4. Install new gaskets and torque screws.
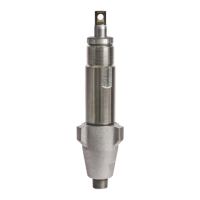
5. Install cover (140) with four screws (79). Torque to
25-30 in-lb (2.8 - 3.4 N m). Install pump handle
cover (196) with screw (197).
ti7805b
140
79
196
197
Torque 50 in-lbs
4 plcs
Adapter
Block
O-Ring
Gasket
O-Ring
Lubricate before installation
ti17601a
Gasket
Note Gasket Orientation
Compensator
Assembly
Torque 50 in-lbs
4 plcs
1
4
3
2
Torque sequence: 1-2-3-4-1
All cap screws must be tightened
When compensator assembled to
Gasket Adaptor Block. Do not
pre-tighten cap screws.
ti7111b
140
197
196
79