5308-798
Service
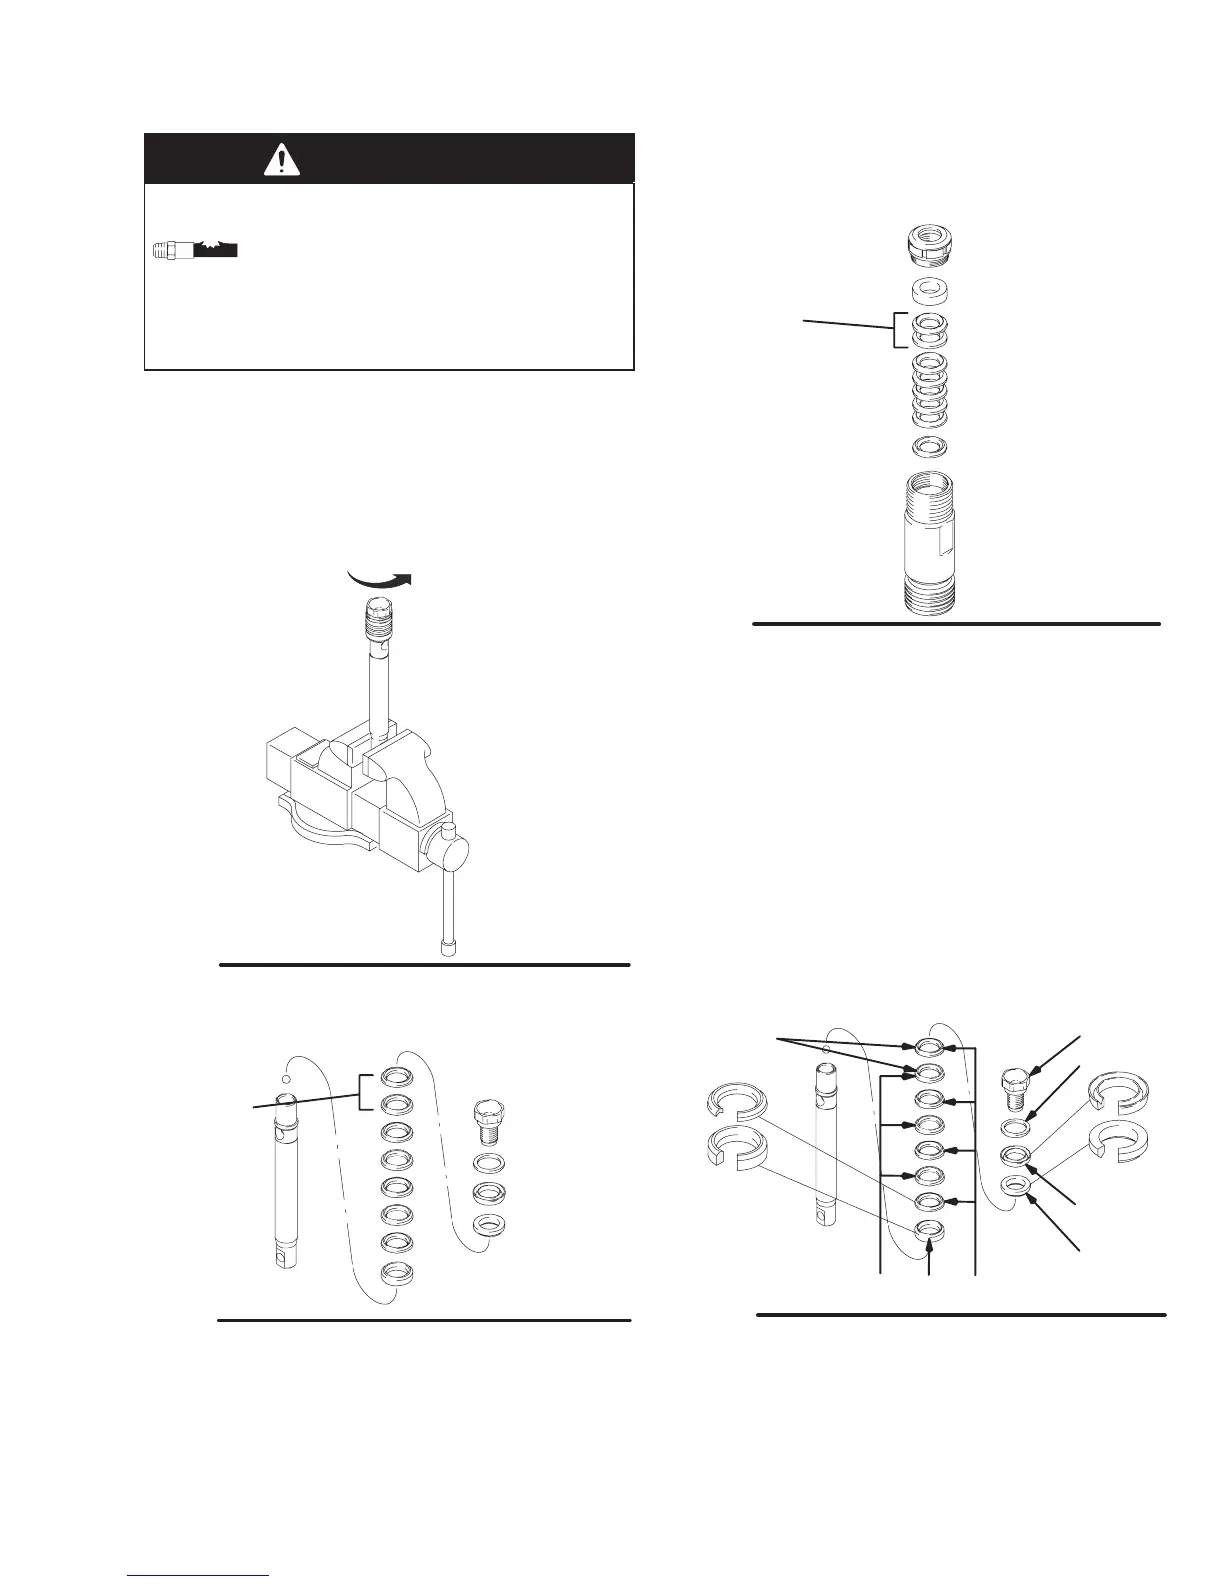
WARNING
COMPONENT RUPTURE HAZARD
Do not clean or wipe the piston valve
threads. Cleaning the piston valve
threads could destroy the special sealing
patch and cause the piston valve to come loose
during operation, causing pump bursting and
possible serious bodily injury.
Fig. 28. Unscrew piston valve from piston rod. Clean
and inspect parts. The piston has a special thread
locking/sealing patch. Do not remove the patch. The
patch allows four disassembly/assembly procedures
before it is necessary to apply Loctite to the threads.
Fig. 28
7576A
Fig. 29. Remove packings and glands from piston rod.
7574B
Fig. 29
Used on
240–291
240–800
&
240–917
Fig. 30. Remove throat packings and glands from cyl-
inder. Discard throat packings and glands.
Fig. 30
7573B
Used on
240–291
240–800
&
240–917
Assembling the pump
Fig. 31. Soak all leather packings in SAE 30W oil for 1
hour minimum prior to assembly. Stack male gland
(219) on piston rod. Alternately stack UHMWPE (208)
and leather (218) packings (note orientation) on piston
rod. Install female gland (217). Install backup washer
(216) and u-cup (209) (note orientation) on piston
valve (210). The special sealing patch on piston valve
threads is good for four repackings. Use Loctite on
piston valve threads after four repackings.
7574B
Fig. 31
216
218
209
208219
217
210
Used on
240–291
240–800
&
240–917