Steering Cable Replacement
3A6981C Repair 7
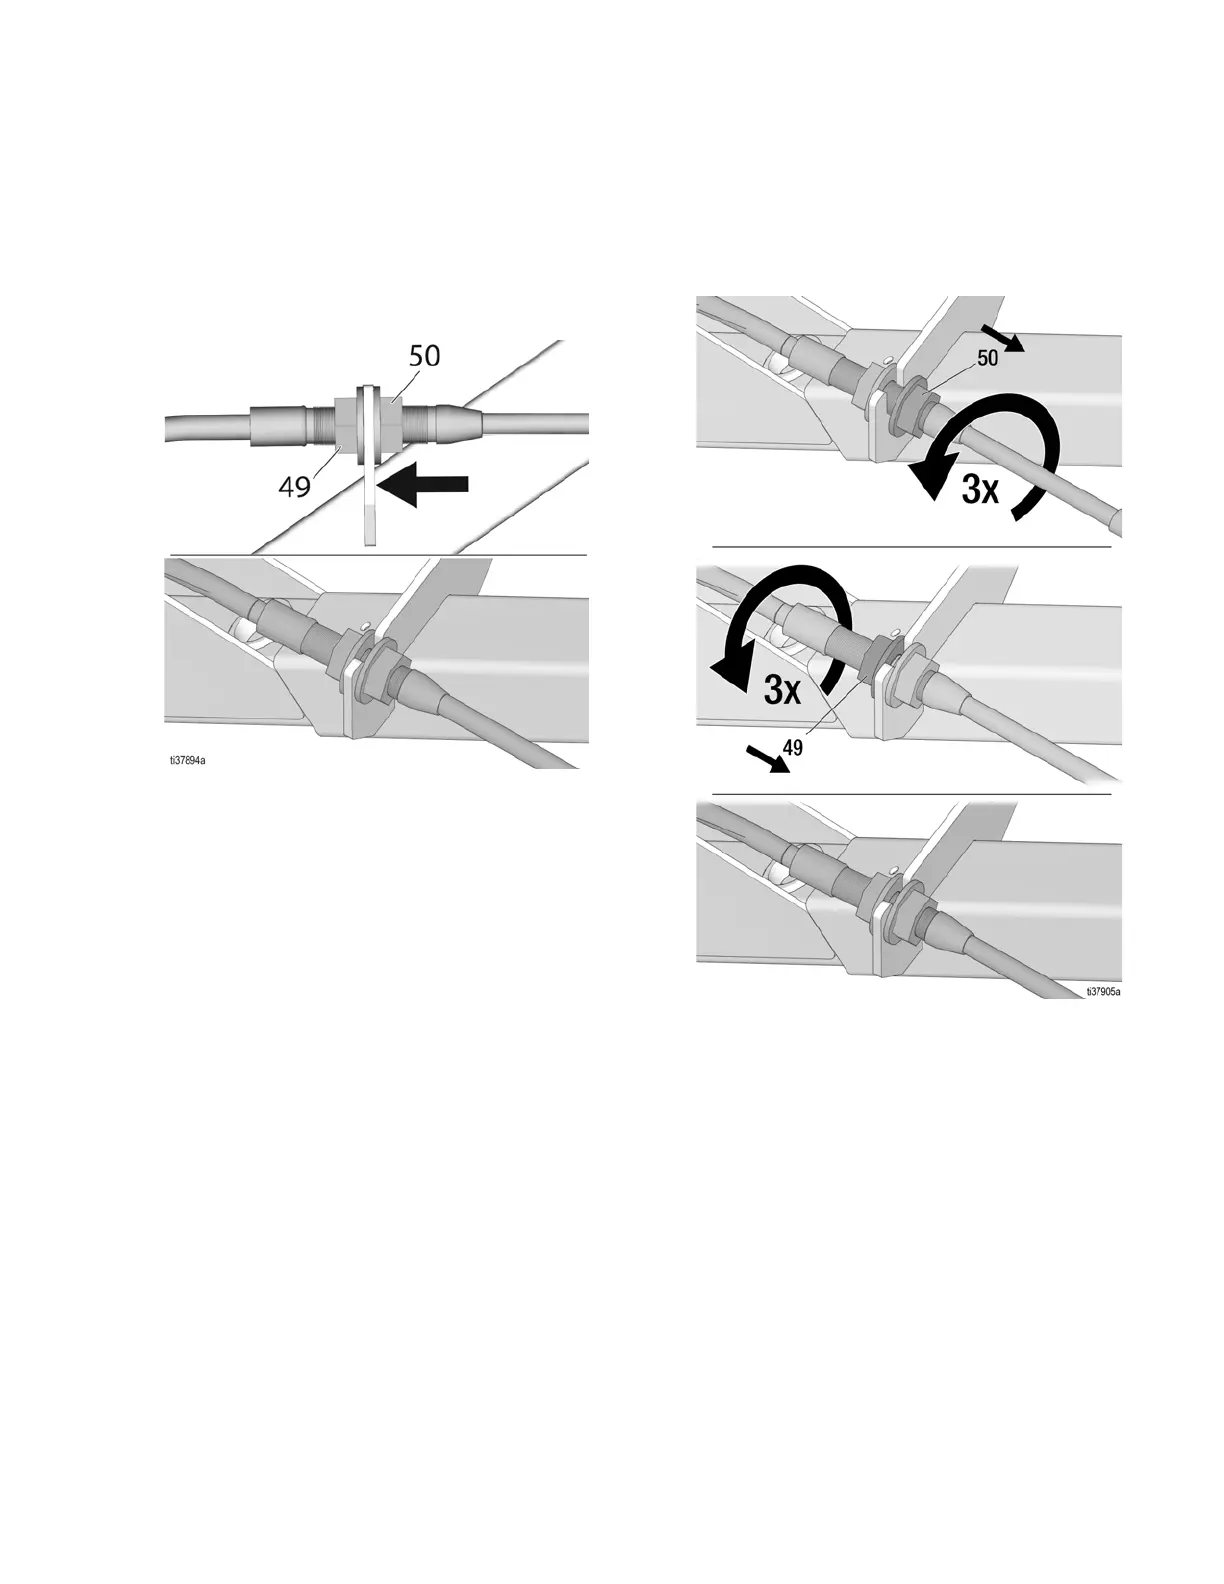
8. Verify handlebar is aligned straight with the frame. If
misaligned, turn adjustment nut (49) to straighten
the handle.
9. Turn front adjustment nut (50) until flush with
bracket. This will determine starting point of ten-
sion adjustment.
NOTE: The following tension instructions must be
followed to assure cable will not fail prematurely.
10. Mark the front adjustment nut (50) to note current
position, then back off three full rotations. Tighten
rear adjustment nut (49) until frame is secured
between both adjustment nuts. Verify both front and
rear adjustment nuts are tight against the bracket.
11. Repeat steps 1-10 for second cable.
12. Verify the front wheel self-centers and that steering
is tight and responsive. Ball joint (40) should rotate
easily on the ball. Install cable ties in locations noted
in step 7 of removal.
13. Reinstall pad and tighten four screws.
14. Reinstall control shroud and tighten six screws.
15. Remove jack stands and test drive sprayer to check
steering and straight line tracking. Adjust if neces-
sary (see Operation manual).
 Loading...