Drive
Housing
WARNING
INJECTION
HAZARD
T
o reduce the risk of serious injury
,
whenever you are instructed to relieve
pressure, follow the
Pressure Relief
Procedure
on page 8.
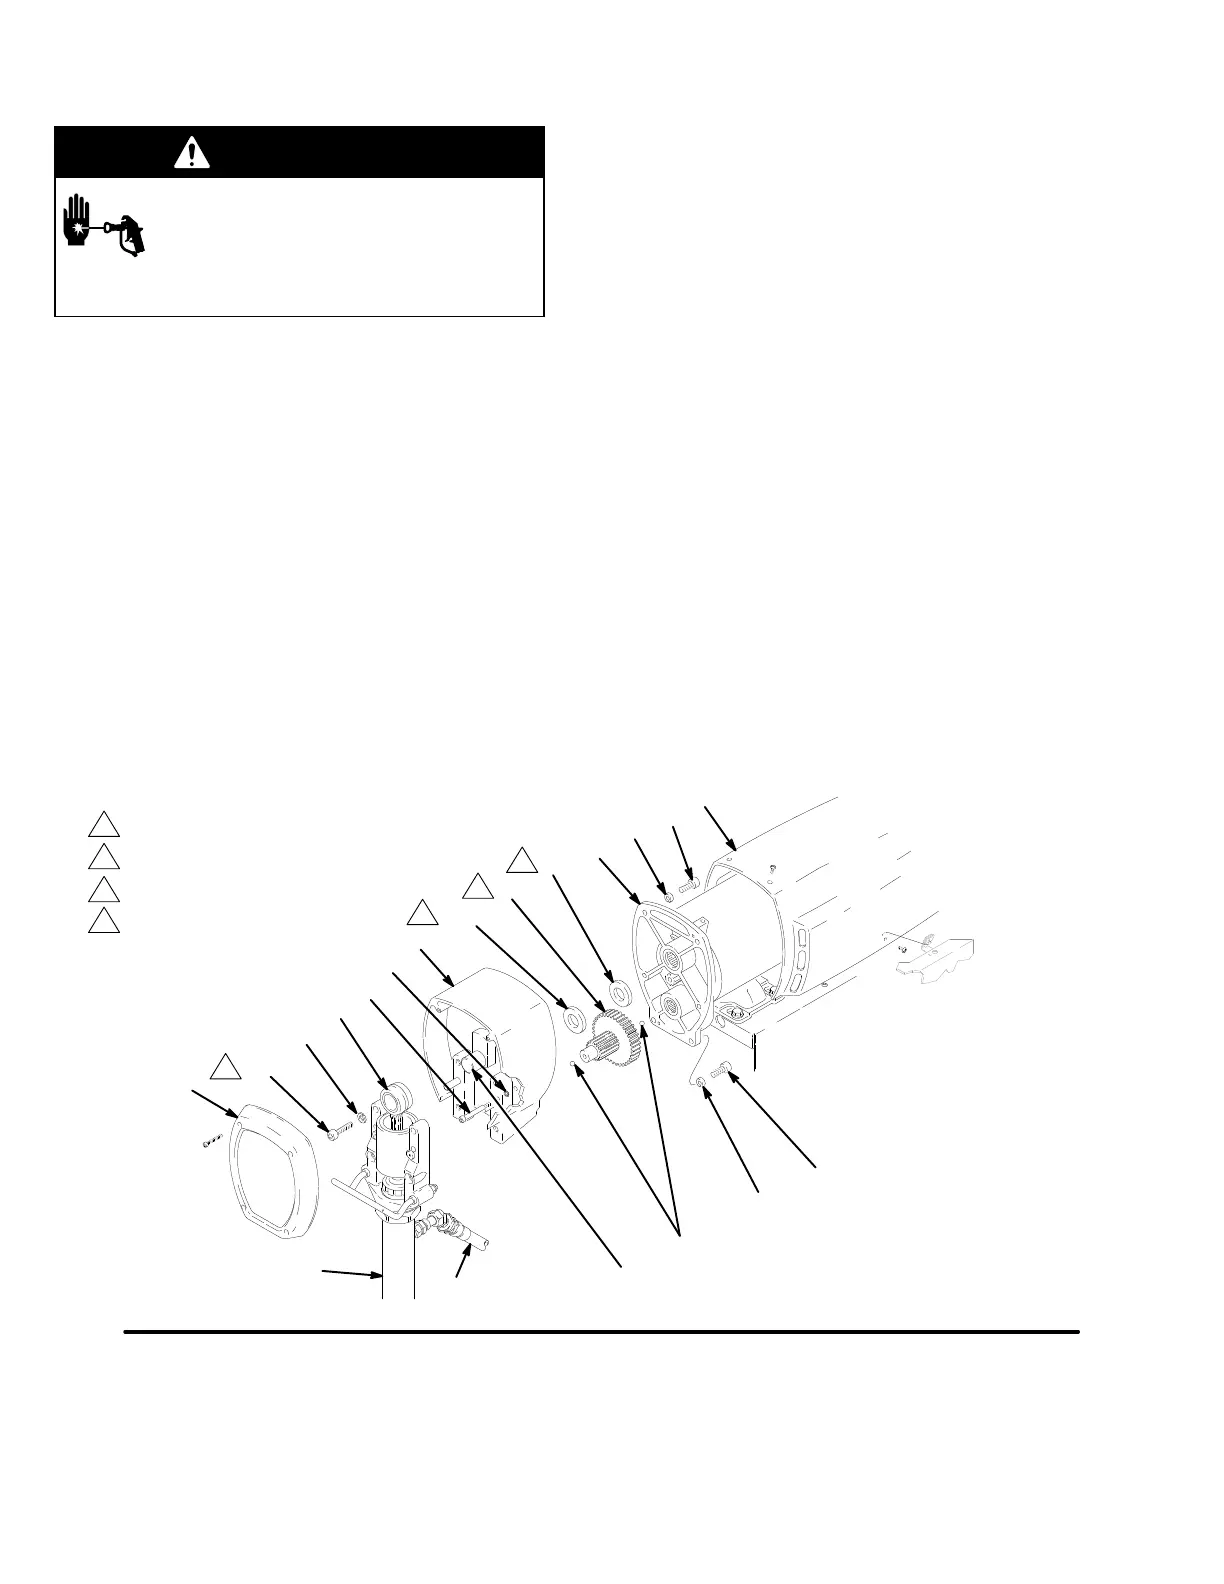
NOTE:
See Fig 19 and parts list
.
NOTE:
Stop the sprayer at the bottom of its stroke to
get the crank (H) in its lowest position. T
o lower it
manually
, carefully rotate the blades of the fan with a
screwdriver.
1.
Remove front cover (31). Remove motor
shield (14).
2.
Disconnect pump outlet hose (132).
3.
Remove screws (33) from bearing housing (27).
4. T
ap rear of pump (39) with plastic mallet to loosen
from drive housing (18). Pull bearing housing
assembly (27) straight of
f drive housing (18).
5.
Remove screws (51) from drive housing.
6.
Remove screws (30, 21) from motor (1).
7. T
ap drive housing (18) with plastic mallet to loosen
from motor and pull straight of
f.
NOTE:
Do not drop the gear cluster (9), which may
stay engaged in the motor bell or in the drive housing.
Do not lose the thrust balls (10) or drop them between
gears. The balls usually stay in the shaft recesses, but
could be dislodged. If the balls are not in place, the
bearings will wear prematurely
.
8.
Use approximately 175 cc of bearing grease
supplied with drive housing replacement kit to
grease gear cluster (9). Check that thrust balls
(10) are in place.
9.
Place bronze-colored washer (18b) and silver-col
-
ored washer (18a) on shaft protruding from big
gear in drive housing (18).
10.
Align gears and push new drive housing straight
onto motor and locating pins.
11.
Continue to reassemble sprayer
. T
orque the
screws (33) to 34 N.m (300 in–lb).
03805A
Fig 19
1
3
4
2
31
132
33
49
27
51
63
18
18b
10
9
18a
1
63
21
30
63
1
2
3
4
Torque
to 34
N.m (300 in-lb)
Bronze
colored washer
Silver colored washer
H
39
14
Apply 175 cc bearing grease