20
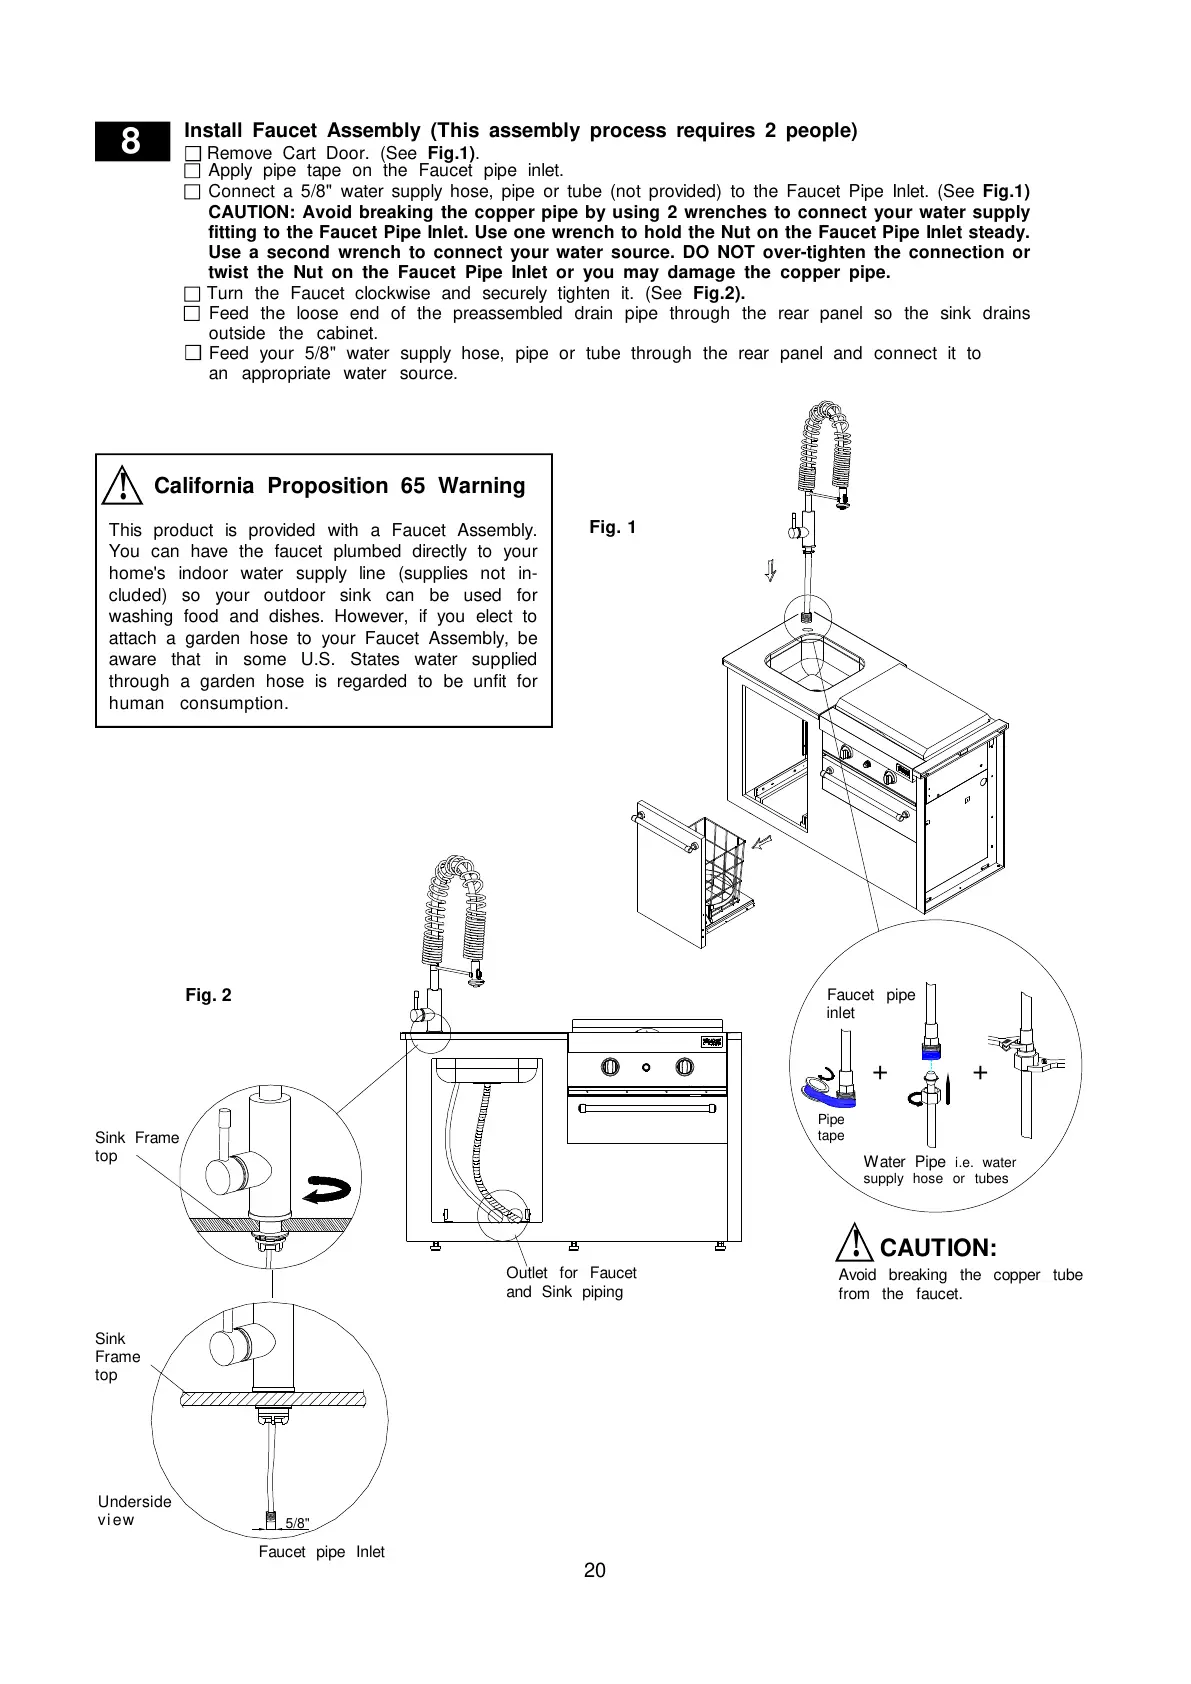
Install Faucet Assembly (This assembly process requires 2 people)
Turn the Faucet clockwise and securely tighten it. (See Fig.2).
8
Fig. 1
Remove Cart Door. (See Fig.1).
Fig. 2
Underside
view
Outlet for Faucet
and Sink piping
Sink
Frame
top
Faucet pipe Inlet
Avoid breaking the copper tube
from the faucet.
CAUTION:!
+ +
Faucet pipe
inlet
Water Pipe i.e. water
supply hose or tubes
Pipe
tape
Sink Frame
top
Connect a 5/8" water supply hose, pipe or tube (not provided) to the Faucet Pipe Inlet. (See Fig.1)
CAUTION: Avoid breaking the copper pipe by using 2 wrenches to connect your water supply
fitting to the Faucet Pipe Inlet. Use one wrench to hold the Nut on the Faucet Pipe Inlet steady.
Use a second wrench to connect your water source. DO NOT over-tighten the connection or
twist the Nut on the Faucet Pipe Inlet or you may damage the copper pipe.
5/8"
Feed the loose end of the preassembled drain pipe through the rear panel so the sink drains
outside the cabinet.
Feed your 5/8" water supply hose, pipe or tube through the rear panel and connect it to
an appropriate water source.
This product is provided with a Faucet Assembly.
You can have the faucet plumbed directly to your
home's indoor water supply line (supplies not in-
cluded) so your outdoor sink can be used for
washing food and dishes. However, if you elect to
attach a garden hose to your Faucet Assembly, be
aware that in some U.S. States water supplied
through a garden hose is regarded to be unfit for
human consumption.
California Proposition 65 Warning
!
Apply pipe tape on the Faucet pipe inlet.
 Loading...