4.
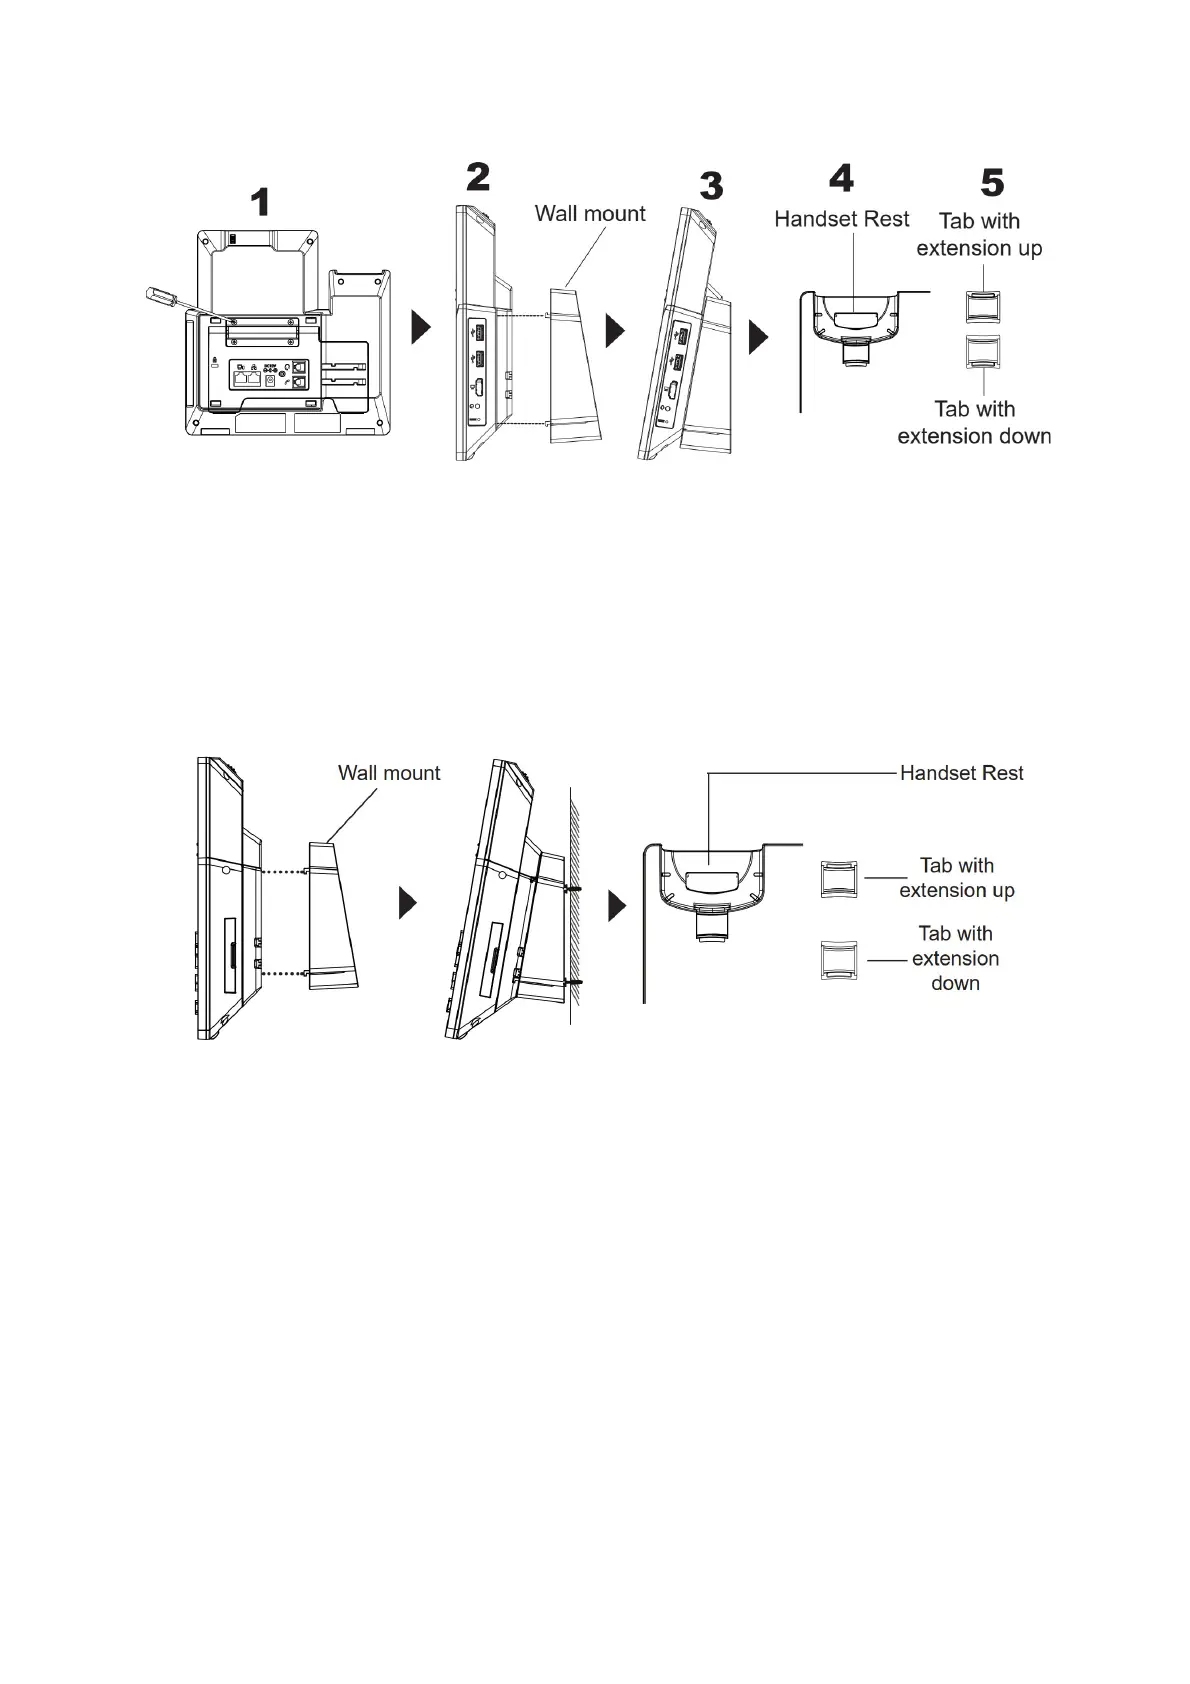
Pull out the tab from the handset cradle (see figure below).
5.
Rotate the tab and plug it back into the slot with the extension up to hold the handset while the phone is mounted on the
wall.
Figure 17: GXV3470 Wall Mount
• GXV3450
1.
Attach the wall mount spacers to the slot for wall mount spacers on the back of the phone.
2.
Attach the phone to the wall via the wall mount hole.
3.
Pull out the tab from the handset cradle (see figure below).
4.
Rotate the tab and plug it back into the slot with the extension up to hold the handset while the phone is mounted on the
wall.
Figure 18:GXV3450 Wall Mount
Connecting the GXV34x0
To setup your GXV34x0, please follow the steps below:
1.
Connect the handset and main phone case with the phone cord;
2.
Connect the LAN port of the phone to the RJ-45 socket of a hub/switch or a router (LAN side of the router) using the
Ethernet cable;
3.
Connect the 12V DC output plug to the power jack on the phone; plug the power adapter into an electrical outlet. If PoE
switch is used in step 2, this step could be skipped;
4.
The LCD will display booting up or firmware upgrading information. Before continuing, please wait for the main screen
display to show up;
5.
Using the web configuration interface or from the menu of the touch screen, you can further configure network
connection using static IP, DHCP etc.
 Loading...