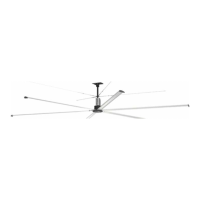
High Volume, Low Speed Ceiling Fans20
®
3. Insert the electrical plug into the receptacle and
twist to lock the plug in place.
4. Secure any loose power cable to the building
structure to ensure it does not interfere with fan
performance.
Without Optional Electrical Plug
1. If the fan is not supplied with the optional electrical
plug, refer to the wiring diagrams below to
complete power wiring.
2. Secure any loose power cable to the building
structure to ensure it does not interfere with fan
performance.
POWER CABLE FROM FAN
POWER CABLE FROM FAN
SINGLE PHASE (LOW VOLTAGE 208-277V)
THREE PHASE (LOW VOLTAGE 208-230V, HIGH VOLTAGE 460V)
SOURCE POWERSOURCE POWER
GROUND GROUND
GROUND GROUND
L1L1
L1 L1
L2L2
L2/NL2/N
L3 L3
Disconnect and Fuse Installation
1. If provided, mount and wire the optional safety
disconnect switch outside of the sweep of the fan’s
airfoil blades. Installation should be completed per
the disconnect manufacturer’s recommendation.
Be sure to follow all national and local codes for
electrical installation.
2. If fusing is required, refer to the fuse sizing chart.
If the fan was supplied with the optional fused
disconnect, the fuses received will match the
models shown. Install fuses per the manufacturer’s
recommendation. Be sure to follow all national and
local codes for electrical installation.
Fuse Sizing Chart
DS-3 (8 to 24 ft.) & DS-6 (8 to 18 ft.)
500W Motor
Motor Voltage 208-230V/
1,3 PH/60 HZ
277V/
1 PH/60 HZ
460V/
3 PH/60 HZ
Motor Full Load Amps
(FLA)*
7A 7A 2.5A
Fuse Required** FRN-R-10 FRS-R-10 FRS-R-5
DS-6 (20 and 24 ft.)
1100W Motor
Motor Voltage 208-230V/
1,3 PH/60 HZ
277V/
1 PH/60 HZ
460V/
3 PH/60 HZ
Motor Full Load Amps
(FLA)*
12A 12A 3.3A
Fuse Required** FRN-R-15 FRS-R-15 FRS-R-5
*FLA is based on worst case system conditions assuming lowest
nominal voltage and phase.
** Fuses shown are available as an optional accessory. Fuses
provided by others must meet requirements of all national and local
codes.
1. Disconnect and lock-out all power switches to fan.
2. Check all fasteners on the ceiling mount, mounting
kit, blades, VFD, motor and accessories for
tightness.
3. Rotate the fan impeller by hand to ensure that it
rotates freely and does not come into contact with
any obstructions.
4. Check all electrical connections for proper
attachment.
5. Verify that the fan is hanging so that the airfoils
and downtube are level and the fan is plumb to
the floor. Adjust guy wire tension as necessary (if
applicable).
Pre-Start-Up Checks