ASSEMBLY
.[
*#$(!)(89(!"'+::('
&+""+,9!")(!"'+::('!)(78!V&+9L^W
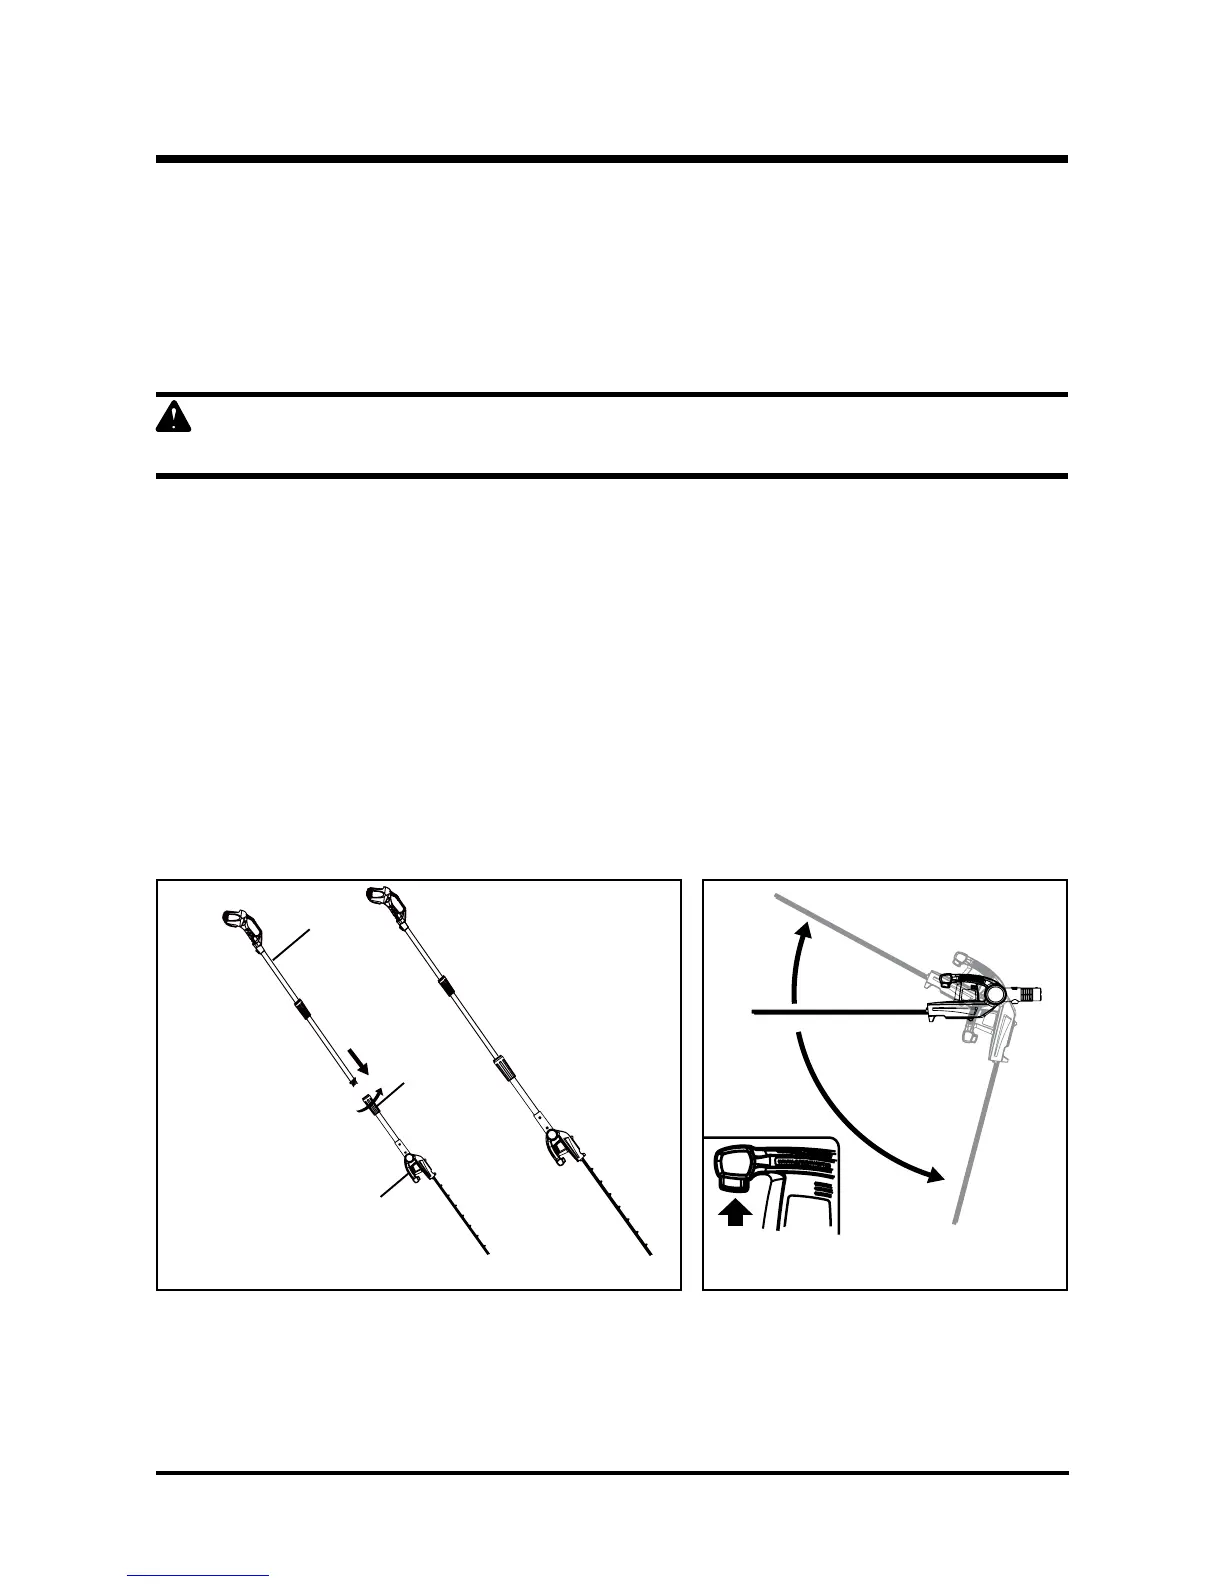
• Align the arrow on the end of main handle (10) with the arrow on the trimmer head (11).
• Push the trimmer head (11) onto the handle (10).
• Fasten the trimmer head coupler (12).
2 7 ',+,9
Periodically check the connections to ensure that they are tightened securely.
'(:#\+,9!")(!"'+::('!)(78!V&+9L^W
Rest the handle (10) on the ground, loosen the trimmer head cam lock and push lock button,
then take off the trimmer head (11).
78_Y4"+,9!")(!"'+::('!)(78!7,9$(!V&+9L/W
The trimmer head pivots 105° and can be locked into 7 positions within that range.
• Squeeze the Adjustment Button.
• While squeezing the Adjustment Button, move the head forward or backward.
• Release the Adjustment Button once the trimmer head is in the desired position.
%61`
1`
^X`
&+9L^
&+9L/
10
11
12
Adjustment
Button