-14-
Model T32720 (Mfd. Since 06/21)
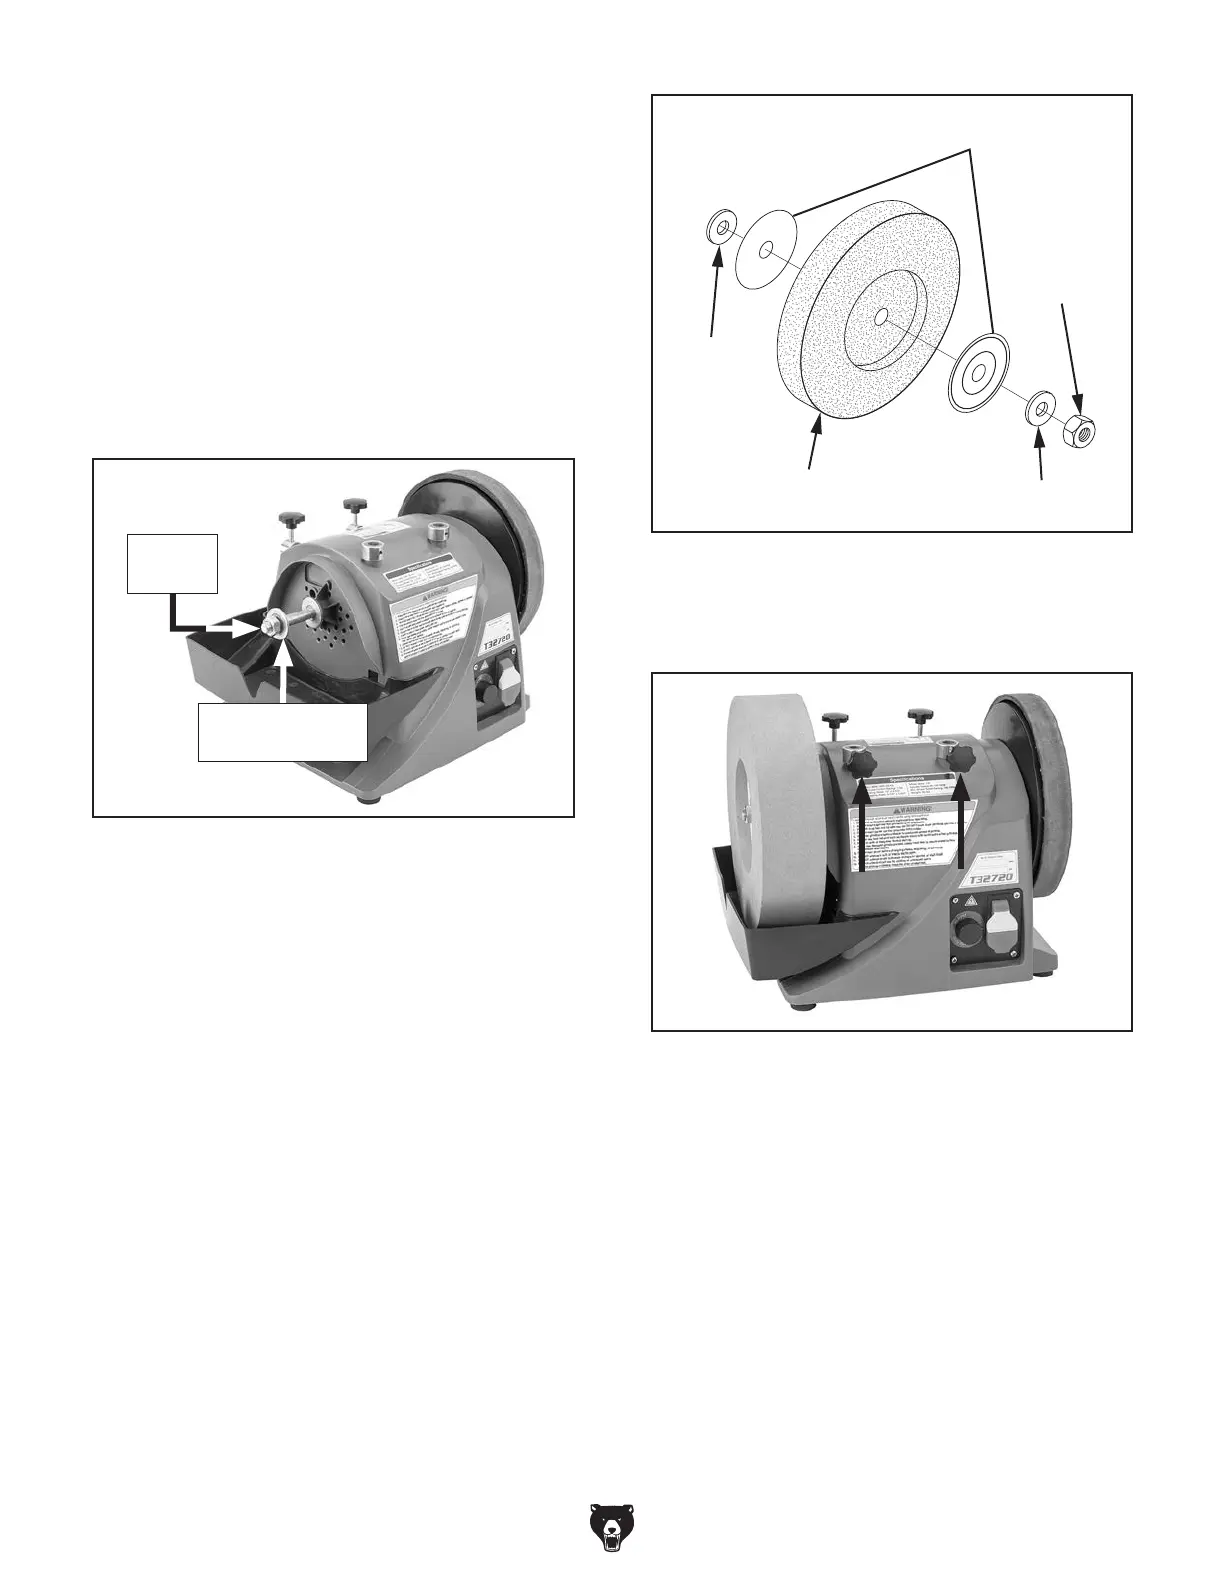
Figure 11. Lock knobs installed on machine.
9.
Install (2) lock knobs at locations shown in
Figure 11.
Figure 9. Location of grinding wheel arbor hex
nut and outer washer.
Arbor
Hex Nut
Grinding Wheel
Outer Washer
5. Turn machine right-side up.
6. Inspect grinding wheel for flaws before install-
ing (refer to Inspecting Grinding Wheel on
Page 19).
— If wheel is damaged, replace wheel before
proceeding with Assembly.
— If wheel is undamaged, proceed to Step 7.
7.
Remove grinding wheel arbor hex nut and
outer washer (see Figure 9).
Figure 10. Assembly order for wheel installation.
8.
Mount grinding wheel components in order
shown in Figure 10. Tighten arbor hex
nut snugly but do not over-tighten. Over-
tightening can stress and crack wheel.
— Paper discs or "blotters" should always
be used to absorb any pressure from
mounting hardware to prevent wheel from
cracking. Grinding wheel that ships with
this sharpener already comes with a blot-
ter present on each side. Part number
PT32720105 on Page 36 can be used to
replace missing or damaged blotter before
proceeding and performing Test Run. If
replacing with a different grinding wheel,
refer to wheel manufacturer to obtain
correct blotters.
Inner
Washer
Outer Washer
Arbor
Hex Nut
Grinding Wheel
1
5
0
R
P
M
A
l
u
m
i
n
u
m
n
O
x
i
d
e
Blotters
 Loading...