English (GB)
8
9. CR, CRN 120, 150
9.1 Dismantling
1. Remove screws (pos. 7a) and coupling guards (pos. 7).
2. Remove screws (pos. 9) and coupling (pos. 8).
3. Attach the lifting device to eyebolt (pos. 28b).
4. Remove hexagon socket screws (pos. 28).
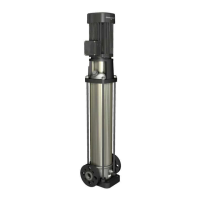
5. 55-75 kW: Remove washers (pos. 66a) and nuts (pos. 36)
from the motor stool.
6. Lift and remove motor and motor stool (pos. 1a).
7. Remove screws (pos. 58a).
8. 11-45 kW: Remove seal carrier (pos. 58).
9. Clean shaft (pos. 51) and slacken socket screws (pos. 113) of
upper shaft seal (pos. 105a).
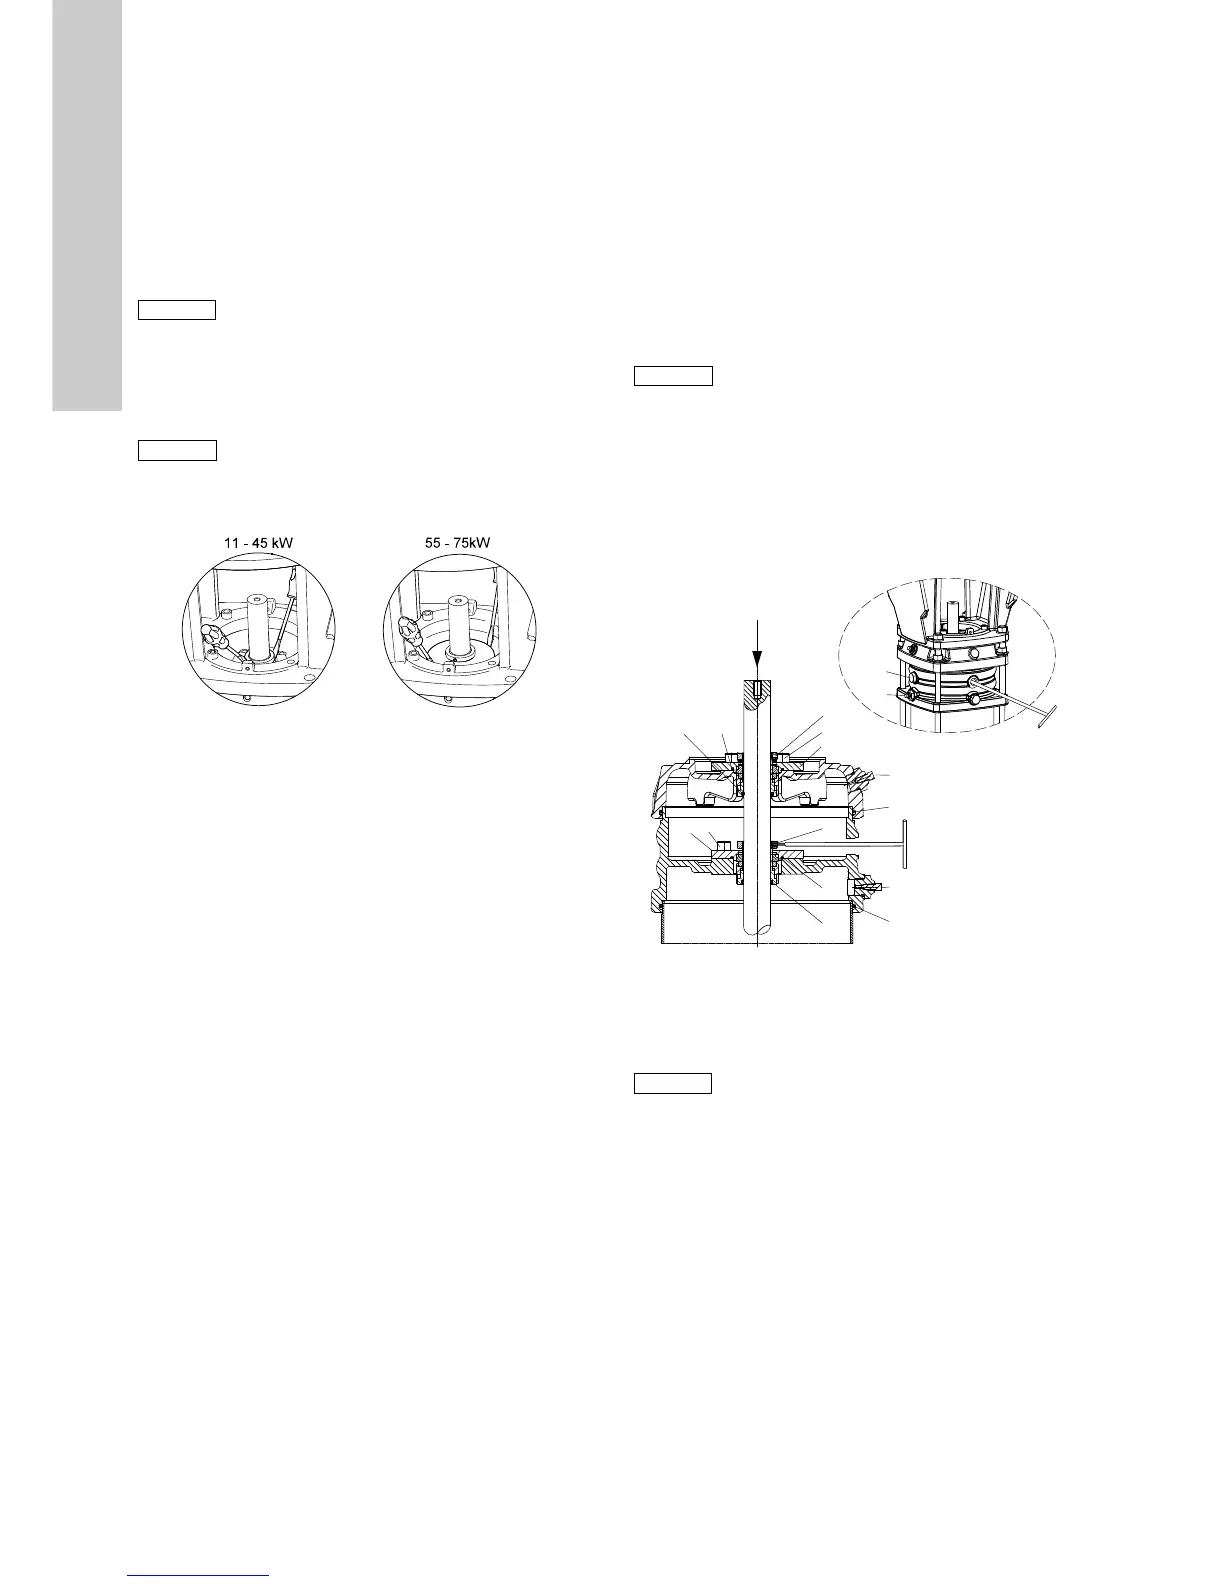
10. Pull shaft seal (pos. 105a) off pump head (pos. 2) and free of
shaft (pos. 51) using two screwdrivers. See fig. 7.
Fig. 7 Removing the upper shaft seal
11. Remove nuts (pos. 36) and washer (pos. 66a) from upper
pump head (pos. 2).
12. Remove upper pump head (pos. 2), it may be necessary to
loosen it with a rubber mallet.
13. Clean the shaft above lower shaft seal (pos. 105b).
14. Loosen socket screw (pos. 113) of lower shaft seal
(pos. 105b).
15. 11-45 kW: Remove screws (pos. 58c)
16. Remove seal carrier (pos. 58b).
17. Pull shaft seal (pos. 105b) off lower pump head (pos. 2b) and
free of shaft (pos. 51) using two screwdrivers.
18. Continue the dismantling according to the instructions for
dismantling of the standard pump.
9.2 Assembly
1. Clean and smooth shaft (pos. 51) using the holder with emery
cloth supplied with the shaft seal kit.
2. Fit lower pump head (pos. 2b) on shaft (pos. 51) and carefully
press it down on the shaft. When it reaches the outer sleeve
press it with even force on the sleeve.
3. Press lower shaft seal (pos. 105b) down into position in lower
pump head (pos. 2b).
4. 11-45 kW: Fit seal carrier (pos. 58b).
5. Cross-tighten screws (pos. 58c).
6. Fit O-ring (pos. 37b) in lower pump head (pos. 2b).
7. Fit O-ring (pos. 37b) in upper pump head (pos. 2).
8. Fit the upper pump head.
9. Fit washers (pos. 66a) and cross-tighten nuts (pos. 36).
10. Fit upper shaft seal (pos. 105).
11. Remove excess grease from shaft end (pos. 51) using a cloth.
12. 11-45 kW: Fit seal carrier (pos. 58).
13. Cross-tighten screws (pos. 58a).
14. Press the shaft home and tighten socket screws (pos. 113) of
each shaft seals (pos. 105a and 105b). See fig. 8.
Fig. 8 Tightening the lower shaft seal
15. Attach the lifting device to eyebolt (pos. 28b).Carefully lift the
motor with the stool and fit it on upper pump head (pos 2b).
Cross-tighten screws (pos. 28).

 Loading...