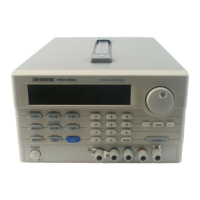
PSM-SERIES PROGRAMMABLE POWER SUPPLY
USER MANUAL
46
6-4. Adjustment and Calibration
--Preparation
1. 30 minutes warm up before calibration.
2. Ambient temperature:23±5°C, Humidity: Under RH80%.
--Output Calibration Steps:
[Step 1]
Press [SHIFT][ .] to appear Password input window, input Password (vary
with different models: PSM-2010= 2010, PSM-3004 = 3004, PSM-6003 =
6003) by using the number key, press [ENTER] key
[Step 2]
When get into Calibrated item selection window, set the cursor to the
calibrated item by using the knob and press [ENTER]. After the calibrated
item is selected, proceeding voltage, current and over-voltage calibration
step by step.
[Step 3] Voltage Calibration Steps
Set to [VOLTAGE] by using the knob and press [ENTER] getting into
voltage calibration procedure.
PSM-SERIES PROGRAMMABLE POWER SUPPLY
USER MANUAL
47
[Step 3.1]
Firstly, proceed the calibration procedure of LO calibrated point, input
DMM measurement value, then press [ENTER].
Note: The DMM selected for the measurement must have the resolution of
4 digits after the decimal point at least, and take three digits after the
decimal point to be the effective value and run off the rest.
[Step 3.2]
Next, proceed the calibration procedure of MI calibrated point, input
DMM measurement value, then press [ENTER].
Note: The DMM selected for the measurement must have the resolution of
4 digits after the decimal point at least, and take three digits after the
decimal point to be the effective value and run off the rest.
[Step 3.3]
Finally, proceed the calibration procedure of HI calibrated point, input
DMM measurement value, then press [ENTER].
Note: The DMM selected for the measurement must have the resolution of
4 digits after the decimal point at least, and take three digits after the
decimal point to be the effective value and run off the rest.
Now, switch to SAVE by using the knob and press [ENTER] to leave the
mode with storing. Also can press [SHIFT][ .] to leave the mode without
storing.
【Step 4】

 Loading...


