2-7
Installing the switch in a 19-inch rack
Front and rear mounting brackets are required to mount the switch in a 19-inch rack. Follow these
guidelines to use the front and rear mounting brackets:
Select an installation position for the front mounting brackets as required: near the power
supply side or port side.
Install the rear mounting brackets based on the rack depth.
If the rack depth is in the range of 327 to 494 mm (12.87 to 19.45 in), orient the bracket with the
wide flange inside the rack.
If the rack depth is in the range of 172 to 339 mm (6.77 to 13.35 in) and the distance from the
rear rack posts to the inner surface of the cabinet door is longer than 153 mm (6.02 in), orient
the bracket with the wide flange outside the rack.
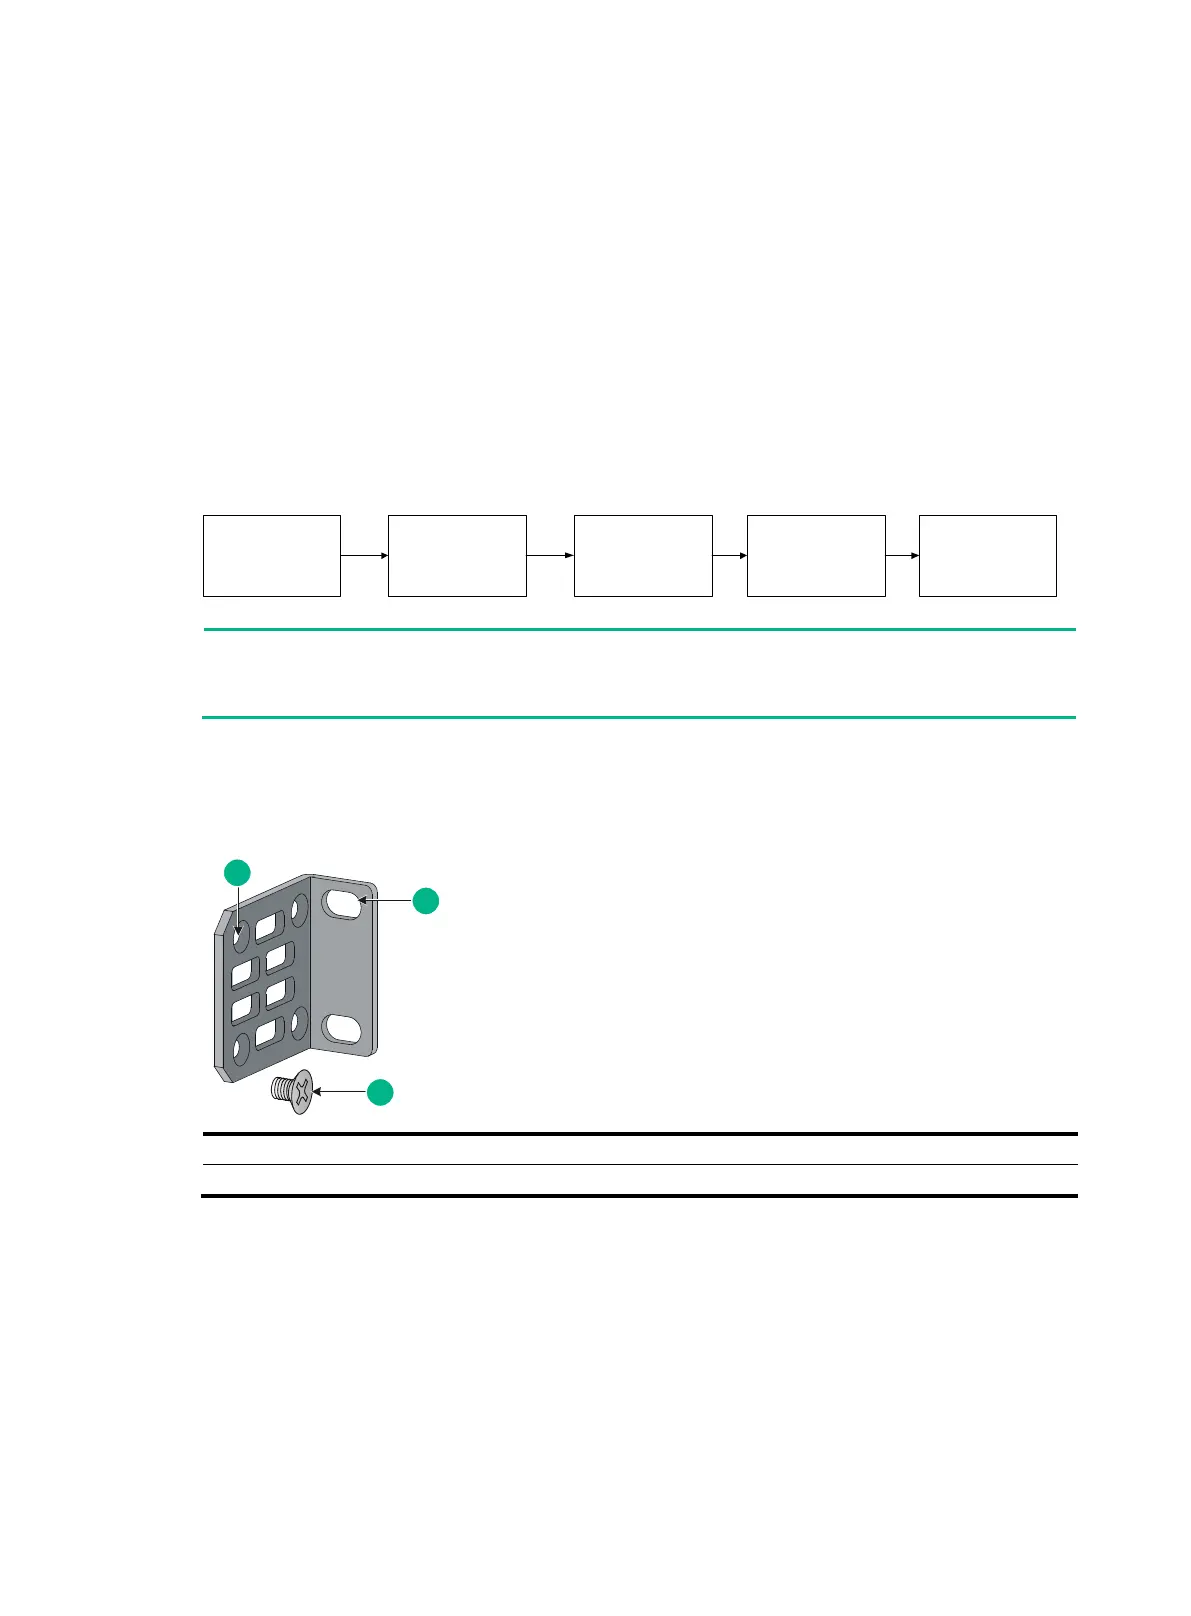
Figure2-2 Procedure for rack-mounting the switch
If a rack shelf is available, you can put the switch on the rack shelf, slide the switch to an appropriate
location, and attach the switch to the rack by using the mounting brackets.
Mounting brackets and shoulder screw
Figure2-3 Front mounting bracket and shoulder screw
(1) Screw hole for attaching the bracket to the switch
(2) Screw hole for attaching the bracket to the rack
Select an installation
position for the front
mounting brackets (near
the port side or power
supply side)
Attach the front mounting
brackets to the switch
Attach the shoulder
screws to the switch
Attach the rear mounting
brackets to the rack
Mount the switch in the
rack

 Loading...