Maintenance
W A R N I N G
Multiple hazards. Do not disassemble the instrument for maintenance or service. If the internal components must
be cleaned or repaired, contact the manufacturer.
C A U T I O N
Personal injury hazard. Only qualified personnel should conduct the tasks described in this section of the manual.
Clean the instrument exterior
The instrument exterior can be cleaned as needed. To avoid human exposure to potentially
dangerous chemicals, make sure to clean the touchscreen immediately after contact with chemicals.
N O T I C E
Do not leave visible moisture on the instrument or touchscreen. Moisture can penetrate the touchscreen and
damage electronics inside.
1. Put the cap on the sample air intake nozzle.
2. Spray a mild cleaning solution on a soft cloth. Wipe the outside of the instrument carefully.
3. Use a soft, dry cloth to wipe the touchscreen surface. If needed, moisten the soft cloth with a mild
cleaning solution.
Set the count to zero
Do this procedure after unexpectedly high particle counts. This procedure will verify that the particle
counter works correctly and will remove residual particles.
1. Put the zero-count filter on the intake tube. Refer to Figure 1 on page 10.
2. Turn on the unit and log in if needed.
3. Push SAMPLE.
4. Push RUN.
5. Repeat the process until the particle counts return to zero.
Update the instrument software
N O T I C E
Do this procedure with only manufacturer-supplied files and directions.
1. Download the self-extracting *.zip file from the location provided by the manufacturer.
2. Extract the files to a compatible USB drive. Use only manufacturer-supplied USB drives for best
results.
3. Remove AC power. Remove the batteries.
4. Plug the USB drive into the USB port.
5. Apply AC power to the instrument.
6. Select Yes to start the update. When the update is complete, the instrument will continue startup.
7. To verify the version number of the update, push DIAGNOSTICS. The version will show on the
Diagnostics screen.
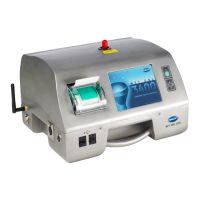
Charge the batteries in the particle counter
Batteries in the 3400 will begin to charge when the AC power cord is connected. A complete charge
in the instrument takes approximately 10 hours. The battery is considered to be fully charged when
they display shows the charge between 95% and 100%.
40
English
 Loading...