5.4 HCNB through embedded LAN server (not Claros compatible)
Note: Make sure to accurately follow the hardware connection and the configuration of the topology.
Note: If some preliminary settings in the Connectivity menu were changed, it is recommended to go back to the
factory settings. Refer to the controller user manual.
• All of the controllers connect to the same network segment.
• All of the controllers connect to the HCNB.
• Controller 1 is the LAN server and connects to the HCNB through this LAN.
• Controller 2 connects to the HCNB through a LAN.
• Controller 3 connects to the HCNB through LAN and connects to a PLC through Industrial
Ethernet protocols, Profibus DP or a mA output.
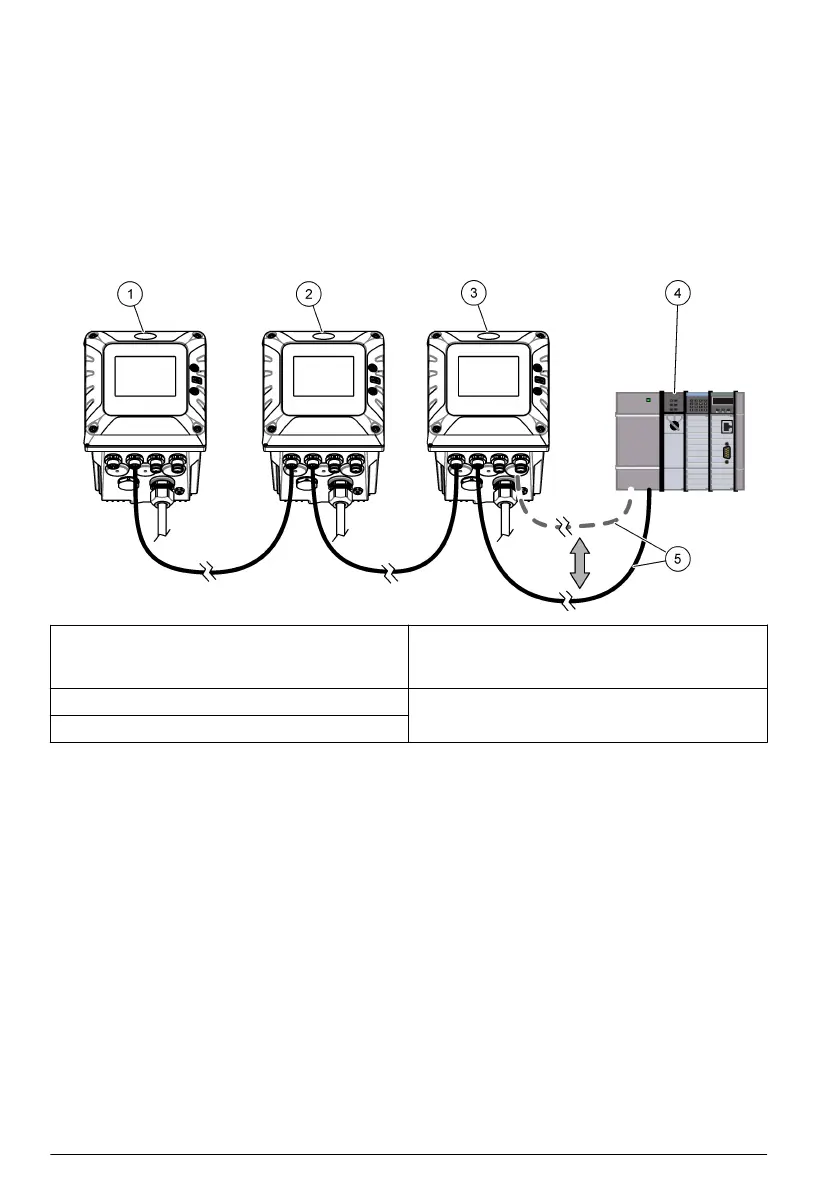
1 Controller 1, SC4500 4 PLC (refer to the documentation supplied
with the controller, PROFINET module and
EtherNet/IP module to configure the PLC)
2 Controller 2, SC4500 5 IEP connection, Profibus DP, or 4-20 mA
connection
3 Controller 3, SC4500
1. Set the Controller 1 configuration as follows:
a. Push the main menu icon, then select Controller > Connectivity > LAN > Ethernet ports.
Select Chaining.
b. Select Controller > Connectivity > LAN > LAN port configuration > LAN Server. Select
On.
c. Go to Controller > Connectivity > HCNB > HCNB. Make sure that HCNB is set to Off.
d. Select Controller > Connectivity > HCNB > Interface. Select ALL.
e. Select Controller > Connectivity > HCNB > Auto detection. Select On.
f. Select Controller > Connectivity > HCNB > HCNB. Select On. Push OK to restart the
controller.
Note: Wait until the controller restarts. Do not touch the display or go to other menus or an error message
will show.
2. Set the Controller 2 configuration as follows:
a. Push the main menu icon, then select Controller > Connectivity > LAN > Ethernet ports.
Select Chaining.
b. Go to Controller > Connectivity > HCNB > HCNB. Make sure that HCNB is set to Off.
c. Select Controller > Connectivity > HCNB > Interface. Select ALL.
16
English

 Loading...


