5.3 HCNB through a customer network (LAN + WiFi)
Claros is optional. Refer to Claros configuration on page 9 to enable Claros.
Note: Make sure to accurately follow the hardware connection and the configuration of the topology.
Note: If some preliminary settings in the Connectivity menu were changed, it is recommended to go back to the
factory settings. Refer to the controller user manual.
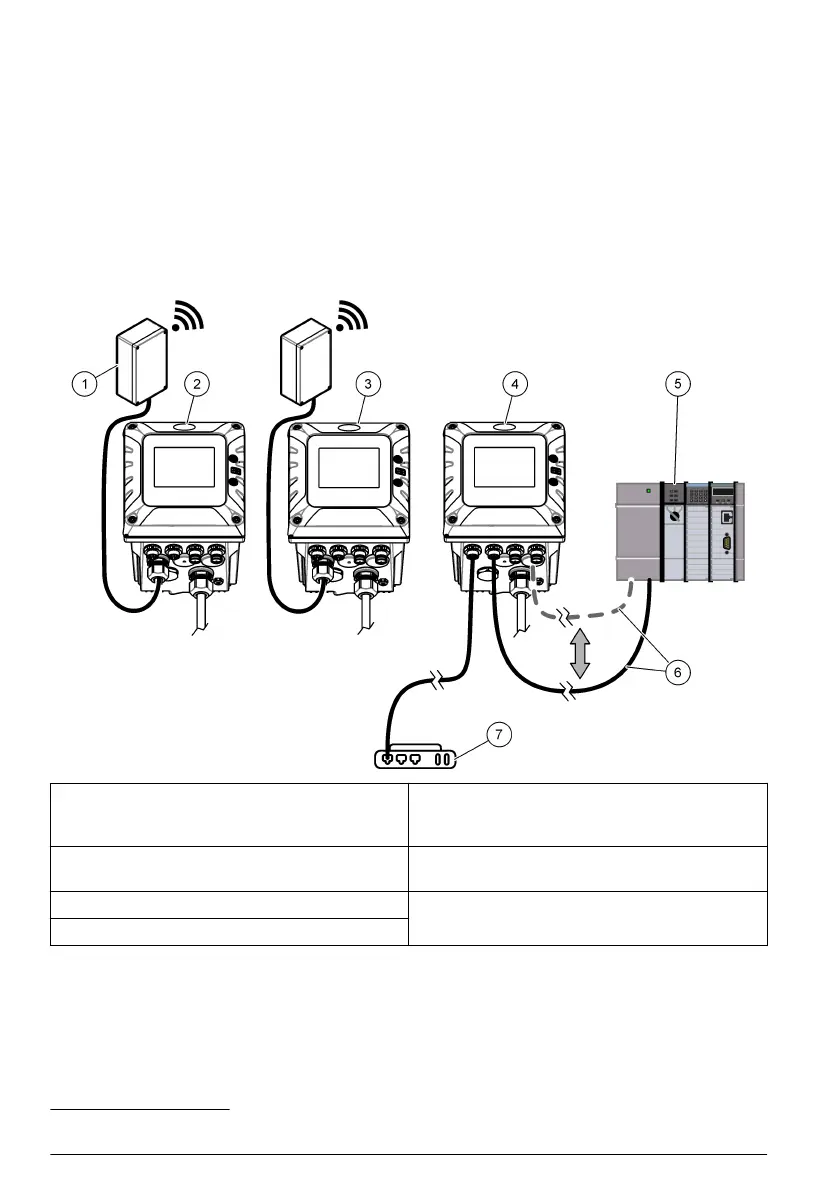
• All of the controllers connect to the same network segment. The Ethernet switch and the WiFi
access point share the same network.
• All of the controllers connect to the HCNB.
• Controller 1 and 2 connect to the network through WiFi. and to Claros (optional).
• Controller 3 connects to the HCNB through LAN and connects to a PLC through Industrial
Ethernet protocols, Profibus DP or a mA output.
1 Wi-Fi USB box 5 PLC (refer to the documentation supplied
with the controller, Profinet module and
EtherNet/IP module to configure the PLC)
2 Controller 1, SC4500 6 IEP connection, Profibus DP, or 4-20 mA
connection
3 Controller 2, SC4500 7 Ethernet switch
5
4 Controller 3, SC4500
1. Set the Controller 1 configuration as follows:
a. To connect to Claros (optional), push the main menu icon, then select Controller >
Connectivity > Claros. Set to on.
b. Push the main menu icon, then select Controller > Connectivity > LAN > Ethernet ports.
Select None.
c. Go to Controller > Connectivity > HCNB > HCNB. Make sure that HCNB is set to Off.
5
If Internet is available on the Ethernet switch, Claros can be set to on and off.
14 English

 Loading...


