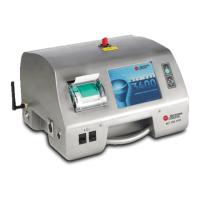
Configure an operator RFID tag (optional)
To use an operator RFID tag to log in to the instrument, save the applicable operator ID to an
operator RFID tag as follows:
1. Push Login.
2. Select the operator ID, then push Options>Initialize RFID Tag.
3. Enter the password for the operator ID as necessary.
4. Complete the steps that show on the display.
5. Push OK to replace the operator ID on the RFID tag with a new operator ID if applicable.
6. Push Close.
7. Put the operator RFID tag in front of the RFID module to log in.
Add sample IDs
Add a unique sample ID for each sample (100 maximum). The sample ID identifies the sample
location or other sample specific information.
As an alternative, import sample IDs from a spreadsheet file to the instrument. Refer to the expanded
user manual on the manufacturer's website to import sample IDs.
Note: When a sample bottle with a sample RFID sticker is put in front of the RFID module, the sample ID is
automatically added to the instrument and selected on the instrument.
1. Push Sample ID.
2. Push Options>New.
3. Enter a new sample ID (20 characters maximum).
4. If the sample bottle has a barcode that identifies the sample ID, read the barcode with a barcode
handset scanner that is connected to the instrument. The barcode is added to the sample ID.
5. Push OK.
6. Select an option.
Option Description
Add Date/Time Adds the data and time that the sample was collected to the sample ID (optional). The date
and time entered for each sample ID show on the Sample ID menu.
Add Number Adds a measurement number to the sample ID (optional). Select the first number used for
the measurement number (0 to 999).
The measurement number shows in parenthesis after the sample ID on the home screen.
Refer to Figure 3 on page 10.
Add Color Adds a colored circle to the sample ID icon (optional). The sample ID icon shows before the
sample ID on the home screen. Refer to Figure 3 on page 10.
7. Push OK>Close.
8. To edit a sample ID, select the sample ID and then push Options>Edit>OK.
9. To delete a sample ID, select the sample ID and then push Options>Delete>OK.
14
English
 Loading...
