18
13. OPERATION (Desoldering Tool)
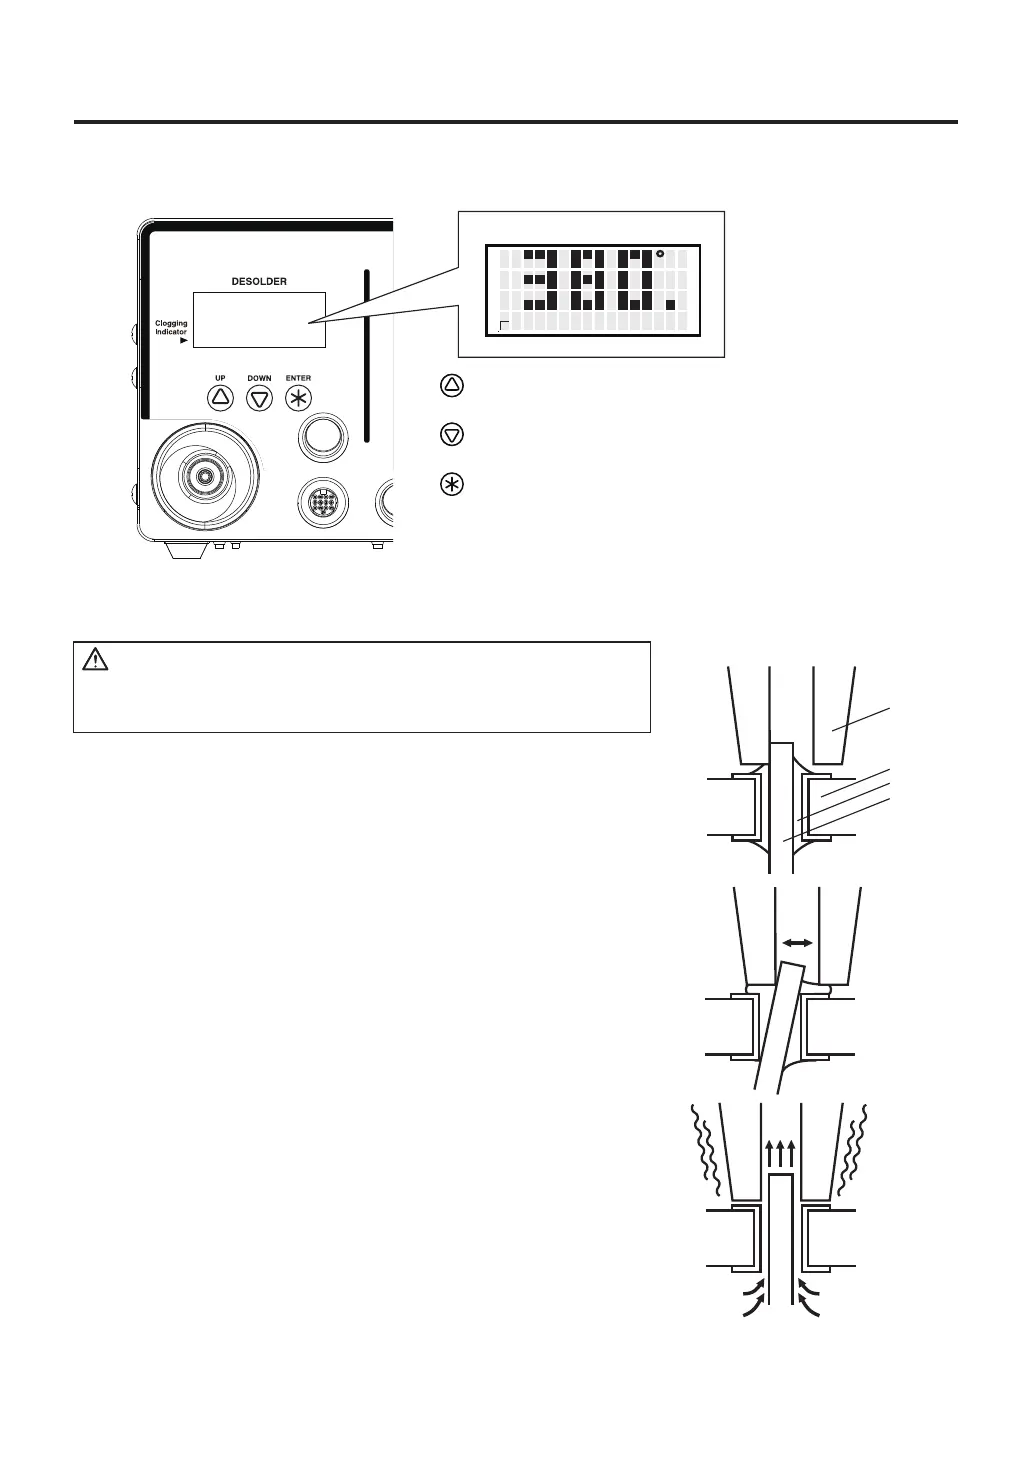
● Operation and indication
Switch and control button
- Moving the cursor UP. Increases the value.
- Moving the cursor DOWN. Decreases the value.
- End of sequence (terminates a phase of a data
entry mode).
Normal display screen
C
1. Place the nozzle over the lead wire of the part to be desoldered
and begin heating.
Be careful to heat the lead wire and the solder, not the land.
Placing the nozzle directly in contact with the land may cause the
land to peel off. You may apply a small amount of solder to form a
heat bridge to help the heating process.
2. Check to make sure all of the solder on the joint has melted.
With the nozzle still in place over the lead wire, slowly move the
lead wire, being careful not to apply too much force. If the lead
wire moves easily, all of the solder has melted.
3. Pull the trigger to remove the melted solder.
Make sure that a filter has been inserted in the desoldering tool.
Desoldering without a filter may damage the pump.
4. If the solder was not removed, re-solder the part using new solder
and then repeat the desoldering process.
A. Desoldering
If the pump does not operate, immediately clean the nozzle
& heating element and replace the filter if necessary.
CAUTION
Nozzle
Board
Solder
Lead