14
Taking measurements—more detail
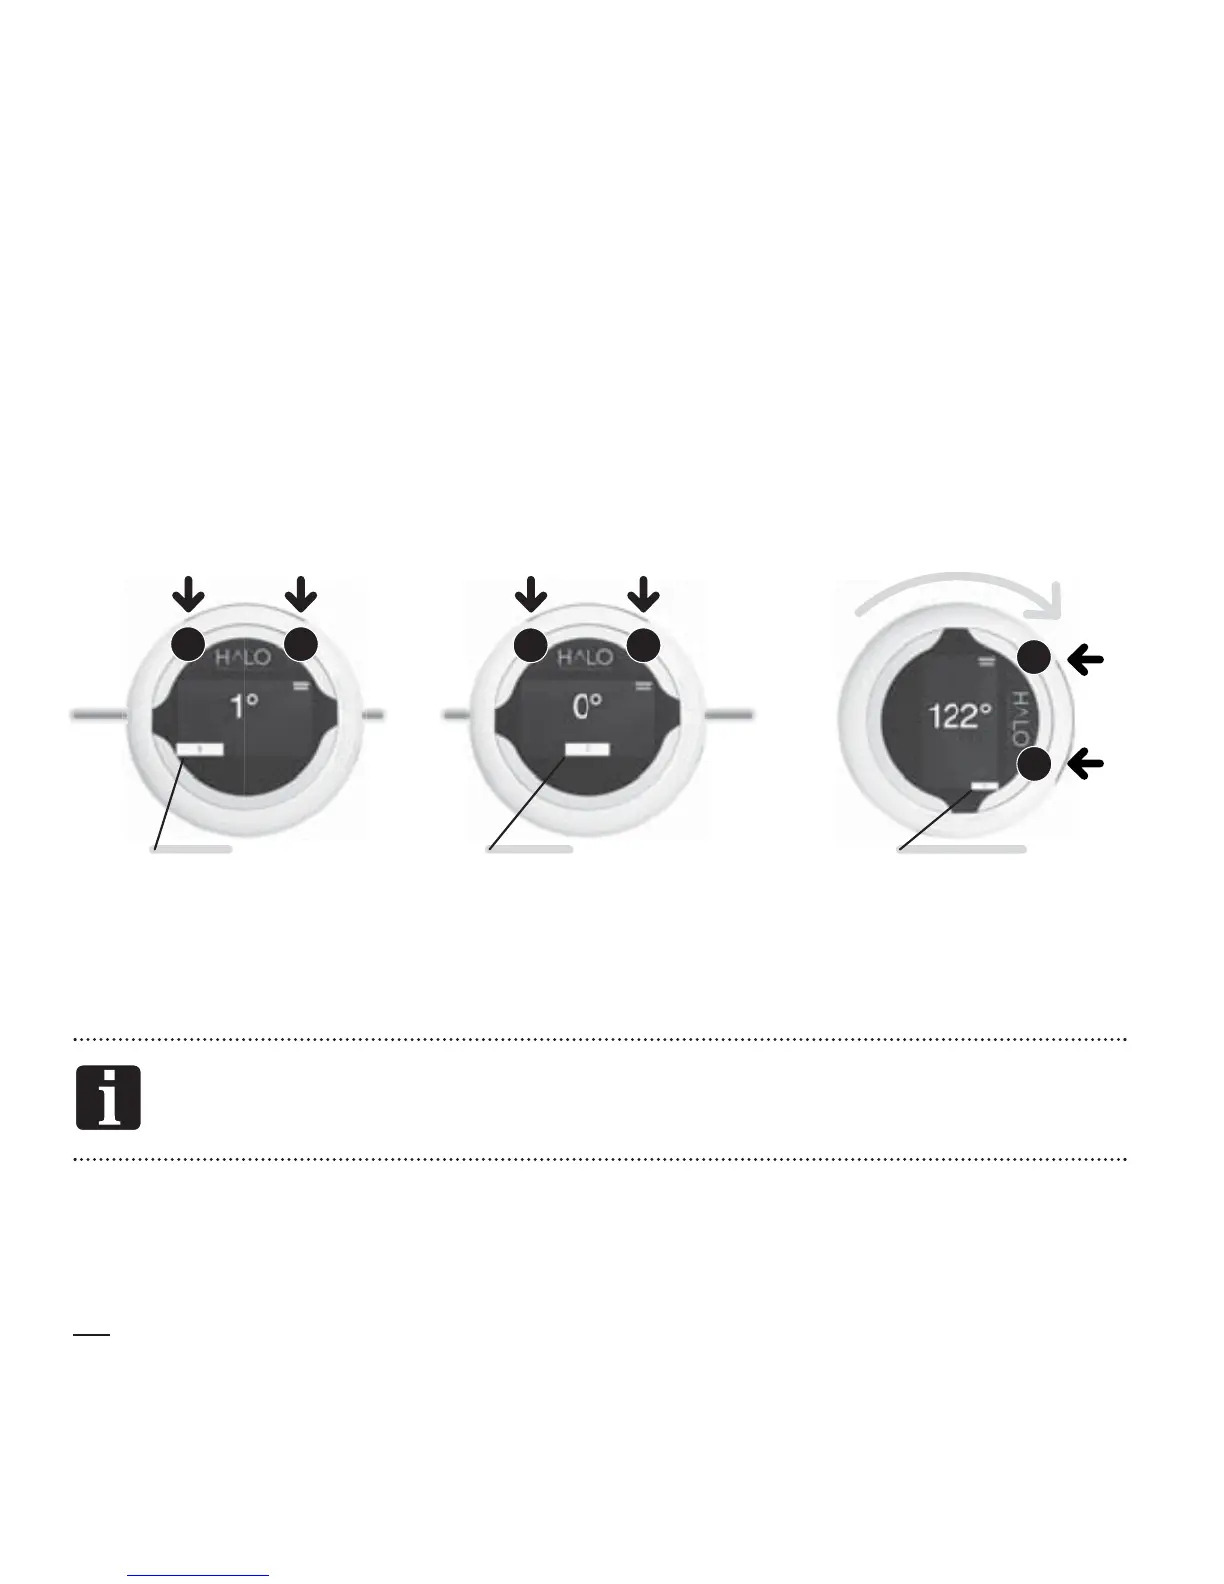
There are three steps in taking a measurement. The steps are indicated by
the white bars along the base of the display. The Step Indicators change
position, moving from left to right across the display and are numbered to
show Step 1, Step 2 and Step 3.
In MEASURE MODE, both Button 1 and Button 2 have the same function.
Either button can be used to take a measurement.
You cannot go back a step. If you make a mistake, move forward
through Steps 2 and 3 and return to Step 1.
Once the HALO is over the limb to be measured, you will rst activate the
lasers, establish the origin of the angle ( rst position), then rotate the HALO
Digital Goniometer to establish the second position.
21
ACTIVATE
or
Step 1
21
ZERO
or
Step 2
2
1
CAPTURE
or
Step 3