!
"
#
!
!
Planer-Thicknesser
A3-26 / A3-31 / A3-41
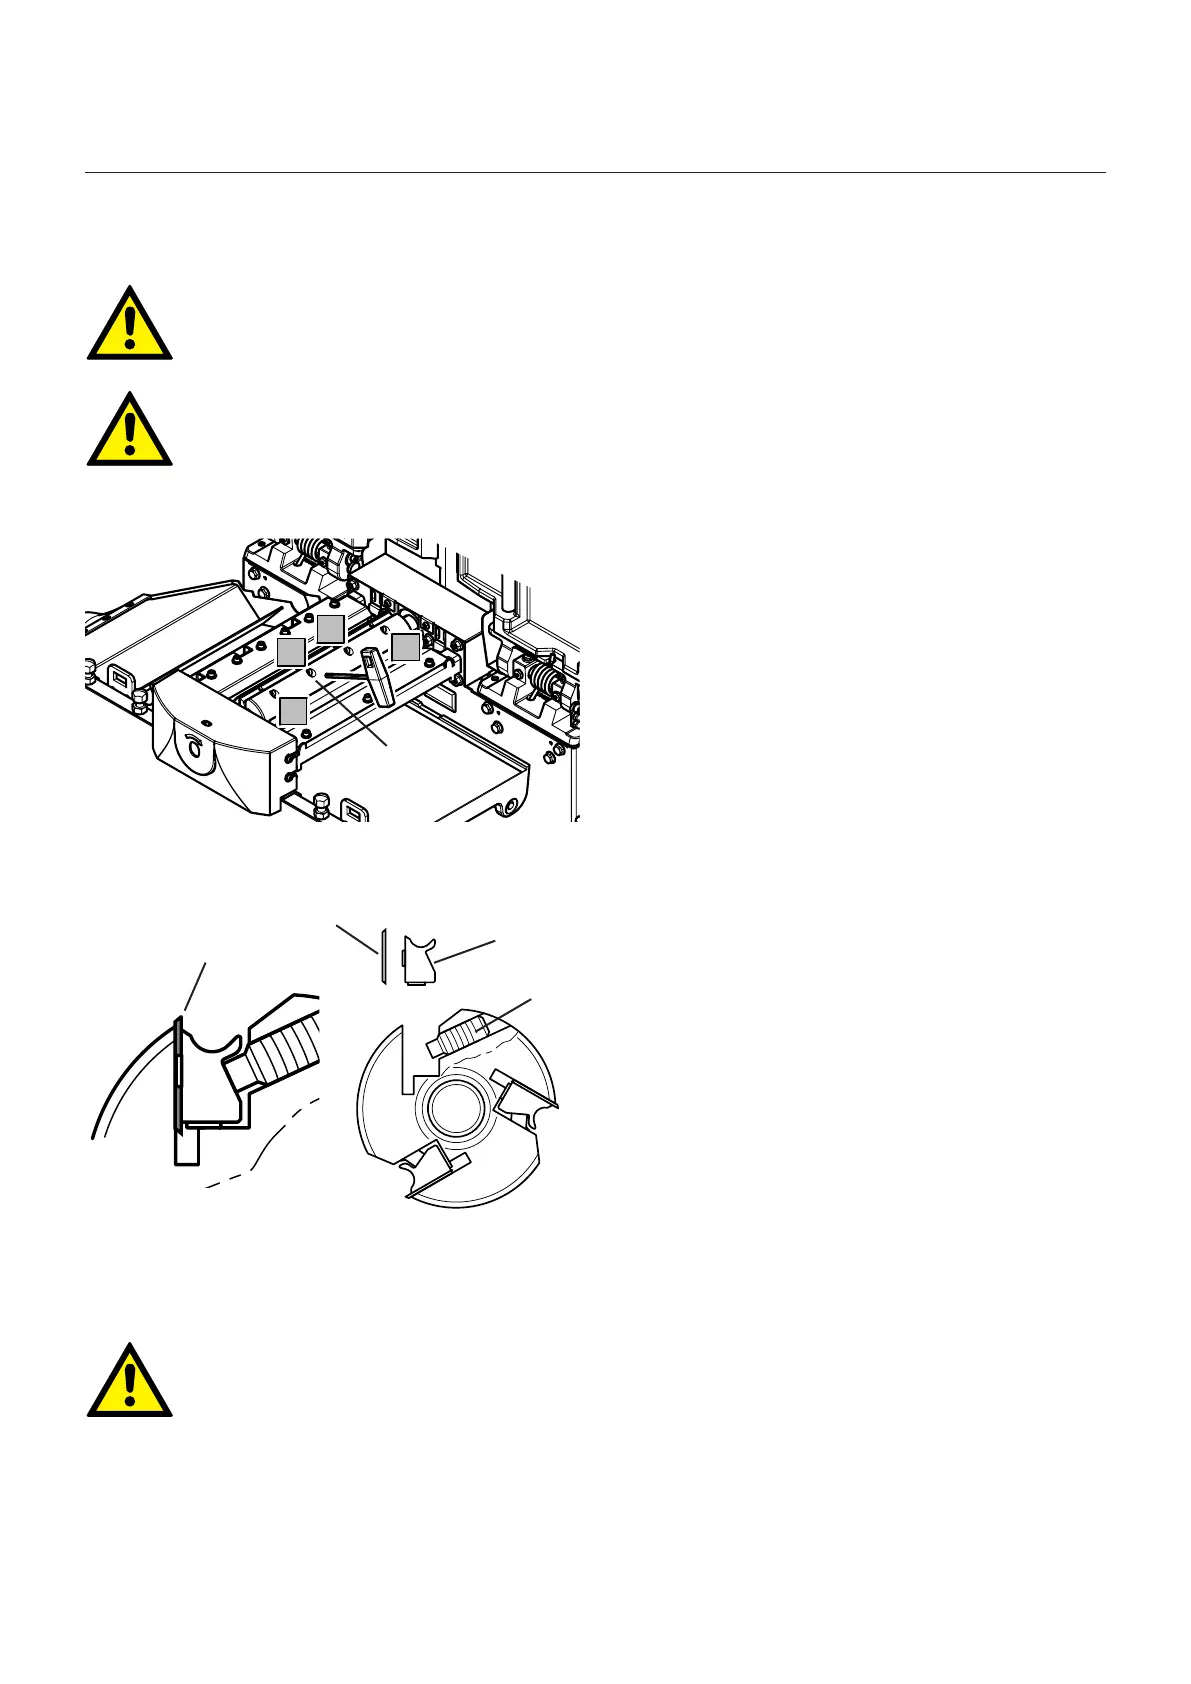
Fig. 11-3: Assembling position
11.5.1 Reversing/replacing the system planer blades
Fig. 11-2: Reversing/replacing the system planer blades
1. Before beginning any maintenance work on the
machine, switch it off and secure it against acciden-
tally being switched on again.
2. Both planer tables must be tilted up and secured with
the fall locks.
3. Remove all the blade-holder screws from one planer
knife.
4. Remove the knife holder and planer knife.
5. Clean resin residues thoroughly from the planer knife,
knife base and cutterblock. Use resin remover art. no.
10.0.002 (0.5l) or 10.0.023 (1l).
6. Reverse the planer knife (if only one cutting edge ‘
is worn)
7. Insert the planer knife (reversed or new) and the knife
holder again.
8. First, gently tighten all the blade-holder screws.
9. Tighten all the knife holder screws (minimum torque
15 Nm).
10. Repeat steps 3 to 9 for the other planer knives.
!Blade-holder screws
"Blade holder
#Planer knife
Attention! Risk of material damage!
Do not clean with compressed air! Ensure that the planer knife is positioned correctly!
Attention! Risk of injury!
The planer knives are razor sharp. Handle the planer knives with the utmost care. especially when turning
the cutterblock by hand.
Attention!
Execute the following instructions exactly!
Always tighten the knife holder screws from the inside to the outside.
Note: Checking the joint adjustment
It may be necessary to readjust the joint if the planer knives have been changed or replaced.
See Chapter >8.3 Adjusting the joint<
Faults