ELEKTRA 2500 HAMTRONIX
5
INSTALLATION AND TESTS
TURNING ON THE CONTROLLER FOR THE FIRST TIME
Be sure the jumper J5 is in S (Squelch) position and J3 in negative position (-). Close SW1 terminal. If you hear the
transmission of a melody, the connections between controller and transmitter are correct. Turn the squelch (SQL)
trimpot fully counterclockwise. Now adjust slowly clockwise until the green LED RX1 goes out. It is recommended to
always close the squelch a little more, as the noise at the reception can vary throughout the day. Transmit to the
repeater input frequency. It should retransmit the signal ending with a courtesy tone, which will indicate that the
connections between receiver and controller are also correct. If the melody is not transmitted or there is not
retransmission, open the SW1 contact and review your CN1 connections. If you prefer to use COR1 instead the
build-in squelch, chance J5 to C (COR) position and select the correct COR1 polarity at J3.
AUDIO SETTINGS
Repeater input audio level
Input audio coming from the receiver on the repeater port
Repeater output audio level
Output audio to the repeater transmitter
Auxiliary input audio level
Input audio coming from the receiver on the auxiliary port
Auxiliary output audio level
Output audio to the auxiliary transmitter
Courtesy Tone and CW level
Audio of courtesy tones, melodies and CW identifier
Voice reproduction audio level
Audio of the recorded messages
RETRANSMISSION AUDIO ADJUSTMENT
The amplitude of the retransmitted audio depends on the input (RX-1) and output (TX-1) settings. To keep the
repeater audio amplitude the same as a simplex operation, proceed as follows:
1) Disable the DTMF mute (function 34-0).
2) Connect a multimeter to the headphone output of a transceiver tuned to the repeater frequency output.
3) Ask someone to transmit a DTMF tone for, let´s say, 30s.
4) At the repeater frequency input (press MON / REV in your transceiver) check the mV AC reading.
5) At the repeater frequency output (release the MON / VER) check the mV AC reading.
6) Adjust RX1 and TX1 to obtain the same voltage as in the input frequency.
7) Test with and without de-emphasis jumper J1. Leave it in the position where the audio is best.
LEDs
Repeater receiver receiving a signal
Auxiliary receiver receiving a signal
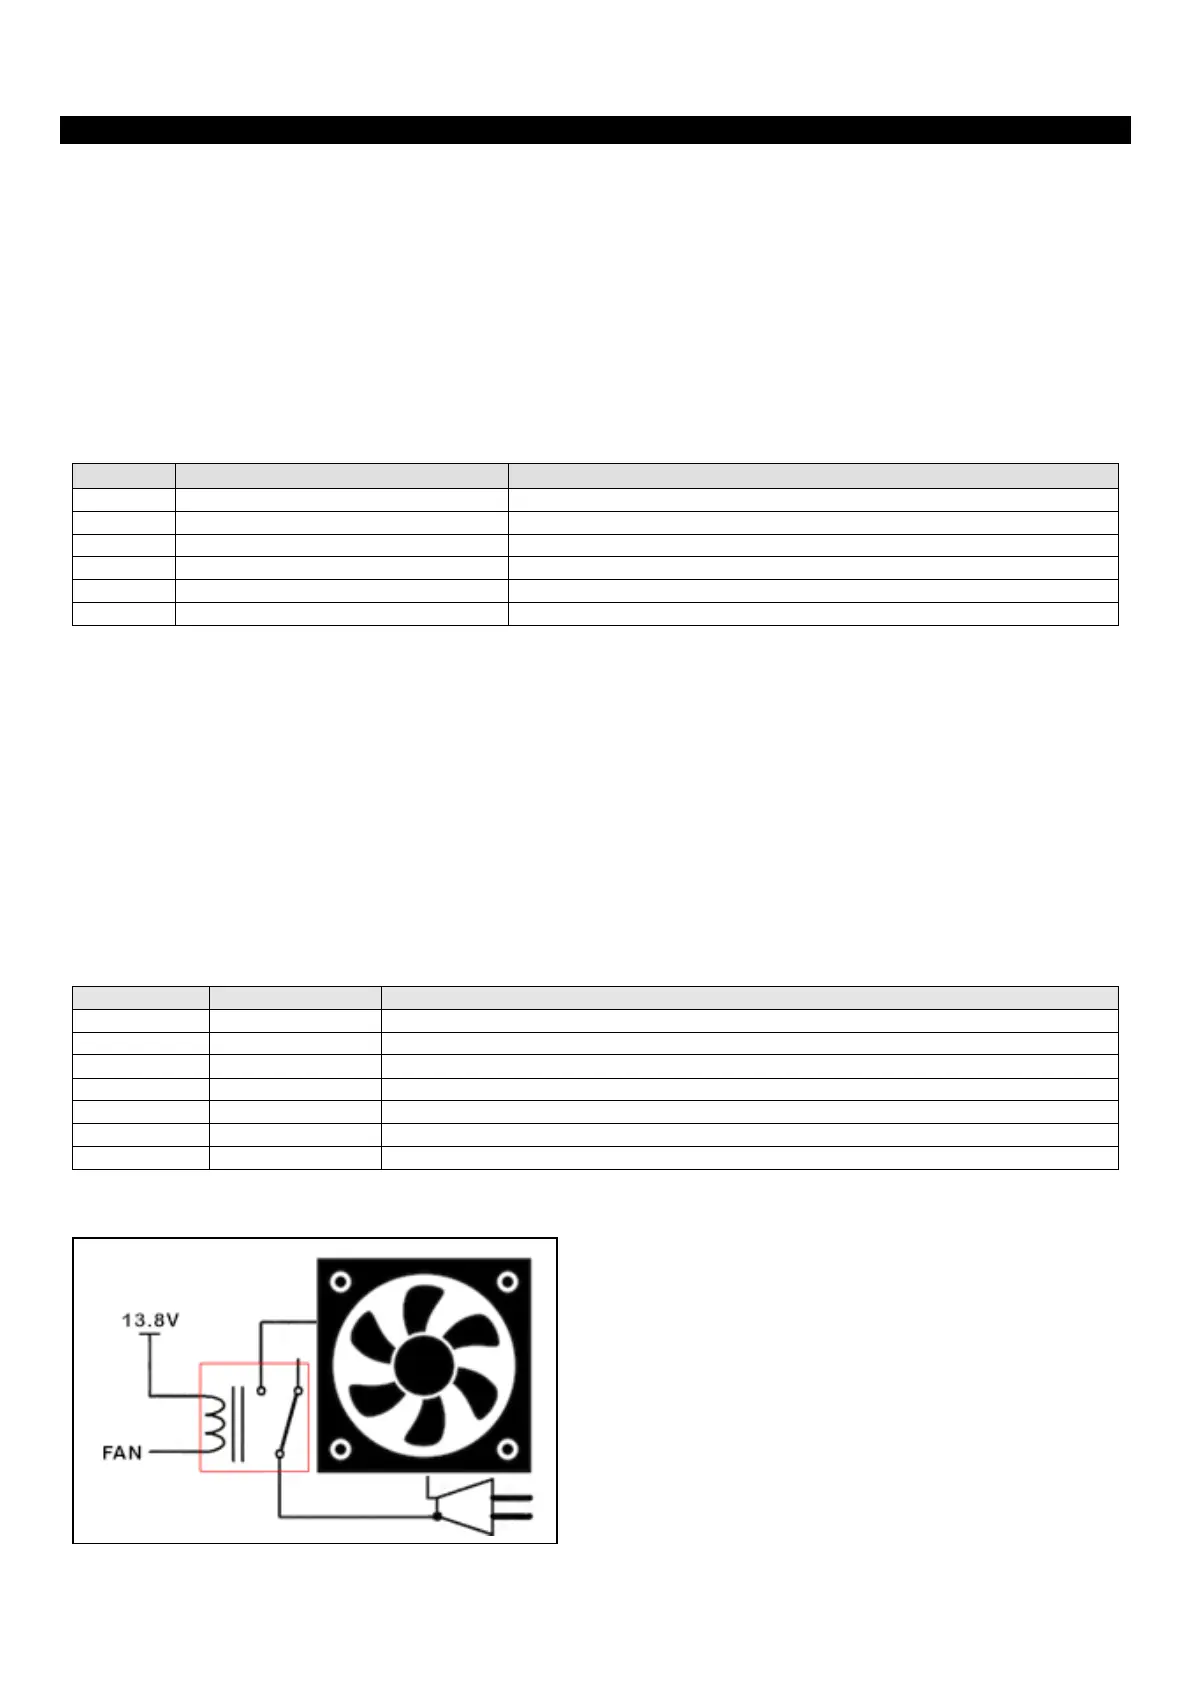
TIMED FAN OUTPUT
The Elektra 2500 can control fans to cool the
repeater/auxiliary transmitter. When the repeater is in use,
the fan is activated and remains on for 2 minutes after the
transmission ends. The fan is not activated during CW or
voice identifications.
The fan drive output (CN1-7) is an open collector type active
in low. Max. 300mA. See the connection diagram on the left.
Note: DC fans are noisy. Prefer AC fans.
 Loading...