10 / 72
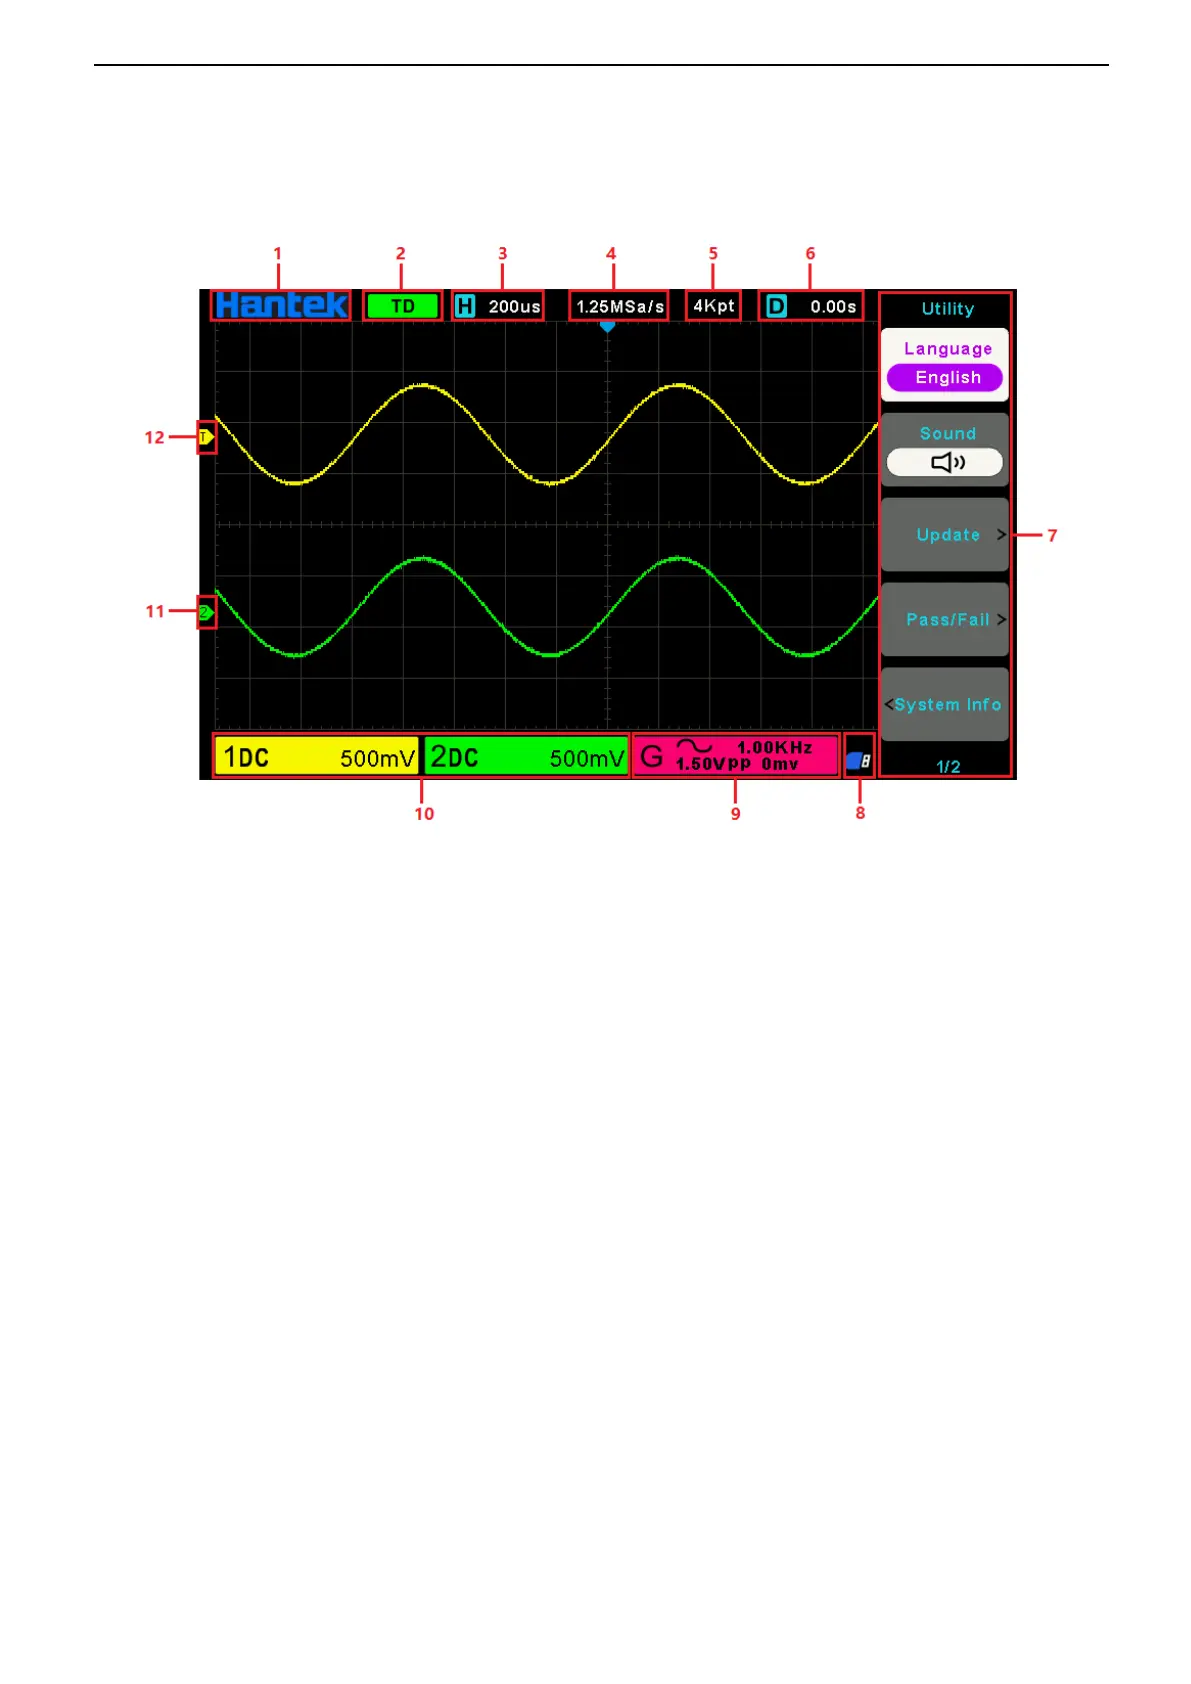
1.4. The user interface
This section will make you understand the front operation panel of this series of digital oscilloscope at
first before use.
1. Hantek logo.
2. Trigger Status.
AUTO: The oscilloscope works in auto mode and is acquiring waveform in the absence of triggers.
READY: All pre-triggered data have been acquired and the oscilloscope is ready to accept a trigger.
ROLL: The oscilloscope is acquiring and displaying waveform data continuously in roll mode.
STOP: The oscilloscope has stopped acquiring waveform data.
ARM1/ARM: The FPGA is acquiring pre-trigger data.
3. The main time base of the current window.
4. Sample rate.
5. Storage depth.
6. Horizontal Tigger time.
7. Operating Menu shows different information for respective function keys.
8. If this icon lights up/active, it means the USB disk has been connected.
9. Signal source information (only valid for model with function generator).
10. Channel information: coupling, bandwidth and volt/div of CH1~CH2.
11. Channel Marker

 Loading...