Do you have a question about the Harbor Breeze 40959 and is the answer not in the manual?
Please read and understand this entire manual before attempting to assemble, operate or install the product.
Turn off circuit breakers and ensure blades are at least 7 ft. from floor and 30 in. from obstructions.
Secure the upper mounting bracket to the outlet box using provided screws and washers.
Connect receiver wires to house supply wires using wire connectors, ensuring proper polarity.
Wrap wire connectors with tape and push into outlet box, ensuring no bare wire is visible.
Align lower mounting bracket tabs with upper bracket slots and secure with screws and washers.
Connect ground wire to house ground, and fan wire harness to receiver wire harness.
Wrap wire connectors with tape and push into outlet box, ensuring no bare wire is visible.
Align motor housing with mounting bracket screws, twist to lock, and tighten all screws securely.
Partially insert blade screws and washers through blades and into blade arms, then tighten.
Install blade arms to the underside of the motor using previously removed motor screws.
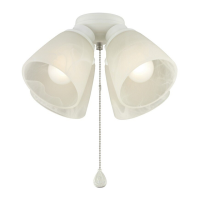
Connect single-pin connectors from switch housing (blue to black, white to white) for light kit.
Align switch housing cap notch with reverse switch, then attach cap and light kit with screws.
Install bulbs into the sockets on the light kit. Allow bulbs and kit to cool before replacing.
Attach glass shade to threaded rod, secure with washer and hex nut, then attach finial cap and finial.
Remove light kit, discard, and install plug button into switch housing cap center hole.
Align switch housing cap notch with reverse switch, then re-install screws to secure.
Turn on the power supply to complete the assembly. Assembly is complete.
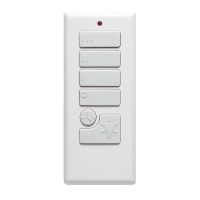
Insert battery, press power button to test. Use buttons for fan speed, light control, and delay off mode.
Use reverse switch for warmer (sun) or cooler (snowflake) airflow. Must be fully up or down.
Tighten screws twice a year. Replace bulbs (max 60W) and remote battery (A23 12V). Turn off power first.
Troubleshoots issues like fan not moving, excessive wobbling, or noisy operation.
Addresses problems with the remote not working, including battery replacement and syncing.
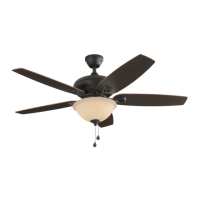
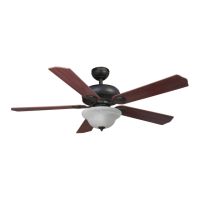
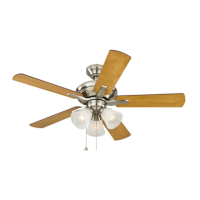
| Brand | Harbor Breeze |
|---|---|
| Model | 40959 |
| Type | Ceiling Fan |
| Number of Blades | 5 |
| Control Type | Pull Chain |
| Reversible Motor | Yes |
| Blade Span | 52 inches |
| Motor Type | AC |
| Motor Speed | 3-speed |