70
GB 14 08 04
Maintenance
Occasional maintenance Occasional maintenance
Occasional maintenance Occasional maintenance
Occasional maintenance
The maintenance and renewal intervals for the following
will depend very much on the conditions under which the
sprayer will be operated and are therefore impossible to
specify.
Pump vPump v
Pump vPump v
Pump v
alvalv
alvalv
alv
es and diaes and dia
es and diaes and dia
es and dia
phrphr
phrphr
phr
aa
aa
a
gms rgms r
gms rgms r
gms r
eneene
eneene
ene
ww
ww
w
alal
alal
al
Diaphragm pump overhaul kit (valves, seals, diaphragms etc.)
Pump model HARDI part No.
363 750342
463 750343
Valves
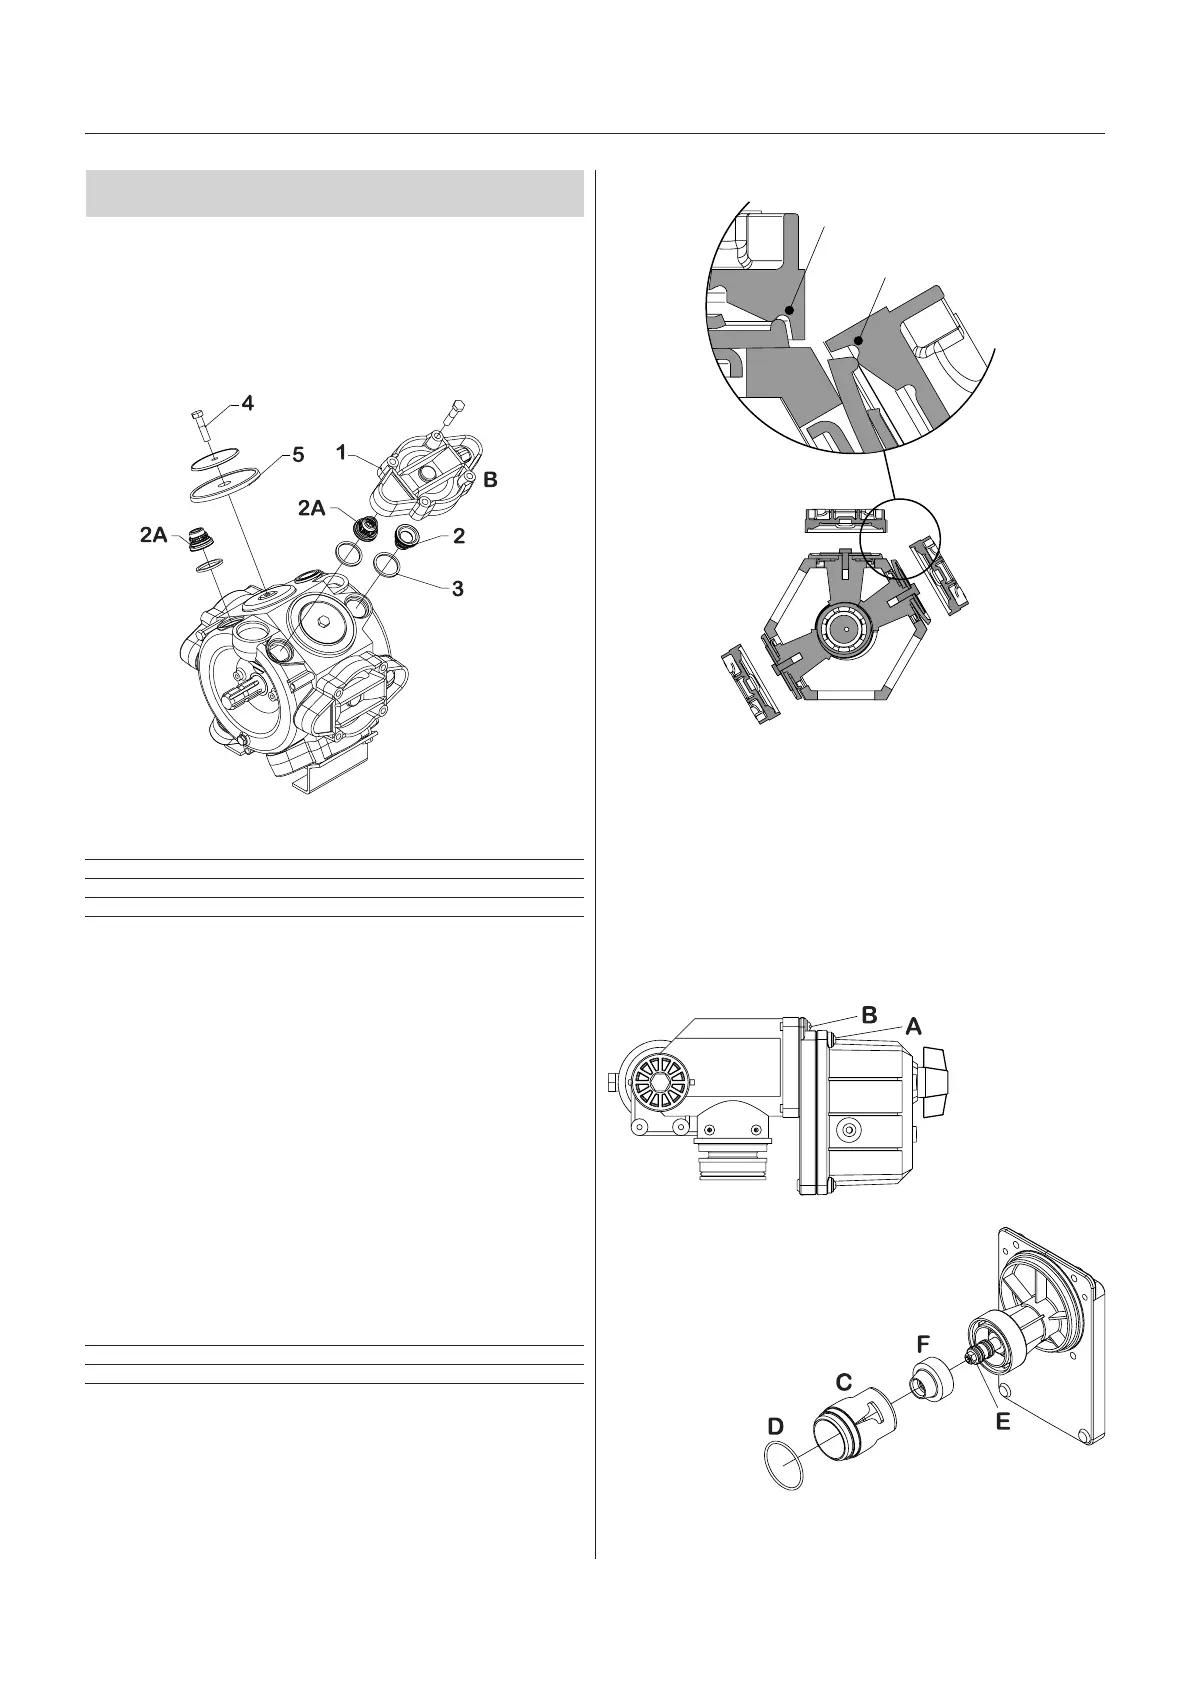
Remove valve cover 1 before changing the valves 2 -
note their orientation so they are replaced correctly!
NOTE! A special valve with white flap 2A is used at the
two upperside inlets. It has to be placed in the valve
openings as shown. All others are the type with black flap.
It is recommended to use new gaskets 3 when changing
or checking the valves.
Diaphragms
Remove the diaphragm cover 4. The diaphragm 5 may
then be changed. If fluids have reached the crankcase,
re-grease the pump thoroughly. Also check that the drain
hole at the bottom of the pump is not blocked. Reas-
semble with the following torque setting.
Pump model Diaphragm cover Nm Diaphragm bolt Nm
463 90 90
463 90 90
1 Nm = 0.74 lbft
IMPORTANT! Before tightening the 4 bolts for the
diaphragm cover B the diaphragm must be positioned
between centre and top to ensure correct sealing be-
tween diaphragm pumphousing and diaphragm cover.
Turn crank shaft if necessary.
Cone cCone c
Cone cCone c
Cone c
hechec
hechec
hec
k/rk/r
k/rk/r
k/r
eneene
eneene
ene
ww
ww
w
al EVal EV
al EVal EV
al EV
C operC oper
C operC oper
C oper
aa
aa
a
ting unitting unit
ting unitting unit
ting unit
If it becomes difficult to build up sufficient pressure or if
pressure fluctuations occur, it may be necessary to
renew cone and cylinder. A HARDI kit is available for this
purpose. Ref. no. 741293.
1. Remove 4 x screws A and remove the housing.
2. Remove 4 x screws B.
3. Replace cylinder C and O-ring D.
4. Loosen the nut E, remove and replace
the cone F.
5. Reassemble in reverse
order.
T192-0005
correct
wrong
T192-0039
T261-0001
T192-0040
 Loading...