© 2015Harmar Mobility, LLC • All Rights Reserved
800-833-0478 | www.harmar.com18
Vantage Stair Lift
ADJUSTING THE GEAR RACK
ADJUSTING THE GEAR RACK
1. Loosen the splice bars just enough to allow for
some play between the rails.
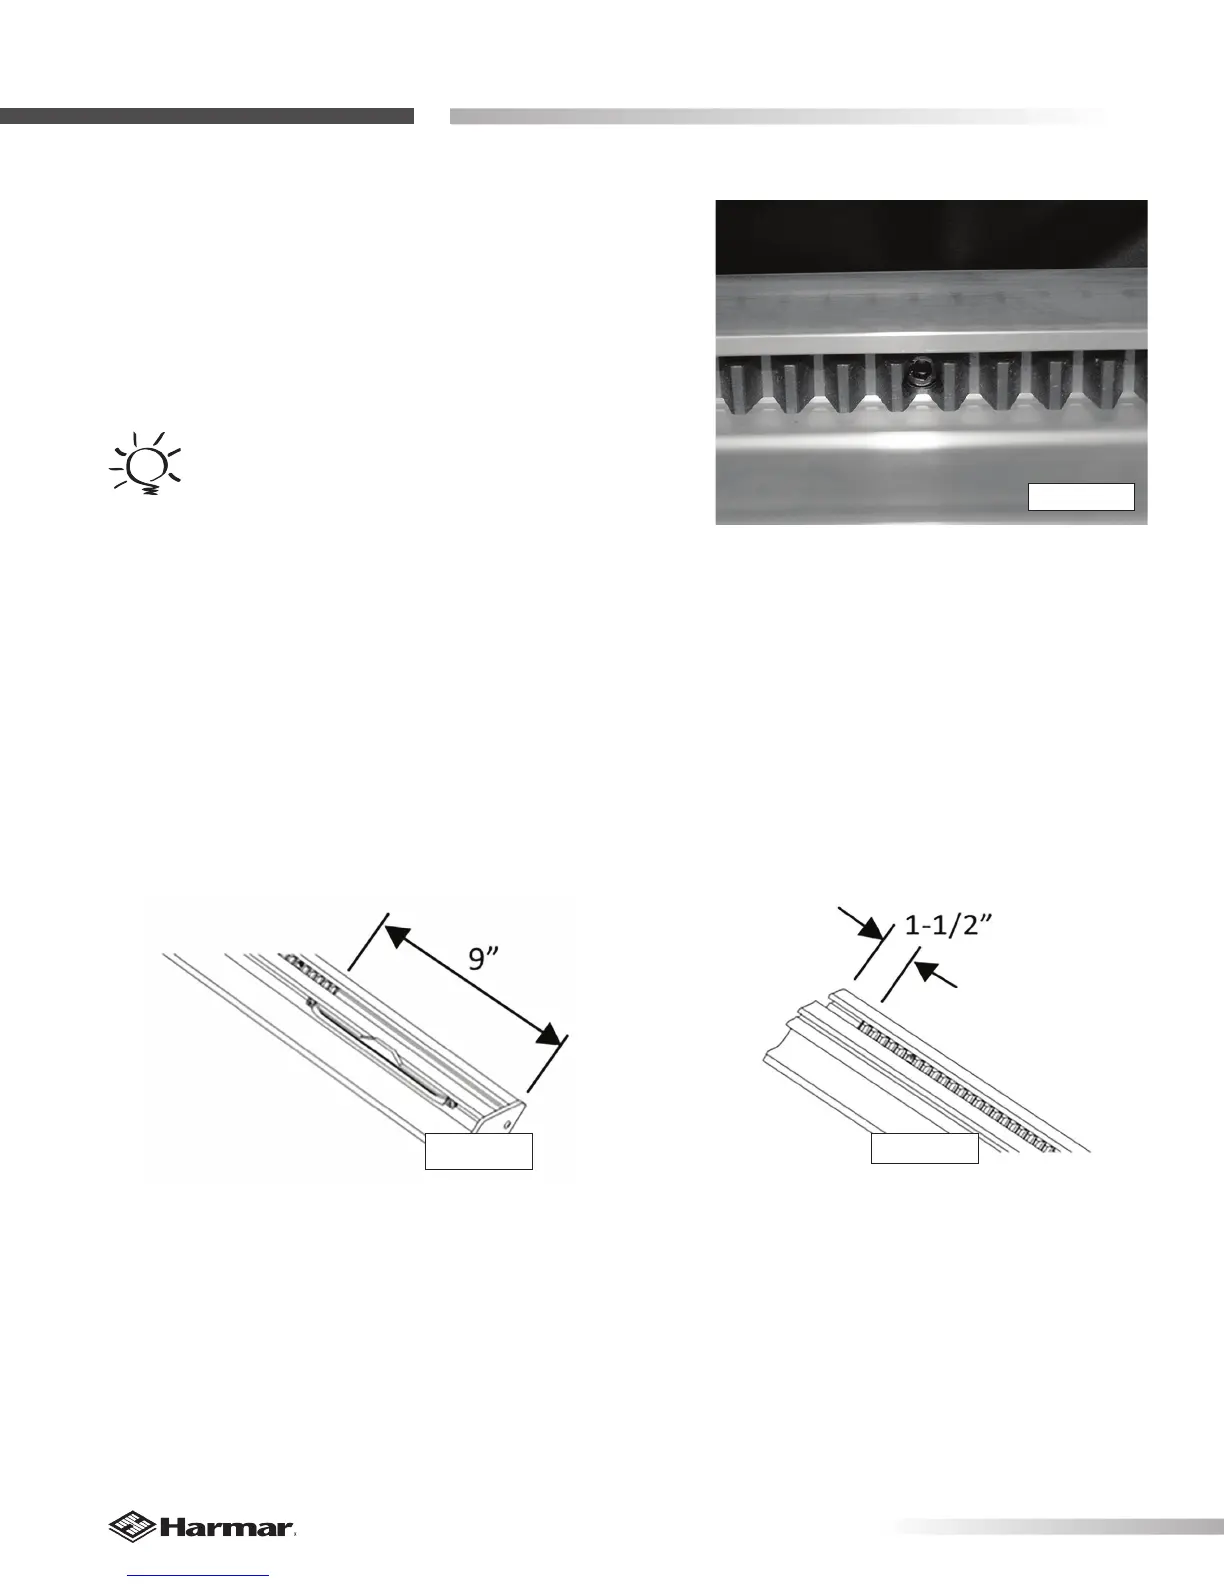
2. Loosen all of the screws in the gear rack using the
9/64" hex wrench included with the lift [Figure 18-1].
(Do not remove the screws)
Figure 18-1
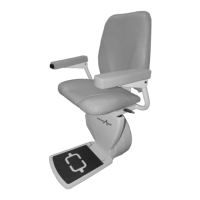
BOTTOM GEAR SPACING
Left hand installation = 9 in. maximum
Right hand installation = 1-1/2 in. maximum
Figure 18-2
Left Hand Install Shown
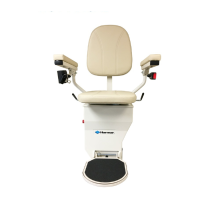
TOP GEAR SPACING
Left hand installation = 1-1/2 in. maximum
Right hand installation = 9 in. maximum
Figure 18-3
Left Hand Install Shown
TIP
DO NOT remove the screws
from the gear rack. If you do, the
fastening plate will become lost
within the channel and the gear
rack will need to be removed.
3. Position the lower gear rack to the correct end of rail
spacing dimension (shown below).
[Figure 18-2 and 18-3]