10
HARTING Electric GmbH
11
Management Software Ha-VIS mCon Series / Edition 2.4
Basic OperationUser Manual Ha-VIS mCon Switch Management Software
5. Enter the network address of the switch into the browser. See the Installation Notes / Quick
Start Guide for more information about altering your computer’s network settings. The Login
Screen of the software will be displayed after your browser has successfully established an
HTTP connection to the switch.
6. Enter your username and password. Normally, the admin account is used for switch
administration. A guest account exists for viewing the conguration only. The default admin
password is harting. You should change this password as soon as possible.
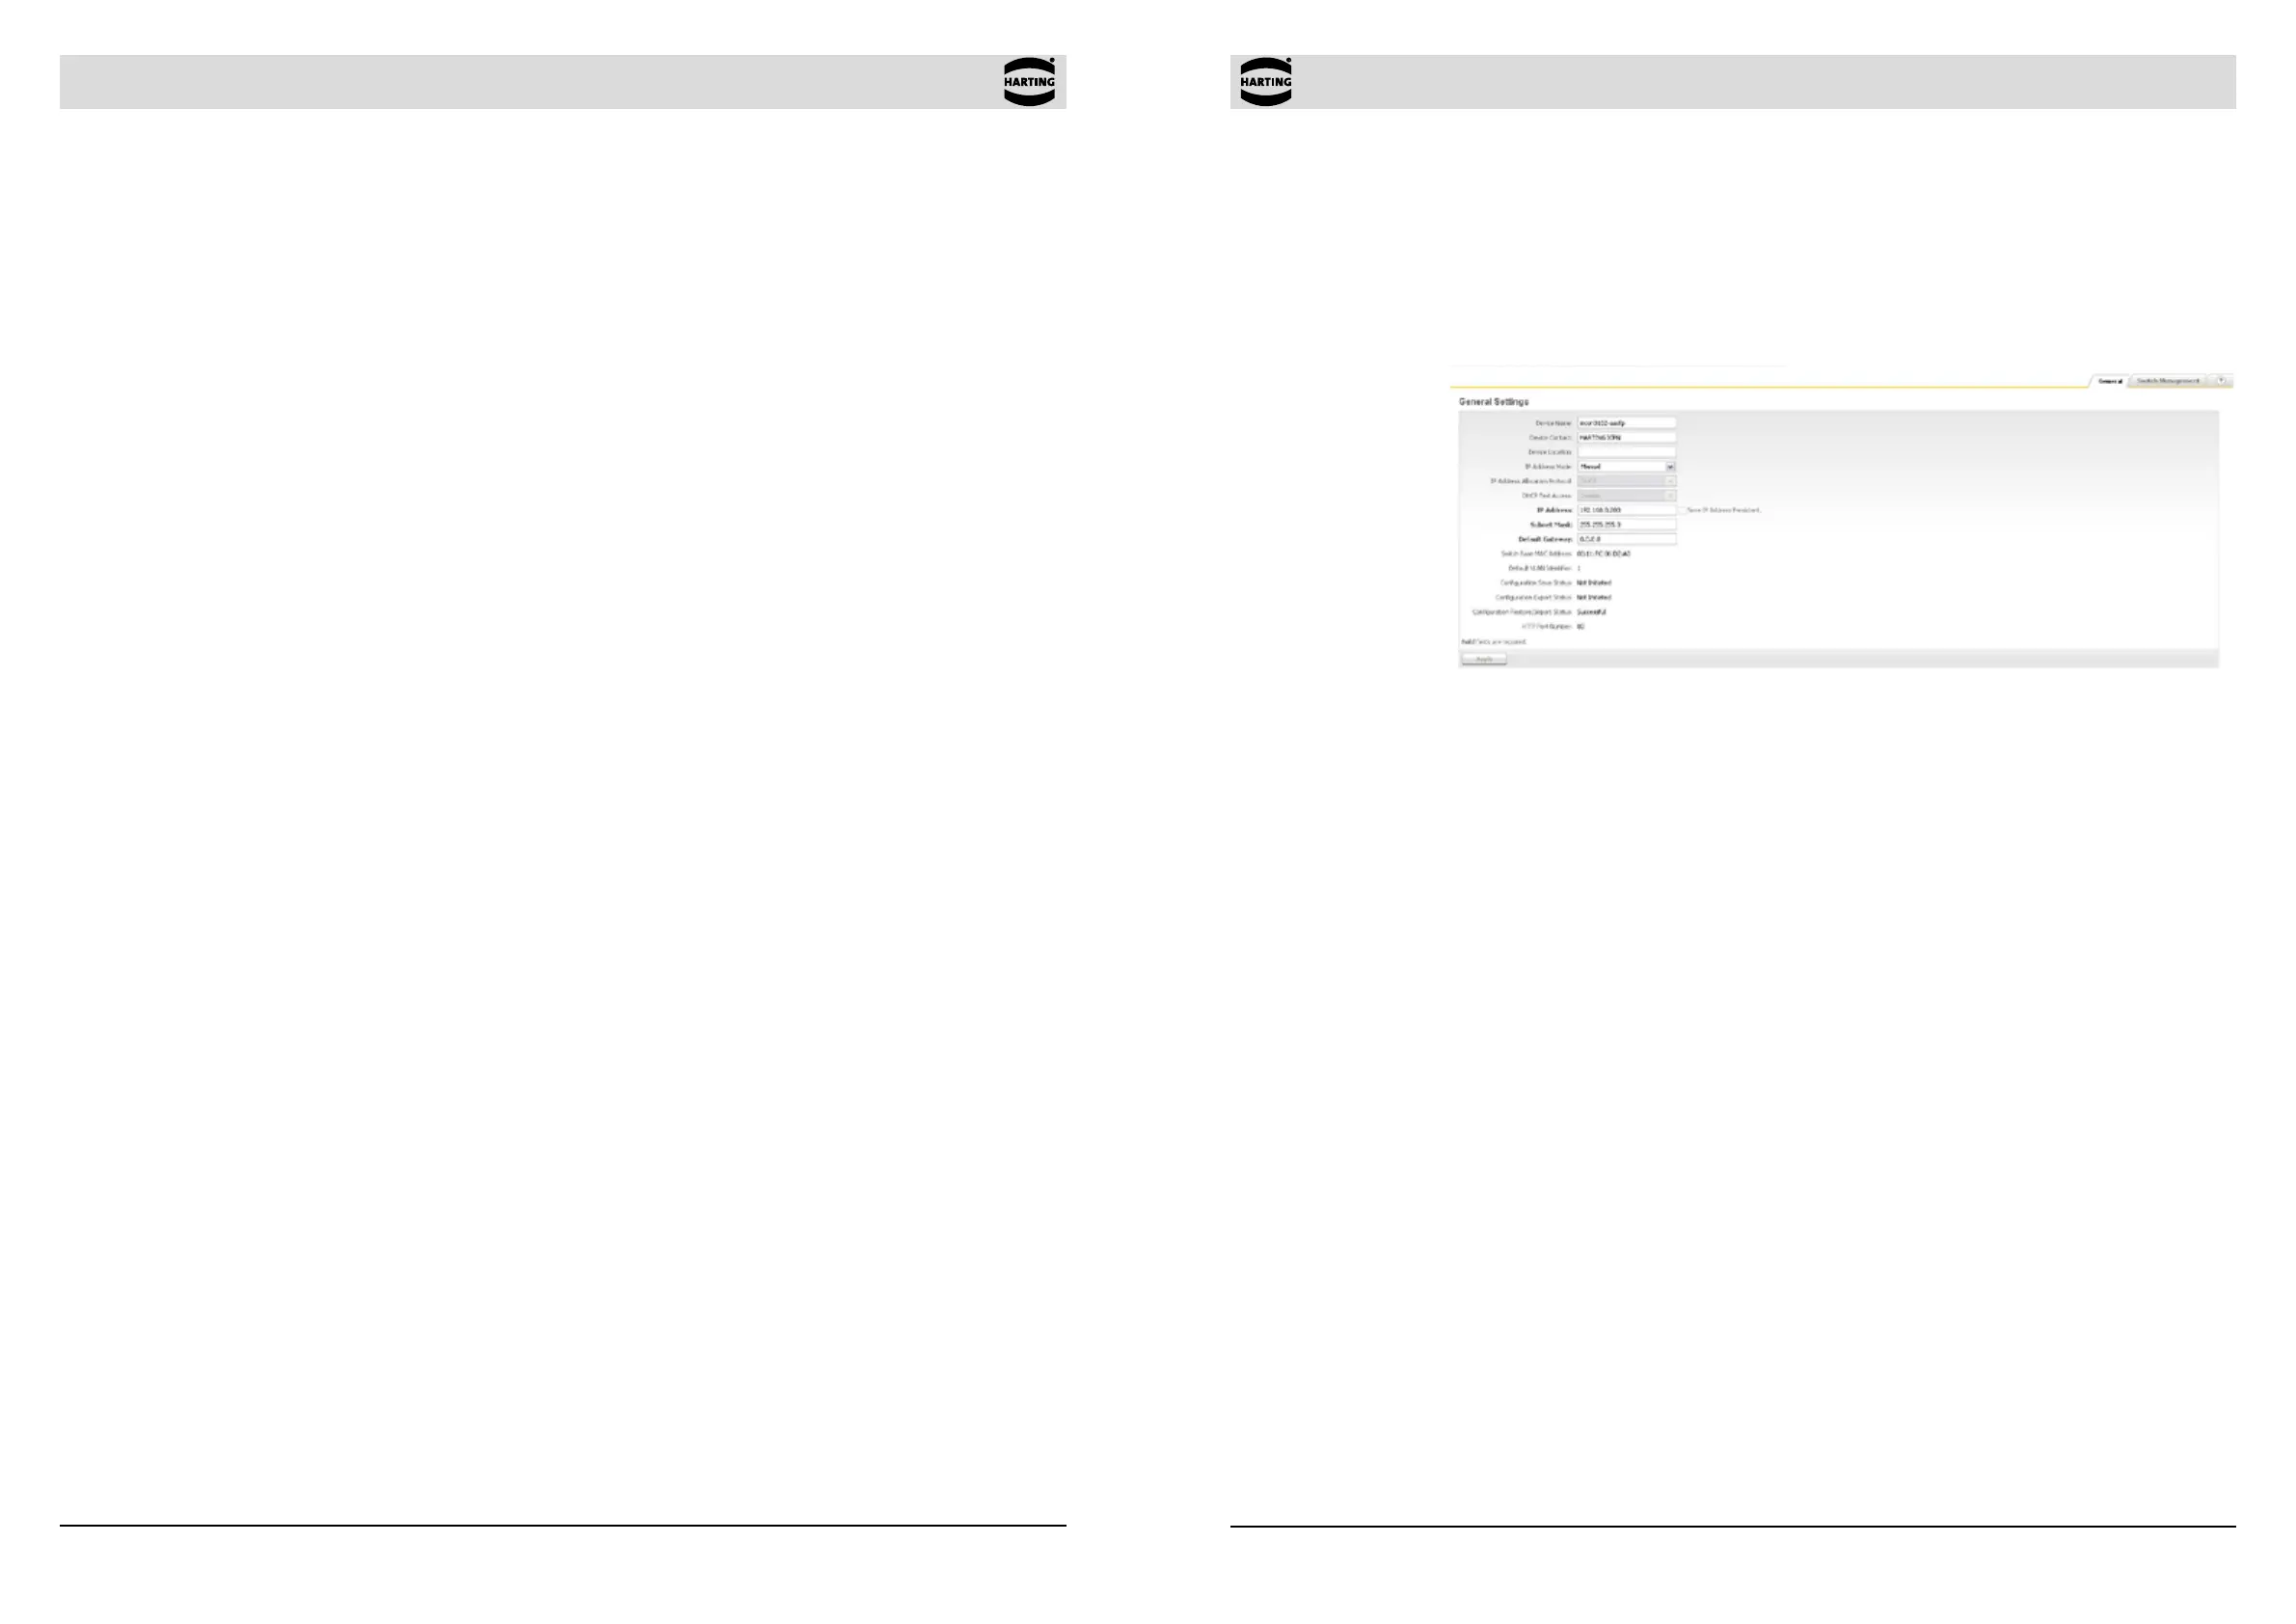
Figure 4-1 General Settings
4.2.2 Logging out
To log out from the software at any time, simply click the Logout button in the top right-hand task
bar. The Login Screen is then once again displayed.
4.3 SNMP conguration
To get access to the switch using SNMP, an SNMP based software tool is needed. SNMP (Simple
Network Management Protocol) is the most widely-used network management protocol on TCP/
IP-based networks. SNMP provides an easy mechanism for managing a network using a simple
Command-Response protocol dened between the Manager and the managed entities. The
management is performed through MIBs (Management Information Base) supported by the
managed entities. The MIBs contain conguration elements, which can be either Viewed (GET)
or Modied (SET) by the Managers.
To access the switch, you need the following information:
• Switch IP address (Default value: 192.168.0.126)
• Community password to read values from the switch (Default value: public)
• Community password to read/write values from/to the switch (Default value: private)
For additional information refer to mCon 3000 NG User Manual SNMP.
4. Basic Operation
Make sure that the switch is securely mounted before starting any software conguration. Refer
to the Installation Notes for mounting instructions.
This Ethernet switch must rst be connected to your local area network before it can be congured.
The switch management software and the embedded web server are pre-installed on the switch.
You will require a networked computer with an HTTP web browser or an SNMP Tool to congure
the switch management software. Optionally you can also install a TFTP server program on
this PC in the event that you need to update the switch rmware or export respectively import a
conguration le.
4.1 Switch access and conguration
The Ha-VIS mCon switches offer a variety of software functionalities to congurate and set up the
network. For conguration purpose, the switch can be accessed in several ways.
The easiest way is to use a standard web browser to congurate the switch via a graphical HTTP
based user interface. To connect to the switch, the user must log in to the switch using the web
browser (following the instructions below). The user must log out before exiting the browser,
because the parallel connections to the switch (web sessions) are limited to two and the timeout
for each session is 10 minutes. Once you logged out, you can close the browser window in which
the web interface was running.
The second way is to access the switch via an SNMP software. The Ha-VIS mCon Ethernet
Switches are supporting the standard MIB II and can be easily integrated to an existing LAN
infrastructure and management suite. Some functionalities are product and HARTING specic
and therefore are not included in the MIB II. To get also access to this functionalities using SNMP,
you have to copy the HARTING MIB le to your MIB repository of your SNMP software.
The third way of conguring the switches is to use the command line interface (CLI). The CLI
can be accessed using the network protocols TELNET or SSH. Most operating systems are
equipped with a TELNET client. Alternatively clients like PuTTY can be used. After logging in
to the system, you will reach the prompt to enter the commands for conguring the switch. For
detailed information on how to use the command line interface, refer to the CLI manual.
4.2 Web access
4.2.1 Logging in
Proceed as follows to turn on the switch and to login in:
1. Connect the switch to your network or to a service computer using an Ethernet patch cable.
You may select any free port on the switch.
2. Connect the switch to the power supply (refer to the Installation Notes). The switch will take
about thirty seconds to boot up.
3. Turn on a computer connected to the same network as the switch. If you are starting with a
brand new switch, you should initially congure your host PC so that it is on the same network
segment as the switch (the switch has a factory default IP of 192.168.0.126, and a subnet
mask of 255.255.255.0).
4. Start your web browser or open a new browser window.