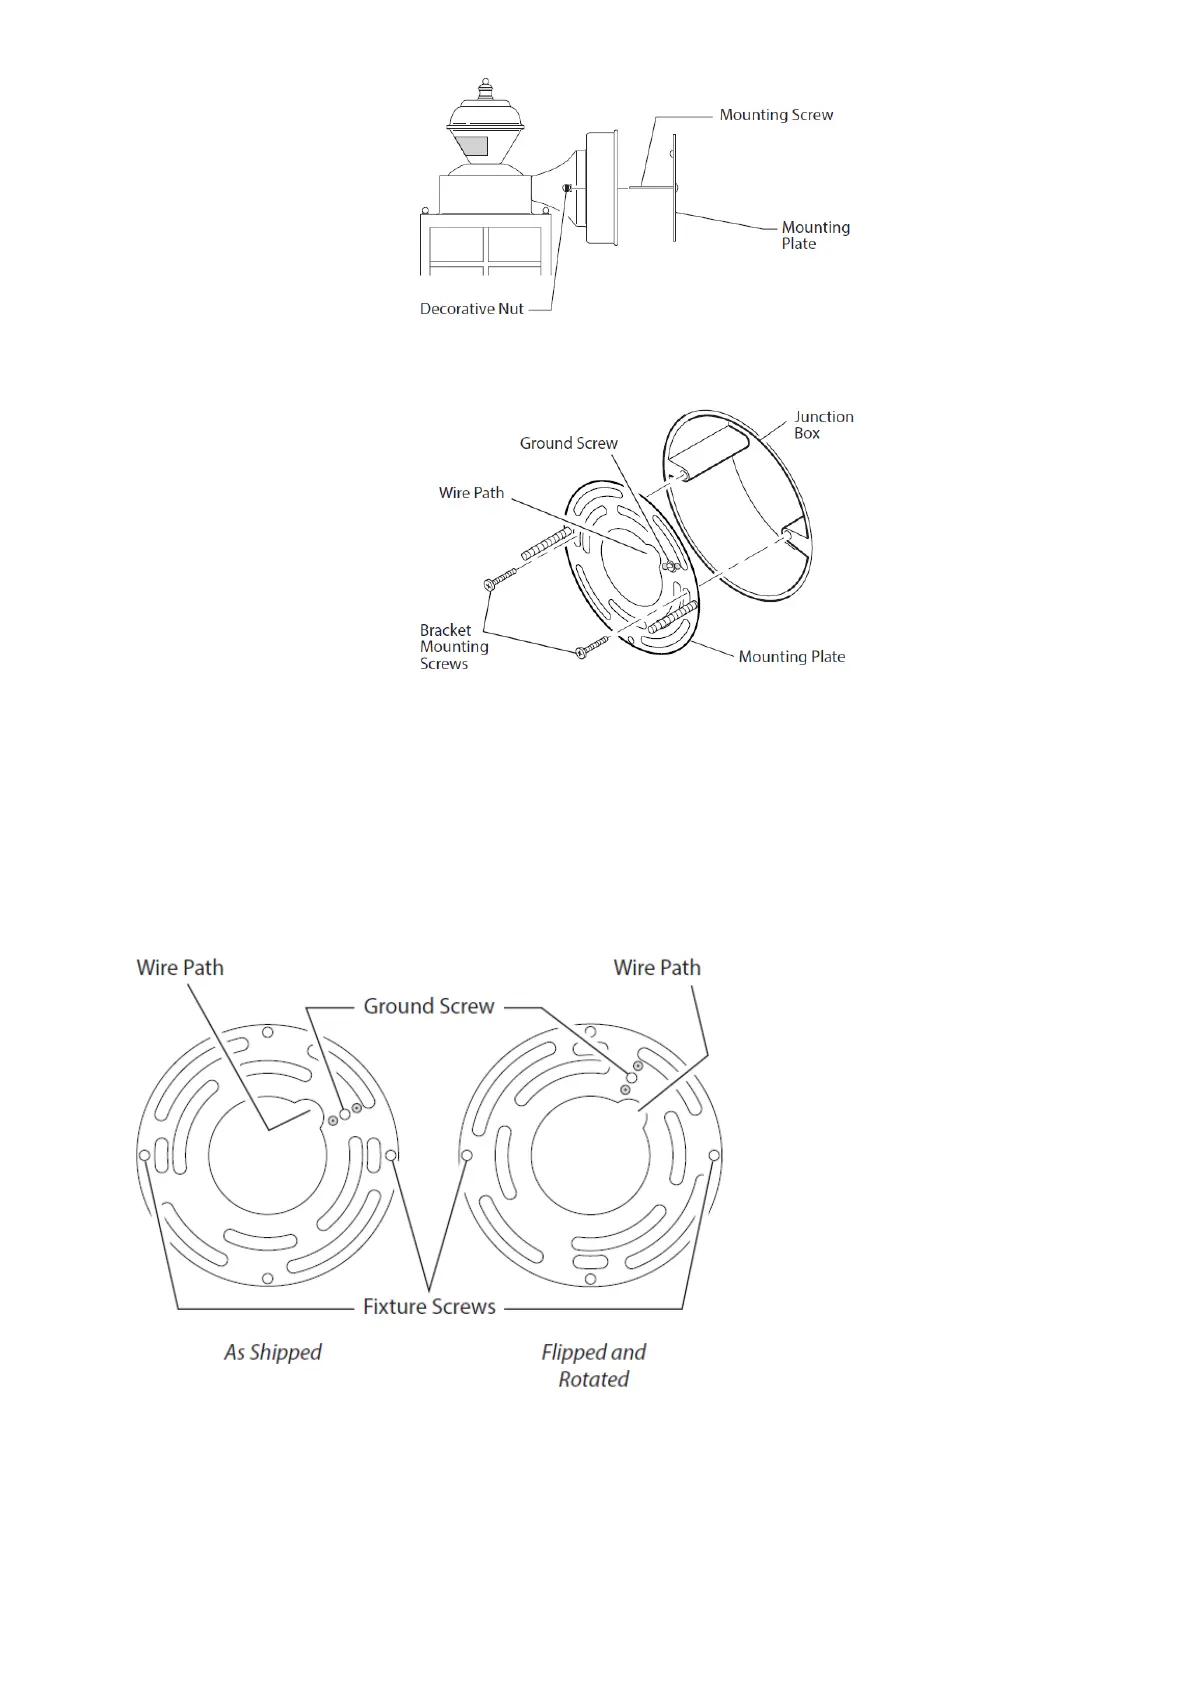
4. Attach mounting plate to junction box. Note: We recommend having an
assistant help hold the lantern assembly during the wiring process.
This fixture comes with a universal mounting bracket. It is pre-assembled on the fixture to fit the majority of junction box applications.
If the slots on the mounting plate do not line up with the junction box screw holes, follow these steps:
1. Remove the fixture mounting screws from the mounting plate. Note: Do not remove the ground screw.
2. Attach ground wire “pigtail” to ground screw on mounting plate (See Recommended Grounding Method for additional information).
3. Flip the mounting plate over.
4. Rotate the mounting plate so the wire path is on the upper right. Note: The wire path on the mounting plate must be located as
shown below to allow the wires on the back of the fixture to pass through.
5. Reinstall the fixture mounting screws and attach the mounting plate to the junction box as shown.
WIRING THE LIGHT FIXTURE
WARNING: Turn power off at circuit breaker or fuse.
Note: All wiring must be run in accordance with the National Electrical Code through conduit or another acceptable means. Contact a
qualified electrician if there is any question as to the suitability of the system.
CAUTION: DO NOT connect the RED wire unless you want to control other lights from the motion sensor (see Optional Wiring).